Thursday, July 16, 2015

Maker's Stamp

If you haven't seen David W.'s YouTube feed yet, you are missing out.  He has some good info there.  He likes topics of things he doesn't see addressed anywhere else. 

The videos are not highly edited, but that is part of the charm.  He just turns his camera on and lets it go.  I find it adds an air of reality when he takes a minute to run across the shop to root around in a drawer for a tool that he wants to show.
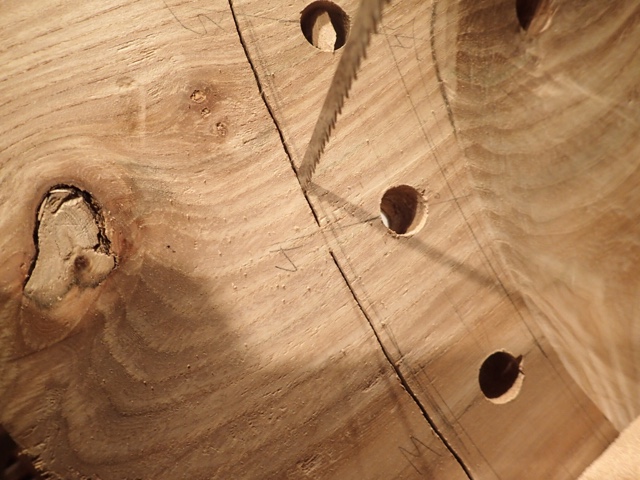
My practice bit of pine.  Looks like I need more practice, but this is promising.

Recently, he did a video about making your own maker's stamp "on the cheap."  Here is his video if you want to watch:
I always wanted a maker's stamp, but just could not pull the trigger on a custom stamp that can cost a couple hundred bucks.  This interested me.

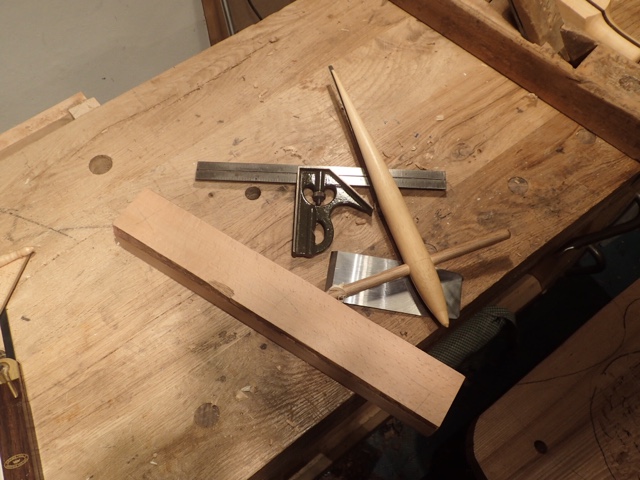
The biggest special tool for this was a set of 3/32" reverse letter punches.  I bit the bullet and ordered a whole set.  Used ones go on eBay every once in a while, and Young Brothers actually sells them individually, if you don't want to spring for the whole set.  You just have to find a retailer who will work with you.

Brass is another story.  David says not to go buy some especially for this project, because it is expensive.  However, I did find some 360 brass at McMaster-Carr that was less than $20.  It is 1/4" thick, two inches wide, and six inches long.  I should be able to get three or four stamps out of this, at least.
Raw material.
The first thing I did was file one long edge clean.  The edges were pretty rounded over.  It didn't take long to file it to use all the way to a sharpish edge.  This probably isn't necessary, but what the heck.
Filed one edge clean.
Once I got that, it was just a matter of pounding what I wanted the stamp to say on the right edge of the brass.  It took me WAY too long to figure this out, as I do not seem to think backwards too easily.
This photo sponsored by Right Guard.
I punched this before hacksawing it out so as to waste as little brass as possible.  I learned that I should have used my small sledge hammer, and that the period doesn't need to be whacked nearly as hard as the rest.
It's supposed to say "B. EVE," not "Bo EVE."  A little less heavy handed next time.
I then just freehanded some notches on the edge with a saw file by eye.  It probably would look better if I laid it out proper.
It's backwards, because it is a stamp.  Hopefully, it will spell what I want it to when I bash it on a piece of wood.
The good news, it works!
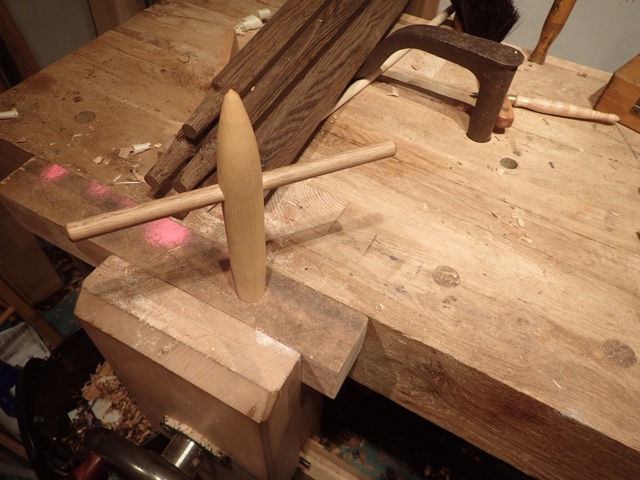
Ugly, but functional.

I think a big, one handed sledge hammer would help with this.  I really had to whack this with my 16 oz. carpenter's hammer.  Several times.  The deep one above appears to have at least one mis-alignment.

The wood I used to try this out on was some scrap pine I have around.  I found out that it is a lot harder to get a good stamp in hardwood.  For the most part, however, I am happy.  It only took about 20 minutes, beginning to end, so there is no reason I couldn't make a prettier one now that I've done a rough one.  I could saw the letters off of this one and use the same blank if I want to redo it, or I could make another one that says, "Munich," to use in conjunction with this one.

I think over time the brass will mushroom and distort on the end that meets the hammer, but I expect this stamp should last many years.  Plus, it was such a simple thing to make. 

The hardest part is figuring out the best way to make a nice, clear stamp, as there are no do-overs on a completed plane!

Sunday, July 12, 2015

Fingers In the Till - European Scrub Plane

One of my favorite tools ever, this flea market find has turned into a workhorse in my shop.
Here it is, I used it to bevel the underside of this chair.
This is one ugly tool, but it works like crazy.  There is a lot of instructions on the internet for turning a jack plane or a smoothing plane into a roughing plane for thicknessing, but I find that this dedicated plane has earned the real estate it occupies in my tool chest.

What makes this particular one special, is that it is old, well used, and well modified by some thrifty German carpenter in it's previous life.  There is a couple of big cracks in the stock of this plane held together with various bolts and screws.  It feels awesome in my hands.

It's a fairly narrow plane, I suspect the blade is between 1 1/2" and 1 3/4" in width.  If you build one, go with a narrow blade. 
When I got it, I ground it at a pretty dramatic radius.
Most roughing plane instructions on the internet recommend something like an 8" radius for rounding a plane like this.  I decided to go bold and ground it at 3" instead.  Since it is so narrow, I can get away with this.  If you grind a 2" blade at three inches, you won't be able to set it so deep as to get a shaving wide enough to justify such a wide blade.

This plane has a crazy open mouth.  I could probably put my thumb in there.  This keeps it from jamming with the rough chips you'll be getting. 

Of course there will be tear out, but this is for course work.
Wow!
As you can see, the blade in this plane isn't something precision made from Starrett.  My guess is it is from a leaf spring, spray painted red for good luck.
Before grinding, you can see how un-flat the steel is.
I sharpened this up to 8000 grit on my waterstones when I got it more than two years ago, and the blade hasn't been out of the plane since.
The crazy tight radius on the blade allows this plane to thickness wood faster than any other hand tool method I have.
Here's how I've found that this tool works best when thicknessing:  I put the board on my bench with the grain oriented right to left.  I traverse which means going across the the grain, like the above photo.  I then plane diagonally, with the grain.  I go from the near right hand side to the far left hand side.  After this, I go diagonally, 90 degrees from the first diagonal.  However, I am careful not to go from the near left to the far right, I must go from the far right to the near left.  To do this I turn the board 180 degrees in the vice and take the plane left-handed.  This allows me to continue going diagonally with the grain, instead of against it.  If I do the diagonal the wrong way, the tear out goes DEEP. 

If that explanation doesn't make sense, you'll find out what I mean when you try it.

For some reason Stanley scrub planes (like the #40) are getting expensive in the US.  There doesn't really seem to be a cheap alternative.  Lucky for me, I live in Europe, and these things are everywhere.  I wonder why?

Saturday, July 11, 2015

Slow Progress

Boy, this June chair build is moving along right on time.  I'll surely be able to finish it by next June!

I've had only a couple of short shop sessions since the last post, but I am pleased with what is happening so far.

Here are some pics:
Here are the tools I used to smooth the seat and shape the outer portion.  The tiny drawknife has been working well, even though I have been asking more of it that it was designed for.  It's the only working drawknife I have at the moment.
Once the top was done, it was time to turn my attention to shaping the bottom so the chair doesn't look clunky and heavy.  I found the best tool for this (since I don't have a big drawknife at the moment) is my german scrub plane.  I drew a pencil line half-way between the bottom of the seat and the line on the front by eye.  I also eyballed a line that mimicked the shape of the chair on the bottom for the chamfer.  I scrubbed away until I got to my line on the front, and did the same on the sides with my little drawkife and spokeshaves.

Scrub plane for the front underside bevel.
I decided not to go right to the top edge of this chair with the underside bevel, as I think making this look too much like a whispy Windsor seat is a little out of character with the Welsh stick chair style I was sort of shooting for.  I think it should look a little heavier than that.  I decided that after beveling the underside, I would put another gentle bevel that I just eyeballed on the front to give it a little more grace.

I really like this look.  A bit of meat, but not so clunky as to distract.
This was the end of my shop time until yesterday morning, when I got a random 30 minutes in before work.

The next step was to trim off the back of the seat blank.  I had left it on until now so I would have something for the clamps to hold onto while doing all of the shaping of the seat.  I had intended to run the blank over to the Dictum shop and use their bandsaw.  That thing eats through this 2 1/4" elm like butter.  The problem was my work schedule prevented me from going over there when they were open.

I decided instead to give my biggest bowsaw a shot.  My biggest bowsaw is a little medium sized Swedish saw given to me by Jonas a couple of years back.  I really like this saw, but I thought it might be a bit delicate for this cut, and besides, it is in need of a sharpening.

I needn't have worried, as this cut was complete in about ten minutes.  Much quicker than driving to another shop.

It turns out the small blade of this bowsaw was just the thing.
Looking at this photo, I just realized I cut off the numbers I had for the stick holes!
I'm not the world's best sawyer when it comes to following a curved line, so I was pleasantly surprised that the cut was relatively even and square.  With a little rubbing alcohol on the endgrain, it was a simple thing to smooth this cut out.

Smoothing endgrain with this awesome spokeshave.
The endgrain wound up plenty smooth for this neat photo at 44X magnification with my new camera.
Smooth as a baby's bottom.
This is as much progress as I've made up until now.  Next, I'll probably round off the underside of the back and call this seat blank done.

Here is the final shape of my seat blank.  I like it!
All that is left for this chair now is to smooth up the crest, drill holes in it and glue the whole thing together.  I'll probably finish it with the same 50/50 recipe of tung oil and BLO that I used for the Viking Throne.

I am really curious if these different elements will work together:  the extreme rake and splay angles of the legs as a throwback to really old stick chairs, the sculpted seat remeniscent of a Windsor chair, the relatively modern look of the crest, and the dark color of the "I've-never-seen-it-used-on-a-chair-like-this-before" fumed oak.

One of the things I have really enjoyed about this build up to this point is the freedom of not sticking to a plan.  Much of the design of this chair was either chosen at random (such as the splay angles of the chair legs), or on the fly, like the shape of the seat blank, or dictated to me by the material I have, like the crest. 

If you have never build like this before, you should try it as it is quite liberating.

Saturday, July 4, 2015

Me 'n' Her - #4

In a hotel:

Me: I forgot my deodorant.

Her: You can use mine.

Me: I can't use yours, it's pink!

Her: Take your pick.  Pink, or Stink.

Wednesday, July 1, 2015

June 31st

It must still be June because I am still plugging away at my June Chair build.

Lots of pics today, so I'll try to keep the text to a minimum amount of superfluous recitation.  Oops!  Too late.

I woke up this morning unhappy with the size of my tapered tenons.  They seemed pretty delicate in comparison to the beefy legs.  I figured with the radical rake and splay angles of the legs, this tenon might not be enough.

The problem is, I used the biggest rounder I have to make those tenons.  It ends the taper at 5/8".  I remembered that when I got to chat with Tim Manney at Handworks, he had this ghetto, shop-made gizmo he said was superior as a rounder.  He told me he gets grief for not selling matching rounders to his tapered reamers, and his reason he doesn't is because they are simple to make and you should make one to exactly match the reamer you have.

Fair enough.

He blogged about it a while back, but it is easy enough I didn't need to reference his instructions to build.
First, get a stick of wood about as wide as a plane blade you have.

I drilled a 3/4" hole, and reamed it with my reamer.

I marked a line on each side that just touched the outside of the circle.  This will be a different distance on each side.

Saw to the line.  At least, don't go over too much.  If you do, don't go over near the hole.

After a couple swipes with a plane, I am getting close.
Once it opens up, clean it up with a chisel.

Clamp a plane blade (bevel-up) with a C-clamp.  I got extra fancy with a piece of leather, because this is a brand new blade.

Round 'till your heart's content.
Usually you want to stop when the end of your leg gets to the very top of the rounder.  I kept going, because I already used a smaller rounder before.  This tenon is getting pretty long.
Success!  The tenons seat farther now.
I figured I would lose some length to my chair legs doing this, but it couldn't be helped.  I think most people who sit in the chair would rather it is a little lower rather than the legs break when they plop into it.

There's an hour re-doing something I should have thought about in the first place.

Oh well, now on to complete my adzing.

It took a lot longer than the five minutes Peter Galbert said it would, but I figure that's expected when using elm rather than pine. I wound up having to use twice as many depth cuts as Peter says in his book.  
This actually looks WAY better than the last time I tried this with a vintage hammer adze.

Next up - the scorp.  What a cool name for a tool.  "Scorp."
The scorp is the medium tool here.  I tried to smooth out all of the adze marks enough so I could go to the fine tool, the travisher.
I find the travisher a very simple tool to use.  Don't think about it, just let the tool tell you what it wants to do.
Now that the chair is scooped out, I need to move on to shaping the front and sides.  Before I do that, it is time to work on the shape.

I had intended on going for a shape with a French curve in it, similar to any other Windsor side chair.  However, something wasn't quite right.  It dawned on me that I had never seen that shape in a Welsh stick chair before.  I decided to change it to a really mild and gradual taper to the back of the chair to give it a bit of a lighter feel without going crazy.

It just took a minute on the bandsaw at Dictum.
When I got home, I was able to use my spokeshave to smooth out the sides and front.
A little layout was required before the next step, so I smoothed the bandsawn edges and laid it out.

I have a couple of nice Swedish drawknives.  The only problem is, I haven't rehabbed them yet, and they have no handles.  Just in time, I was given this drawknife.  It is a new Pfeil, and is a real dainty thing.  Just perfect for those tiny details.

For hogging off an inch thickness of elm, not so much.

It is, however, amazing how much you can get away with when it is all you have and it is sharp.
Action shot!

Here's where I had to leave off for today.
There I am.  Most of the shaping of the seat is done.  Just some refinement and I'll have it.  Then I can saw off the back, bevel the underside and bang the legs home.  The only real work left after that is refining the shape of the crest and gluing it on.

June 32nd is only a day away!