Showing posts with label Fingers In the Till. Show all posts

Wednesday, March 25, 2020

Belated Tool Review: Liogier Cabinet Maker's Rasp

#stayathome

Heeding this hashtag is the best thing we can do at the moment to help curb the spread of the current pandemic. Unfortunately, staying at home is also crushing many small businesses. In my opinion,  patronizing businesses that are still open is crucial to helping everyone get through this situation unscathed.

I think that boutique tool makers are at a high risk of shutting down. To do my part, I decided to order a new, fine grain modeler's rasp that I have been thinking about getting for several years.

I decided to get one directly from Liogier, because about five years ago I got one of their cabinet maker's rasps, and I love it. I had planned on doing a review on my new modeller's rasp once it arrives, but I realized that I have never written about this cabinet maker's rasp. Here is my long-overdue review.
The rasp came in a hard plastic case, which happens to be the perfect storage solution for me.
I used to think that a rasp was a course, slow woodshaping tool that was probably only slightly more effective than a rusty butter knife. This was before I had ever tried a quality, hand-stitched rasp. I was able to try one at some point, and was hooked.

While looking for a rasp, Auriou was a French rasp maker that kept coming up. The Auriou rasps I've tried have all been very, very good, but at the time (2015) Liogier rasps were a little more in my budget. Liogier is also a French rasp maker that hand-stitches rasps. I figured I would give this one a try, and if I didn't like it, I could always get an Auriou.
I chose the base model 8" rasp in grain 11.
I wasn't really sure what to order, so I ordered the biggest one that I thought I could afford, an eight inch rasp in grain 11. They have two different models, Traditional, which is what I ordered, and Sapphire, which sounds like it is heat treated to make the rasp stay sharp longer and resist rust.

I went with the Traditional, because I figured there was little point in sinking extra money into a tool if I didn't like it.

I was impressed with the rasp when it arrived. It looked awesome, felt sharp and had a comfortable wooden handle. I instantly realized that I didn't get some bargain knock-off attempting to look like a quality, well known tool. This was the real deal.
Purdy, ain't it?
I was shocked when I put it to wood. Grain 11 is on the fine side of medium, but this rasp removes wood very aggressively, and leaves a surface that needs very little cleanup.
Here's a closeup of the teeth. The unevenness is what makes a hand-stitched rasp superior to a machine made one.
I use this rasp whenever I have a curve that needs cleaning up after roughing the shape with a bow saw. It also works great for chamfers, and rounding over parts.

I tend to be rather tough on my tools, in fact most of you would probably be horrified if you were to peer into my tool chest. However, you will always find this rasp carefully stored in the plastic tube it came in. More than any other tool I own, I feel the need to keep this one nice, as it is by far my best rasp.

In fact, when I came to Spain to be with my wife on her temporary contract, I left this tool in my toolbox in Germany so nothing would happen to it. I love when I get an opportunity to use it, because every time it surprises me with how easy it is to use.

Therefore, I had no problem ordering another rasp from Liogier two days ago. I know it will be good. I recommend you get one, too.

For full disclosure, I am not affiliated with Liogier in any way. However, I have been in contact with Noël Liogier. This was because I was having difficulty using my credit card on his site. It works now, but in the email conversation I asked how business was going during the lockdown in France. He said it was tough, because none of his retailers are making orders with him. He asked if I was on a forum or if I had a blog, if I would give him a shout-out, and I said I would be happy to.

If you have been thinking that you need a rasp, or any other woodworking tool for that matter, it might be important to place your order sooner rather than later. Your order may help a boutique tool maker stay in business and weather this storm.

Saturday, December 5, 2015

Fingers In the Till - Sterling Tool Works Precision Protractor

I will admit this up front - this post is more of a new tool review rather than a grabbing of a random tool in my chest, but I thought it would be good for this series of posts anyway.

A couple of weeks ago I ordered a batch of tools from Sterling Tool Works, and as an afterthought, I threw in the precision protractor.
Nice and simple.
In short, I was astounded at how well made and useful this dead-simple design is for woodwork.  I never knew before that I couldn't live without it!

In long, here are the details:

The first thing I noticed about it is this isn't one of those flimsy 99 cent protractors you can get at the Borg.  It is hard to see in photos, but this protractor is made of some substantial steel.  Nice and hefty for it's small size.  That alone speaks quality to me.

The turn bolt is comfortable and cinches down tight, even though it is a bit small for my fingers.  It doesn't get in the way of anything, though.

The metal is brushed, so there is no glare.  At least with the lighting in my shop.  The numbers are all deeply engraved, dark in color and easy to see.

The best part about this tool is it's simplicity.  There is no learning curve.  I dare you to pull it out of it's plastic sleeve and screw up a measurement.

The ruler moves in and out so it can be made longer or shorter depending on your needs.  The first thing I did with it was measure a moulding plane I recently made to ensure the angle of the bed was exactly the way I thought.

It was.

That tells me that I was getting accurate results with my INCRA protractor, but it is a bit fiddly to use and takes me a while to ensure I am getting an accurate measurement.  Also, it is just one size, so if it isn't appropriate for what you are doing, tough luck.

This Sterling Tool Works protractor is adjustable for size. It locks in a specific angle or measures an already established angle simply and intuitively.  It is worth the price tag just for that.

My guess is woodworkers will be put off of by spending the $50 this tool is priced at because of the photos.  There are some nice ones on the website, but you really can't see the quality of this tool in them.  Trust me, it is not slim, flimsy and light like you think it is.

For full disclosure, I did notice that I was cranking down really hard on the adjuster to keep the arm locked tight.  In the above photo I was using this tool to ensure my stopped, tapered chamfer was staying at 45 degrees.  Expecting a lever to stay put like this might be a bit much to ask.  It will stay put for measuring and marking an angle, but hard use over and over presents opportunities to knock the ruler a degree or two out of whack.  You could always use this protractor to set the angle on your t-bevel if you need to keep that angle locked in solid.

For my two cents, the price is right there in the sweet spot of affordable for a tool you will find indispensable forever.

While you are at this site, take advantage of the fact that some other toolmakers' goods are available.  You can save on shipping!  I bought things made from Hamilton Woodworks and Texas Heritage Wood Works.  All went in the same box.

Happy birthday to me!
In conclusion:  trust me, you need one.

Wednesday, September 23, 2015

Fingers In the Till - Ratty Old Swedish Jack Plane

This has to be one of the ugliest planes I've ever seen.
This plane will win no beauty contest.
Last year while building chairs with Mulesaw in Denmark, Jonas' parents came to visit one day to see all the commotion.  Jens also brought along a trunkload of vintage tools from his frequent visits to Sweden.  Many of those tools followed me home.
Jens and Jonas.  The Swedish Hoarde is on the bench.
In this pile of tools were a ratty old jack plane, and a somewhat nicer try plane.  Both beech, and both with EA Berg double irons.

My intention was to rehab these planes one of these days and see if I could use them.  Nothing happened because I like my Veritas BU Jack so much and I never really needed these planes. They sat collecting dust waiting for me to someday get to them.

To make this long story even longer, I have been watching David W.'s series about building a wooden try plane.  I wound up with a ginormous slab of quatersawn 12/4 beech the last time I was at the lumberyard, so this project has launched itself in to the "do soon" category.
12/4 beech on the roofrack of a VW.  That's not something you see everyday.
I have been psyching myself up to build a wooden jack plane, and maybe a try plane because it looks like a fun project.  David W. makes a good case for them. Honestly, I really want to try one (get it?  "TRY one.").

In the meantime, my list seems to add three projects every time I finish one.

While I was working on tapering some ash legs for a staked desk, I was thinking about the thick shavings I saw on YouTube with that wooden jack.

The other day, I got as far as tapering my foursquare legs to a tapered shape on one leg, and two sides of another before I was worn out with my BU jack.  Today I wanted to finish that up, and maybe get some octagonalizing done on them.

I had forgotten about this little wooden jack plane until I saw it when I walked in my shop today.  I thought, "Huh!  It's too bad I didn't rehab that plane already or I could use it for this project.  Perhaps I'll just see if the iron could be sharpened quickly and see what this thing can do."

Instead of that, I gave the iron a couple taps in the mouth of the plane to set it to a course cut to see what it would do.
A shaving in the mouth.
HOLY CRAP THIS THING CUTS FAST!
I would break my arm making shavings this thick with my BU jack.
Jens must have sharpened this thing before he brought it over for me to look at.  I can't believe how well it works.

It feels light, is easy to push, takes incredibly thick shavings with no tear out (unless going really bad against the grain), and made quick work of tapering the rest of the desk legs.

I actually finished the whole job of tapering the rest of the legs without ever taking the blade out to sharpen. I think the double iron forgives a multitude of sins in this matter.

The mouth of this plane is a little different than an English or an American plane.  Everything is very triangular, but I suppose it works.  The plane is 20 inches long and has a blade 2 1/8 inches wide.
Here is a view of the mouth.  You really can't see anything in this photo.
I think you still can't see anything of worth.
This one is a little better.
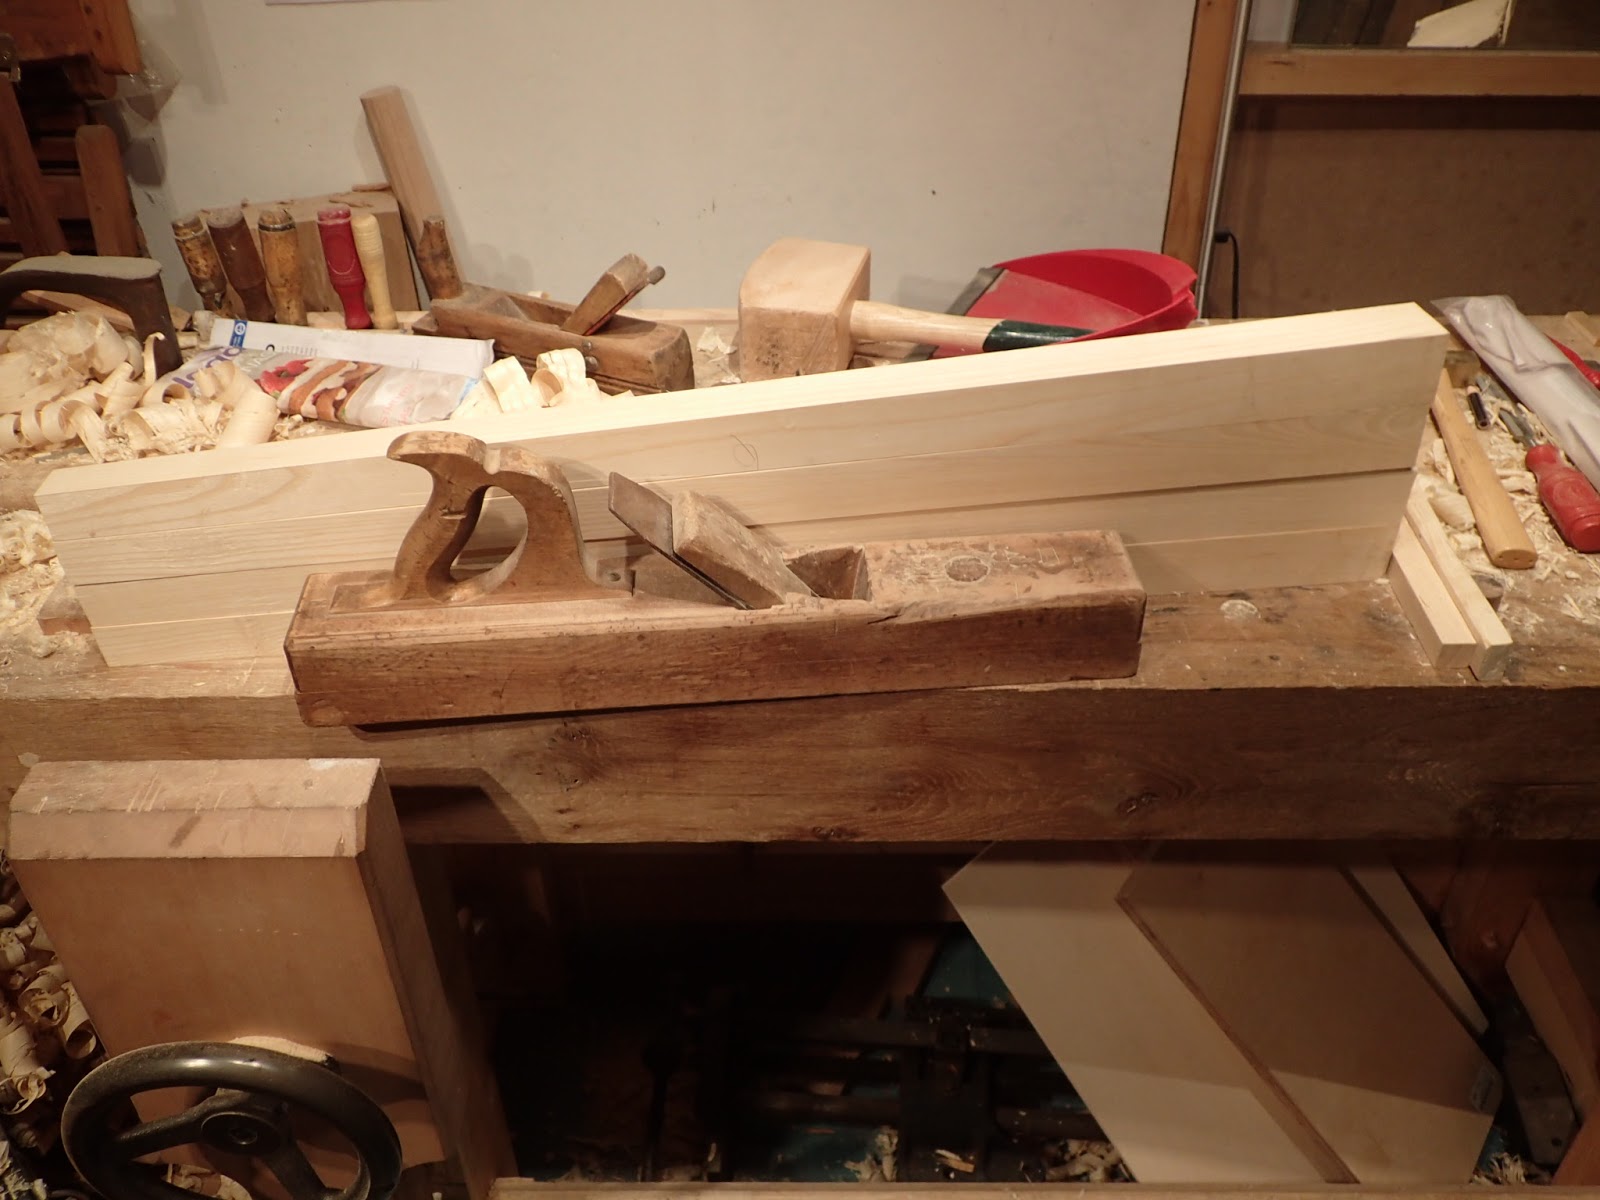
This plane looks like it was made from a rejected piece of firewood.  The annular rings go at a 45 degree angle to the plane, rather than quatersawn, like a quality plane would.
Can you see the annular rings?
The bed looks like someone thought it would be fun to plane a board with a nail in it.  Over and over again.
Not pretty.
The mouth is wide, as expected, and there is a big chip in the back of the mouth that is just cosmetic.  In fact, the whole plane is a cosmetic disaster.
You can even see rays in the grain on the sole!
The rest of this plane looks like it fell in a garbage disposal.
Maybe they thought they could set the wedge with a felling axe?

Another glamour shot.
I have fallen in love with Swedish steel lately, and was happy to see this Shark logo on the blade.

If you can see through the rust, there is an EA Berg logo there.
Cosmetics aside, this plane works well.  I was able to finish tapering the desk legs with far less effort than I did with the BU Jack.

Don't get me wrong, I love my BU jack, especially the versatility of the plane.  But, this old woodie does the one thing a jack plane should - remove a lot of wood fast.  I don't think I would use this one for shooting, or smoothing, jointing or any of the other things that the BU jack does pretty well, but for a single purpose tool, this one nails it.
I used it to taper these legs.
Just to see if I could do without my BU jack, I got out my old Krenov jack plane to finish the tapers and the octagons.
I made this Krenov jack plane a couple years ago, but it doesn't get much use.
This plane, unlike the vintage jack, is optimized for very fine shavings.  Next time, I'll know better. 
Very fine shavings, indeed!
It actually makes a good partner with the vintage jack.  Rough off the bulk with the rough plane, and this one smooths and joints in one fell swoop.  At least good enough for staked legs.
Finished tapered octagonal desk leg.
The moral of the story is, if you find an old, ratty jack plane, rather than let it go for firewood or something to screw to the wall at AppleBee's, try it out first.  You might be surprised.

Sunday, July 12, 2015

Fingers In the Till - European Scrub Plane

One of my favorite tools ever, this flea market find has turned into a workhorse in my shop.
Here it is, I used it to bevel the underside of this chair.
This is one ugly tool, but it works like crazy.  There is a lot of instructions on the internet for turning a jack plane or a smoothing plane into a roughing plane for thicknessing, but I find that this dedicated plane has earned the real estate it occupies in my tool chest.

What makes this particular one special, is that it is old, well used, and well modified by some thrifty German carpenter in it's previous life.  There is a couple of big cracks in the stock of this plane held together with various bolts and screws.  It feels awesome in my hands.

It's a fairly narrow plane, I suspect the blade is between 1 1/2" and 1 3/4" in width.  If you build one, go with a narrow blade. 
When I got it, I ground it at a pretty dramatic radius.
Most roughing plane instructions on the internet recommend something like an 8" radius for rounding a plane like this.  I decided to go bold and ground it at 3" instead.  Since it is so narrow, I can get away with this.  If you grind a 2" blade at three inches, you won't be able to set it so deep as to get a shaving wide enough to justify such a wide blade.

This plane has a crazy open mouth.  I could probably put my thumb in there.  This keeps it from jamming with the rough chips you'll be getting. 

Of course there will be tear out, but this is for course work.
Wow!
As you can see, the blade in this plane isn't something precision made from Starrett.  My guess is it is from a leaf spring, spray painted red for good luck.
Before grinding, you can see how un-flat the steel is.
I sharpened this up to 8000 grit on my waterstones when I got it more than two years ago, and the blade hasn't been out of the plane since.
The crazy tight radius on the blade allows this plane to thickness wood faster than any other hand tool method I have.
Here's how I've found that this tool works best when thicknessing:  I put the board on my bench with the grain oriented right to left.  I traverse which means going across the the grain, like the above photo.  I then plane diagonally, with the grain.  I go from the near right hand side to the far left hand side.  After this, I go diagonally, 90 degrees from the first diagonal.  However, I am careful not to go from the near left to the far right, I must go from the far right to the near left.  To do this I turn the board 180 degrees in the vice and take the plane left-handed.  This allows me to continue going diagonally with the grain, instead of against it.  If I do the diagonal the wrong way, the tear out goes DEEP. 

If that explanation doesn't make sense, you'll find out what I mean when you try it.

For some reason Stanley scrub planes (like the #40) are getting expensive in the US.  There doesn't really seem to be a cheap alternative.  Lucky for me, I live in Europe, and these things are everywhere.  I wonder why?

Tuesday, June 23, 2015

Fingers In the Till - 48" Rule

Since I am in the middle of a chair build, I'm sure you might expect me to pull out a cool chairmaker's tool for this instalment of "Fingers In the Till." 

You'd be wrong.

Instead, today's episode is about an innocuous layout tool, a 48" rule.

One long ruler.
What I love about this one, is that sometimes you really want a long rule, and sometimes a yardstick just isn't quite enough.

I have had this rule (actually, I think I have two) for almost 20 years, and I find I use it all the time.  I actually used to build golf clubs, and this rule is important for that.  It has been a LONG time since I have done that, but this rule still finds use in my shop.

I use it often as a straight edge.  It isn't certified flat to a billionth of an inch, but it also doesn't cost $352.  I find that it is pleny accurate for woodworking.  Indeed, I am using it in the above photo for laying out tapers on my chair legs.

Shockingly, this rule is available from Golfworks for $10.99.  You can't beat it.
Measures to 1/8".
If you find you don't like measuring tapes, and need to measure something to 39 1/2", this tool is indispensable for a low budget.

Tuesday, March 10, 2015

Fingers in the Till - Bradawl

Is this tool really worth talking about?
Last fall, I had a once in a lifetime opportunity to build Welsh stick chairs in Denmark with my good friend Jonas from Mulesaw.

We met at a woodworking course at Dictum in which we built the Anarchist Tool Chest with Christopher Schwarz as the instructor.  It was cool.

Jonas brought his dad along, who entertained everyone the whole week long.  What a neat experience, and what a cool couple of woodworkers to know.

A moment of rest while building chairs.  We are consuming Jens' favorite beverage:  uhhh... Orange juice!  Yeah.  That's it!

When I was at Jonas', Jens, his dad, came with a box full of tools he brought along from his auction hunting in Sweden.  Needless to say, I bought a bunch from him.  I call that pile of tools, the Swedish Hoarde.  Incidentally, he told me an awesome story about the Milkman's Workbench.  If you remember, the Schwarz bought the original from him and then wrote about it in Popular Woodworking.  Jens told a story about it that was absolutely hilarious, and said that Christopher Schwarz didn't even know this story.  I'm sorry, but he asked me not ever to tell.  You'll have to wait until you see me, and get a coupla beers down my neck.

Back to work.
The Swedish Hoarde in it's entirety.

In this hoarde was this tool:
This is a bradawl.  Note the double bevel tip.  Don't confuse this tool with a screwdriver for your eyeglasses!
If you watch Roy Underhill, then you probably know how this tool should be used.

Basically, never as a screwdriver.  This tool drills holes.

The way you do it is to put the blade of the tool across the grain, push down and twist back and forth.  Or, forth and back if you are Danish.
Place the blade crossways to the grain,

push down,

twist.
This sinks a hole rather quickly. 
Here are a few holes I did in spruce this way.
This is a light duty tool, so in this case it went through soft 3/4" spruce easy as could be.  I have used it in hardwoods before, but it works best there with holes no deeper than about 3/8", depending on your specific tool.

My Swedish bradawl has a nicely shaped wooden handle, of something that reminds me of boxwood, but probably is hornbeam (Carpinus betulus).  If you buy one, focus first on a comfortable handle, and then that the tool is firmly seated in the handle.  Mine is a little wobbly, but is secure in that when I turn it, the tool does not spin in the handle.

You'll love this tool, and if you are like me, you will find yourself using it all the time when you never knew you needed one before.

Friday, March 6, 2015

Fingers in the Till - Rabbet Plane

Today my hand drops in my tool chest, and what comes out but my trusty Kenyon 1 1/8" straight rabbet plane!

My trusty old rabbet plane right after rehab.  That is, the plane was rehabbed!

This great old plane almost never made it as one of my regular arsenal of beloved tools.  It was one of the first planes I ever bought.  I can't rightly remember, but I would be surprised if I paid more than ten bucks for it on eBay.

The first thing I did was sharpen the blade.  The steel on this particular blade must be magic, because this is one of the only planes I have that I enjoy sharpening.  It cleaned up and became razor sharp in no time.

I next decided to flatten the sole, as it looked pretty  beat up.  One swipe from a plane, and WHAM!

I found a nail in the sole.

This plane languished for a couple years in this state.  I almost got rid of it when I read Matthew Bickford's book, "Mouldings In Practice."  This book inspired me to get that old rabbet plane running.

Long story short, I extracted the nail and glued a strip of some mystery tropical wood for a new sole, and I was in business.

Plane in use.
With the new sole, this plane transformed from a paperweight into one of the most awesome things known to man.

I resisted the temptation to round over the edge of the new sole.  This crisp, sharp edge allows this plane to ride in the mark from a marking gauge.
The first step in making a freehand rabbet - ride the edge of the plane in a mark from your gauge.
If your rabbet plane doesn't ride in a gauge line, you have to deepen the line with a chisel or something until your plane will register there.  The sharper the edge, the smaller the line can be.  This equals a step you can skip if the edge is crisp.

Another view of the plane riding in a gauge line.
Matt's book showed me how to do a rabbet in this way.  The idea is that you use your plane to deepen the mark.  The next stroke you bring your plane a little more upright.  After three or four strokes like this, you can then use that edge as a fence, and hog down to your depth (which hopefully you have marked out), and you are done.

Even if I had machines in my shop, I think I would do rabbets this way if I only had one or two to make at a time.
After establishing the edge of the rabbet wall, you can use it as a fence.
Rabbets this way are surprisingly fast and easy to do.  Before I understood this, I had no idea how a rabbet plane could be used to make an accurate rabbet.  I thought that it took some kind of magic skill from a true artist.  In reality, anyone can do it, it really is easy.

My recommendation would be to take a look at your rabbet plane, and if the edge is rounded over, dress the sole with a finely set jack plane until it is sharp again.

You can buy wooden rabbet planes brand new.  Just because it is expensive, it doesn't mean that it is a useful or more superior tool.  I saw one with a $250 price tag that had the edges rounded over for comfort.  To make them sharp would have meant taking the sole down nearly 1/8 of an inch!
A rabbet plane also excels at chamfers.
One also could be forgiven if they thought all a rabbet plane could do is make rabbets.  In truth, this plane can do so much more.

I find that when this plane is on my bench, I won't pull out my block plane.  This plane will make chamfers like a pro.  With the tall body, it is easy to see the angle that you are planing.

I think this is the reason there are so many examples of this tool in existence today.  This tool is extremely versatile.  Have you ever wondered why there aren't examples of wooden bodied block planes everywhere?  It is because this tool is better at it and more versatile.  It is smaller, and nothing could be more simple, as it is just a block of wood.  I suspect far cheaper, too.

The only thing I think you probably could say a block plane could do that this can't is use on a shooting board. 

Like a block plane, the rabbet plane can be set for a very fine cut.  In contrast, the rabbet can also be set for a cut as course as any roughing plane.

One thing I recently discovered, was that using this plane cross-grain (at least in soft spruce), leaves not only an expectedly rough surface, but a ragged edge on the rabbet, too.  If it is critical, this is where a filletster plane should be used.  One might be able to get away with a rabbet plane with an angled blade, but care would have to be taken to ensure to continually strike a line on the wall to sever those fibers.  A filletster plane has a knicker that does this automatically, and the angled blade leaves a much smoother cut.

In conlusion, I think that while this tool isn't essential for woodworking like the tools in my beginner's tool kit (jack plane, two chisels, a Japanese saw, marking tools and a sharpening stone), I would recommend this to be one of the very next tools a beginner should buy when they are ready. 

Wednesday, February 4, 2015

Fingers In the Till - Lie Nielsen Dowel Plate

A friend was reading my last post in this series, and when he came to the part about why I call  it "Fingers In the Till," he noted that my point was to stick my hand in my tool chest, and discuss whatever tool I pulled out.  He suggested when I stick my hand in my tool chest that I be careful not to cut myself.

Not to worry, as so far I haven't actually stuck my hand in my tool chest as much as pull up some photos that I have already published on my blog.  However, the idea is the same.  That is, to randomly pick a tool in my posession and do a review.  My last post in this series was about my favorite tool.  This post is about a little-used tool in my shop, but a very handy one.  It is the Lie-Nielsen Dowel Plate. 
Lie-Nielsen Dowel Plate.  Photo courtesy Lie-Nielsen Toolworks Inc.
A dowel plate is supposed to allow you to make your own dowels out of whatever stock you have on hand.  In theory, you could have a limitless supply of dowels that you make yourself.

Does it live up to this promise?  Well, yes and no.  If you have never used a dowel plate before, you may be disappointed with the results.  This tool does indeed make precise dowels, but there will be tear out along the grain.  Most likely it will not be usable as a show surface. 

If you want a good example, there is an episode of the Woodwright's Shop where Roy Underhill builds a hay rake.  He rives his rake tine blanks and uses a home made dowel plate to make them round.

If you have used a dowel plate, you might be impressed with the little details that Lie-Nielsen is famous for.  Being such a simple thing, what details could be included in a dowel plate?  Well, this tool has the hole sizes etched deeply in the plate, for one.  This negates the need to guess.  There is also a slight taper in the holes, which makes it easier for the pegs to come out of the plate.
Here is my own.  I think the discoloration comes from the heat generated.
What I have found the dowel plate works well for is making dowels for pegged tenons.  The long grain of the peg is buried in the wood, with only end grain showing.  I do find it takes a bit of a knack to get good results.

The way I use this tool is to start with a piece of scrap wood of the proper species you need, preferably with some straight grain.  I try to saw my dowel blanks out with as little run-out as possible for maximum strength.  If there is run out the blanks will likely break during this process.  I try to saw my blanks out about the same size as my finished dowels, ensuring to avoid an undersized thickness.

I like the dowel blank to be a good bit longer than I need.  Once I drive them home, I like to have some sticking out on both sides.

I try to saw out about twice as many of these as I need.  Better to have one too many than just enough and one break.  With a lot of extras (which take no longer to make), I can sort through them and pick out the very best for my project.  Not all of these dowels will turn out suitably.

Once I have my blanks sawn out, I put a blunt point on the end either with a pencil sharpener, a chisel, or my favorite, a floor standing belt sander.  This point does not have to be sharp, just pointed enough for the end to pass through one of the holes on the dowel plate.

I clamp the dowel plate over a dog hole, and put a bucket under the bench to collect the dowels as they come through.
Dowel plate in action.
I should have made a video, this is way harder to describe than to see.

If I am making 1/2" dowels, I put the blank on the hole one size bigger.  I try to center it as best as I can, then bash it with the biggest hammer I have handy.  I prefer a metal sledge for this, as they are oversize and the end will be sawn flush eventually anyway.

On a side note, this makes an unholy racket, so keep that in mind if your shop is within hearing of civilization.  This is probably the single loudest thing I do.

Once I get close to the surface of the dowel plate, I don't have to do anything to get the dowel out.  I just start a new one on top of the old.  After a bash or two, it will drop out into the bucket while a new one is being formed.

After running all the blanks through the oversized hole, I run them through the smaller hole.  This usually takes a little bit more force.  Here is where I'm glad I have a big hammer.

Voilà!  There now is a bucket full of dowels.  I inspect them carefully, because some of them likely  have a big flat on one side, as it didn't go into the plate quite straight.

I have made a couple of dining tables using pegged tenons, and this worked perfectly for them both.  I just bash them in (after applying a little paste wax to make it a bit easier), then trim them flush on the show surface.
My walnut dining table with 1/2" pegs having been freshly driven home.
I suppose this post has been about the use of any dowel plate.  It is a simple thing to make one if you have the materials and means to drill different sized holes in a thick piece of scrap steel.
An oak dining table with the pegs clearly visible.
If you are like me, you will appreciate that this tool can be purchased.  Lie-Nielsen's is nice because all the holes are labelled with the size of the hole, and the holes are tapered a bit to make it easier for the pegs to fall out.  Lastly, there are countersunk screw holes on either side of it to facilitate screwing it down to something.

I have to say I haven't experience with any dowel plate besides this one, but it does the job.  I love being able to make dowels rather than have to buy expensive mail-ordered ones or use whatever species the Borg happens to have in stock.  I feel that as long as I plan for a few failures the dowel plate works like crazy.