Tuesday, June 30, 2015

Last Day for June Chair Build... Almost

This build so far has been perfect.  As far as I know, no one has finished their chair for the June chair build.  Including me.

There's still plenty of time, though, I think you probably still have a few hours depending on your time zone!

I have no problem with this.  On the other hand, maybe that's my problem.  Woodworking as a hobby is at the mercy of whatever else life is throwing at us.

The good news for me is that I made some real progress today, as it has been more than a week since I have been able to spend any time on this project.

Here goes:
Mark all to length at once.  It's faster and more accurate.
First, I needed to deal with my sticks.  I cut them to length, octagonalated them, rounded the corners, then scraped them with my roundish scraper.  Not perfect dowels, but I think I like it.
It's amazing how good results you can get with accurate layout.

Back to my Moxon vise for the octagons.

Finished off with a pollisoir.
I wasn't quite sure the best way to layout and drill holes for the back, as this one will be much different than my last chair.  The answer presented itself in Peter Galbert's book!
I spent five minutes making this jig, and most of that was digging through my scrap bin.
I did do it a little different, though.  Peter suggests using string with a notch in a protractor to find the rake and splay angles for this.  I decided to eyeball the sightline, and match the resultant angle with my plastic cheapo angle finder.  This worked perfectly.
I also spent ten minutes looking for a piece of string in my shop.
I decided to drill straight through the seat blank, and intend to wedge the straight sticks from the bottom to hold everything tight.  This requires super hyper accurate boring.
I had success by checking my angle about every turn or two.
Things are starting to look chair-like!
Look!  A piece of wood with sticks in it!
I really enjoy this part of the build.  Making the tapered mortises is an opportunity for dialling in the leg angles to absolute perfection.
Maintaining the perfect angle on the sightline.
I was a bit apprehensive about my leg angles that I chose on the fly.  Looking at photos of old Welsh stick chairs, the coolest ones seem to have crazy rake and splay angles.  I used Drew Langsner's recommendations for the last chair I made.  These were a bit conservative, in my opinion.  So I went crazy.  Splay angles are 25 degrees, the rear leg's rake angles are also 25 degrees.

I am happy with the look, except I suspect the chair legs will be a little less then 30 inches apart from each other when the legs are cut to size.  Maybe next time I'll move the legs in even farther.
Really starting to resemble a chair!
The next part I have been looking forward to since my last chair build.  I got a new adze from Tim Manney, and have been itching to try it out.

Caleb James posted a video of Peter Galbert demonstrating this technique the other day, so I thought I would do it just as he said.
The idea is to start by driving cuts to depth, followed by scooping everything out across the grain.
This tool is great.  I only had about twenty minutes before I had to quit making noise, and was able to get the seat to a depth of about 9/16" in elm.  Peter Galbert says he can do this in about five minutes, but he was working with pine.  I'm sure I'll be able to finish it up in no time in the morning.

Drew Langsner says to go shallower when using a hard wood, but I decided to go deep on this seat.  One reason is that it is so thick, the leg tenons don't come all the way out.
I took a break long enough to take a close up of Tim Manney's adze.
Even at this point, it is comfortable.
Pay no attention to the mess in the background.
If you have started a chair or have finished one, send me a pick and I'll post it.  Here are a couple pictures of some chairs that I have seen so far:
Here is Steve Voigt's Birdcage Side Chair.
Ray Schwaneberger's chair is coming along.

Monday, June 29, 2015

iPad for Woodworkers?

The other day I bought a new iPad. I was reluctant to buy an iPad at first because there are a few reasons I don't like them. On the other hand, there are plenty of really cool things that can be done with one.

Here is a review of the iPad which may be of some help.  Perhaps you might find you use yours similarly.

The machine I got was an iPad air 32 GB.
My new iPad.
The reason I got it, was because my old netbook from 2009 is on it's last leg. The fan stopped working after I dropped it three times in one day, and I think it's just a matter of time before it burns up losing all my info. Another reason I got it is because my new camera has a cool feature on it which allows it to transfer files from the camera via Wi-Fi. The problem with that is it needs to connect to a phone or a computer with an app to do it. My phone had no such app.  The last reason is that this iPad is a screaming good deal.

So first the bad:

  • Mac is worse with collecting your personal data than even Google.
  •  I can't figure out how to tab on this virtual keyboard. 
  •  Typing on an iPad with no keyboard is a PIA.
  •  It's just a little thing but the learning curve does take a bit of effort if you're not used to an iPad. 
By far the worst in this list is the first point. I unsuccessfully tried to quit Google a while back because I am not particularly crazy about allowing the company to mine my online habits in order to sell me something. Mac takes this concept to a whole new level. You need to enter in all kinds of personal information just to do basic things with an iPad.

Now the good, which in my opinion makes up for nearly all of the bad:
  • Apps.
  • The Cloud.
This seems kind of like a weird list but let me explain: there are some apps that excel with use by a woodworker. Here are some apps I found which make the world of difference:

Instagram.
Instagram has a fantastic woodworker's community. It seems to be a real comfortable place for woodworkers to post pictures of their work and comment, share, brag, etc. It is very active and works best with a smart phone or a tablet with an app.

My camera's app.
After all, this was one of the big reasons I bought the iPad. There are some other options, however it works fantastic with the iPad. It works  by turning itself into a router. You connect with the camera in your settings and download pictures directly from the camera in only seconds.

Google Photos.
Here's a great place to store all your unedited photos. If you don't mind a little loss in size, Google stores an unlimited number of photos. If you want the original files, you are limited to a dozen gigabytes or so. This means no need for a huge local hard drive any more.

E-book readers.

I installed the apps for both Kindle and Nook. This allows me to read all of my purchased e-books, no matter what file format. I also have a couple other apps that work hand-in-hand with these.

Overdrive.
If you're not getting the books, audiobooks, videos, etc. from your local library online, you're missing out. Most libraries use the OverDrive software to facilitate borrowing books and checking them out from your library. I listen to audiobooks every day during my commute.

Zinio.
My library has a deal with Zinio.  Zinio is an app that allows you to buy electronic magazines, or if used with your library to check them out through your library for free. E-magazines look fantastic on an iPad. I've tried them before on my PC, but I couldn't get into it. Reading them on  an iPad is almost as good as the real thing. In fact, today I read the last four issues of Popular Woodworking. 

YouTube.
Although you can watch YouTube through Safari - iPad's browser, the app is far superior. Video on my iPad looks clear, is fast, and the sound is just fine for my purposes. Also, try it on your smart tv.

EBay.
Like YouTube, eBay can also be viewed in the browser, but works better through the app. Not that I'm buying more tools, but it's fun to look. Okay, I am buying more tools. Don't tell the Frau.

Siri.

Siri isn't really an app, it comes with the operating system in an iPad.  Siri is a text to voice and voice to text application.  It will read out loud, you can ask it questions and it will answer, and you can even avoid typing by speaking to it.  In fact, I entered most of this blog post using it.  I find that I can enter it about ten times faster with my old way of typing, but it sure beats the hell out of that virtual keyboard.  I will have to figure something out.  No wonder so many woodworkers are abandoning their blogs for Instagram.

That's it!  If you can deal with selling your soul to the collective, then an iPad is awesome for woodworkers.  :)

Do you have an app that helps your online wood life?  I'd love to hear about it and learn a thing or two.

Thursday, June 25, 2015

Convert Milimeters to Inches with Fractions

While surfing the internet today, I realized I have a piece of lumber at home that was recently surfaced to 40 mm. 

"How much is that in inches?" I asked myself.

A quick google came up with this site, and the answer of 1 9/16".

Just put in your mm or cm measurement, and out comes something useful for the shop.  This is handy for those of us in Europe who prefer to use inches.  Also, if you would like to use a plan in the shop that is metric.

Tuesday, June 23, 2015

June Chair Build - Day 2

I hope everyone got the sarcasm in the end of my last post.  There was no way I was going to finish this chair today.  The good news is, I feel like I am cruising through this build faster than last time.

I found a piece of wenge (Millettia laurentii) in my scrap pile, and it looks an awful lot like my smoked oak.
Can you tell which is flat sawn wenge and which is flat sawn smoked oak?
When I was building chairs at Jonas', he showed me a cool technique for using a power jointer to taper legs.  You can watch a video of Glen Huey demostrating the technique here.

Anyway, while I was at the Dictum woodshop, I was not permitted to do this technique.  I can totally understand that, as if I was hurt while doing it, their insurance adjuster probably would say, "you let him do what with the jointer?"

I decided to do it the old fashioned way, which really isn't that hard.  I used my BU jack (of course) and finished the cut with my hot-rod jointer.
Any excuse for me to post a picture of this plane.
It was a good workout, and between that and the octagonalization of the legs took most of the day.  Overall it was pleasant enough work.  Plus, I now am certain that the grain of the wood is plenty straight enough for chair legs.  There is virtually no run out on this wood.  Nearly as good as riven stock!

For some reason I couldn't find the octagon-layer-outer that Olav gave me, but it was simple enough to make a new one.  Follow this link for the original post on this simple layout jig.
My version of the octagon-layer-outer.
The octagon-layer-outer in use.  Granted, the pencil mark is hard to see on this wood.
 I used my moxon vice as a joiner's saddle to plane the octagons.
Moxon vise alternate use #1.
Here I took a break and ran back over to Dictum.  I decided to use the seat blank that I had ripped in half as stock for the crest.  I feel like I could be wasting a good seat blank, but what the heck.  This stuff grows on trees.

I made a decision to saw the shape out of the 2"+ thick wood I had.  After Andi and I spent half an hour using all of the geometry, trigonometry and calculus we knew, we figured I could joint one edge on an angle, make a cut for the inside of the crest, re-joint the bottom square and make the cut on the outside of the crest.  Perhaps it is easier to see in a photo or two.
Action shot!
If it looks like the wood is not sitting on the bandsaw's table square, it is because it is not.  It is at a slight angle.  Hopefully, when it is done the crest will have a gentle curve, and the top will be about 1/2" thick where the bottom will be a full inch.
Completing the cut.
 After re-jointing the bottom, I'm ready for the next cut.  By the way, this bandsaw is really nice.
Ready for the outside cut.
Luckily, all the thinking Andi and I did paid off.  It worked perfectly!
The rough crest.  I kept the offcut to aid in clamping it to the bench if I need to.
Peter Galbert's book said you should drill holes for the back before saddling the seat, so that's my plan.  Before I do that, I needed the crest so I can see where to drill the holes.

Enough of that, back to the legs.  Plane, plane, plane, plane, taper, taper, taper taper. 

Repeat.

I did find another cool use for the Moxon vice.  I don't have a shavehorse yet, but I was given a cute little drawknife that was perfect for pre-shaping the rounded tenons on the legs.  Since I don't have a lathe, that is.
Moxon vise alternat use #2.
The Moxon vise was perfect for this.  I just set the jaws up on the vise so the far side was wider than the near one, and pulled the tapered chair leg until it stopped.  This vise is awesome, as one good tug and the leg was firmly seated.  To turn the piece, I just gave the leg a little push to loosen it, and pull it again in the new position.  A lot like a real shavehorse!

I have to say I love this Moxon vice.  I have had it for about a year and I have yet to use it to cut dovetails.  It is amazing to me how many uses I find for this vise.  It is great.

Once I got the tapers roughed in with my drawknife, I used my rounder made by Elia Bizzari to taper the tenon.  This tool works best to just finish off the joint.  It doesn't do well to hog off lots of material.
Tapered tenon rounder.
With only a little cleanup with the drawknife, the tenon is done!
Completed tapered tenon.
 This is the state of my shop at the end of today.  I have even emptied my trash bucket twice by this point!
Totally trashed!
That is about it for today.  I was hoping to ream the holes on the seat and try the legs out, but there just wasn't quite enough time.  Unfortunately, I have another long stretch at work starting tomorrow, so there is only one more day in order for me to finish this chair in June. 

Do you think I can do it?

Fingers In the Till - 48" Rule

Since I am in the middle of a chair build, I'm sure you might expect me to pull out a cool chairmaker's tool for this instalment of "Fingers In the Till." 

You'd be wrong.

Instead, today's episode is about an innocuous layout tool, a 48" rule.

One long ruler.
What I love about this one, is that sometimes you really want a long rule, and sometimes a yardstick just isn't quite enough.

I have had this rule (actually, I think I have two) for almost 20 years, and I find I use it all the time.  I actually used to build golf clubs, and this rule is important for that.  It has been a LONG time since I have done that, but this rule still finds use in my shop.

I use it often as a straight edge.  It isn't certified flat to a billionth of an inch, but it also doesn't cost $352.  I find that it is pleny accurate for woodworking.  Indeed, I am using it in the above photo for laying out tapers on my chair legs.

Shockingly, this rule is available from Golfworks for $10.99.  You can't beat it.
Measures to 1/8".
If you find you don't like measuring tapes, and need to measure something to 39 1/2", this tool is indispensable for a low budget.

Me 'n' Her - #3

After a long day in the shop, on the way to the shower -

Me: I'm going to hose myself off.

Her:  Please do!

Monday, June 22, 2015

June Chair Build - Day 1

OK, this is kind of embarrassing.  I thought it would be a great idea to organize a group build for June, and here I am getting started on June 22nd.  On the other hand, this kind of has no rules, so if I say the 22nd is a good day to start this build, then there you have it! 

C'est la vie, life gets in the way, blah, blah, blah.

It still is fun, though.

I scrapped the idea of building a pair of chairs, because I think doubling the work here is just begging for not one, but two unfinished projects.  Instead, I am going for a single Welsh stick chair, but as a side chair this time.  There doesn't seem to be too many of those on the internet out there, so here's mine.

The first thing I did was choose which piece of elm to use.  I wound up using the smallest one, because I liked the grain on this one.  I figure a side chair can be a little narrower than the arm chair was, so this one will have the grain going fore and aft just like my last chair.
Look!  A piece of wood.
I used a template from Drew Langsner's book, but only for the size and rough layout.  I tweaked it from there, and decided to use my own design for the shape of the chair, as well as the rake and splay of the legs.
The rake angle of the back legs on my other chair look a bit weak to my eye.
I started today by trying to make one surface of this board flat.  It has dried a bit over the last months, and cupped a bit.  I decided to use the part of the board that is on the inside of the tree as the show surface on this chair, and that surface had a huge hump down the middle.

I decided to start this with my scrub plane, taking heavy shavings across the grain in the center of the board to start.

Scrubbing across the grain.
After getting some of that hump down, I moved to my BU Jack plane.  I used this across the grain, with the grain, and diagonal to the grain.  This started to get things flat-ish.
My beloved Veritas BU jack.
I also used my home-made jointer plane.  This tool is a bit fussy, but I think it helped.  Plus, I feel like a badass when I use it.
My badass Krenov style jointer.

As an aside, I followed Drew Langsner's instructions on the last chair, including the angles for rake and splay, and found the angles a tad on the conservative side.  The back legs especially didn't have enough rake for my taste, so I decided to go radical on this chair.  This chair's rake and splay will look extremely rustic.  I can't wait to see if it looks good or not.

I spent a little time here laying out my idea for a chair seat.
Starting the layout.
Next, I put my geometry to work.  Actually, I used Peter Galbert's geometry.  His sight-angle-figurer-outer is a neat trick. 
Layout done, ready to drill some holes!
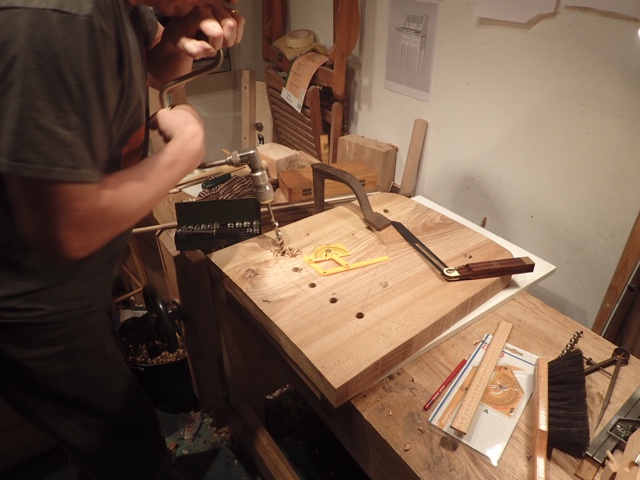
I think this method makes things easy.  I tried to get the angles as perfect as I could, but I know if they are off a bit I will be able to dial those angles in perfectly when I ream the tapered mortice.
Look ma!  I'm drilling a hole!
The rest of the day I spent at the shop at Dictum.  In the hour that I had there, I cut the shape to the front of my chair seat on the band saw, ran a big board of smoked oak through the jointer and planer, fretted a bit about the cracks in the oak, cut some legs and some sticks from that oak for the rest of the parts of the chair.  Sorry, no photos of that process.  Many electrons were abused.

A word about this smoked oak:  it is cool.  I paid a bit extra at the lumber yard for this, but figured it was worth it as opposed to fuming the oak myself.  It was a little less than 8/4 rough, and is dark the whole way through.  The guy at the yard said they do it with some kind of vacuum process.  I'm impressed.  It reminds me of working with wenge.  This should make for a fairly un-traditional look.

Unless I get a unexpected session in the shop tonight, that will do it for today.
Here is today's progress.
The plan for tomorrow is to drill some more holes for the back sticks (I plan on using seven), saddle the seat, taper the legs and octagonalize them, round the sticks into dowels of some sort, shape the crest, drill holes in it, bang it all together and slap a coat of finish on.

Easy, right?

I almost forgot!  If you have been building a chair this month, or intend to, send me some pics or a link to your website.  Life happens, and several of the folks who let me know they wanted to build this month haven't been able to for one reason or another.  That's OK, though, because Ray Schwanenberger is well on his way to making us all look bad with his build.  He started this project with a big cast on his foot, and looks to know what he is doing.
Ray has been steam bending.
Check out his build on his blog, Rivings And Shavings.  Let him know what you think of his chair build.