Thursday, February 23, 2017

Experiment: Making My Own Cold Bleached Linseed Oil

I was always happy with standard boiled linseed oil (BLO). It's got a lot of great things going for it: it's widely available at any hardware store, it looks great as a finish on it's own, it can be combined with other things to make different finishes, it makes a great wipe-on finish, etc.

My only beef with it for a long time is the smell.

It turns out that BLO isn't boiled at all. Nowadays, raw linseed oil (which works as a finish, but takes weeks to dry making it unhandy) is mass produced by adding metallic chemical drying agents such as manganese and cobalt which through the magic of chemistry makes the linseed oil dry relatively quickly.

A quick internet search produced a Material Safety Data Sheet (MSDS) for some BLO, which includes this:

Effects of Overexposure:
Inhalation:  Vapors may cause irritation of the respiratory tract.
Skin:  Prolonged or repeated skin contact may cause irritation or dermatitis.
Eyes:  Contact with eyes may cause burning and tearing.
Ingestion:  Ingestion of large amounts may cause gastrointestinal irritation.
Chronic:  Not Available.

Overall, it looks pretty safe. But not totally. I wouldn't drink it.

Then, I was ruined by Dictum. They sell a Swedish cold-bleached linseed oil.
Linseed oil from Dictum. Also, some great smelling turpentine balsam, and some natural tung oil from Denmark.
This stuff is great. No chemicals, it smells great, and it works fantastic! After a little bit of research, I think I know how this was made, and I am going to try to replicate it in my apartment.

What could go wrong?

The first thing I found was this great YouTube video by Joe Besch:
His website led me to a page on Tad Spurgeon's website. Mr. Spurgeion's passion is oil painting, and shares on his site how oil paints made by the old masters were made from linseed oil.

I figure if this is good enough for the old masters, it should also work for woodworking.

Enough blah-blah. Let's get to work:

First, instead of pressing my own flax seed, I ordered a liter of pure, quality raw linseed oil from El Barco, a local paint shop in Valencia.
Raw linseed oil.
Once it arrived, I went for a walk down to the beach. Joe Besch's video shows him adding sand, salt and marble dust to his mixture, but after reading Tad Spurgeon's notes, I am convinced that plain sea water and some sand from the beach should work great. These additives, from what I can figure, are to help purify the final oil similar to running water through a sand filter purifies the water.

I'm not sure, and if you would like to try it, I'm sure you'll have success using only tap water.
Believe it or not, you can buy sea water at a local grocer for 3.99/liter!
It was a bit stormy, but my trek was successful.
beach sand and seawater. And who-knows-what.
There was some dreck in the water, so I filtered it out with a paper towel.
Filtering the sea water.
Then I washed the sand by filling the jar with tap water, fixing the lid and shaking like crazy. I dumped the water out and repeated until I didn't feel like doing that any more.
The clean sand.
Likely, I used way too much sand. I think much less would have worked just as good. Once I dumped the liter of linseed oil into my two liter jar over the sand, I figured it was too late to take some out and we'll just have to see how it goes.
Next I dumped in my raw linseed oil.
Then, I topped off the jar with sea water. I would have liked a 50-50 mix of oil and water, but this is where we are. I think it should do something.
Oil on top, the water sank below it, and the sand is on the bottom.
Next I shook the jar like crazy until everything was mixed.
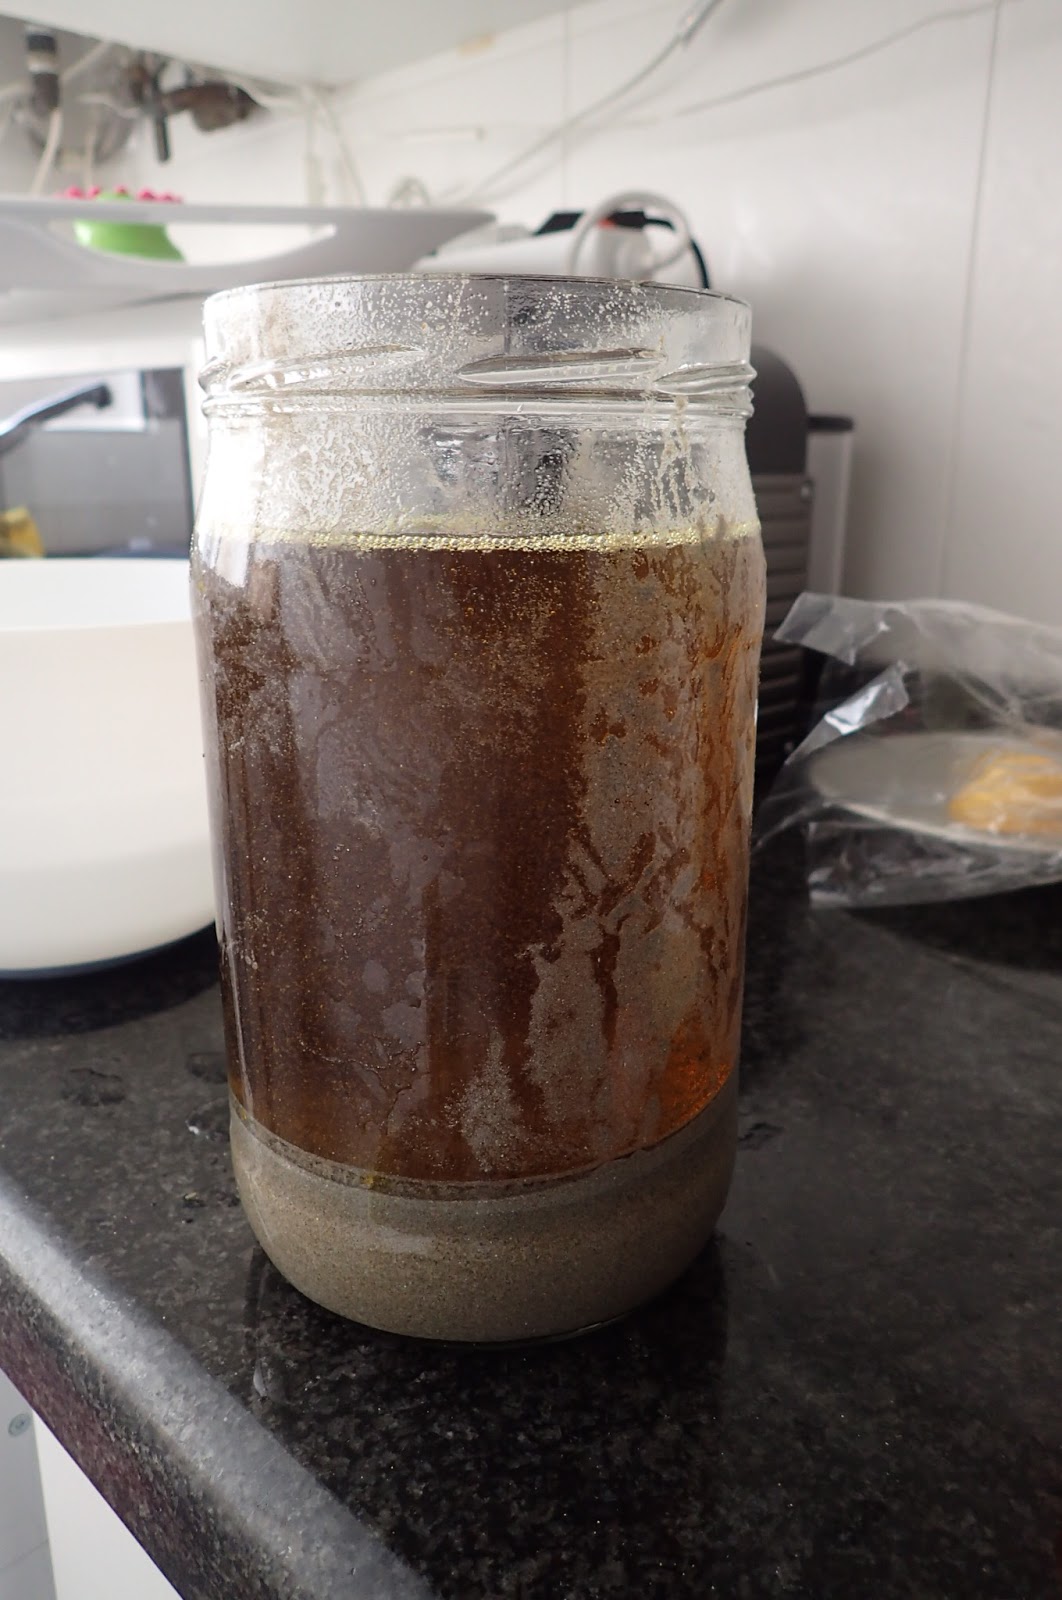
After the mixture was shaken. Not stirred.
Over the next couple of hours, I shook it up again. Joe Besch suggests three times.

Then, let it sit in the sun.
Waiting...
After an hour or so, you can start to see everything separating nicely.
After an hour.
And the last photo is where we are this morning, after about ten hours of rest.

If you are wondering what you are looking at, you can clearly see everything settling in layers. The bottom is the sand, and the little black bubble looking things above that is actually clear water. It is heavier than the oil so it sinks to the bottom.

The yellow band is a layer of fat we've just rendered out of the raw linseed oil. I suspect this is the stuff that prevents raw linseed oil from drying quickly.

The brown layer on top is the good stuff.
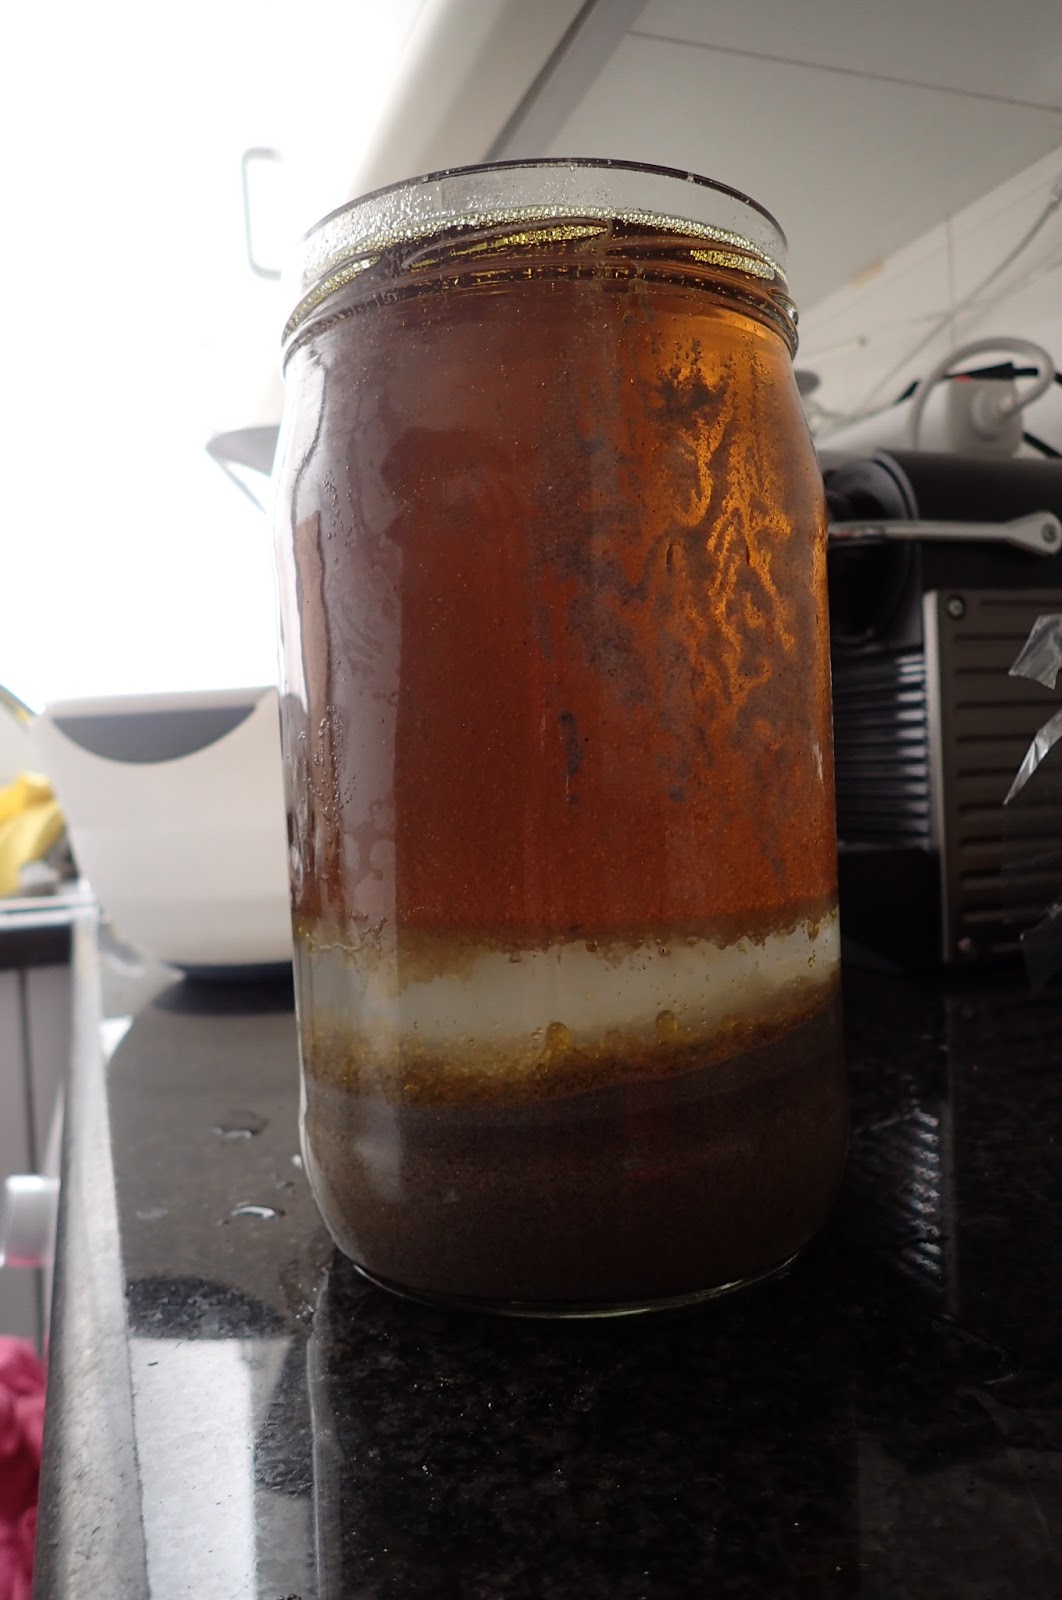
The next morning.
No earlier than tonight, and likely tomorrow, I'll extract the top layer using a baking syringe that I bought for the purpose. The idea is to get the pure stuff off the top without any of the unwanted stuff below.

I'll follow Joe Besch's advice and do this process again with my refined oil. I imagine after a couple times of this, I should get some pretty nice quality stuff.

The last step is to let it rest in the sun for some weeks or months, and the yellow color will evaporate away.

For my purposes, it probably doesn't need to be crystal clear, but it will be fun to see how far I can take this.

There is likely to be quite a bit less than one liter of oil after this process, but what I have should be good.

I'm not sure if this will be worth it, but it is fun to see if it will work.

Keep an eye on this blog in the future, I plan to post on the results of this experiment over time.

Saturday, February 11, 2017

Bevel Up Jack Plane - Will It Work as Your Only Plane?

A few weeks ago, one of my very favorite woodworking heroes, Richard Maguire, wrote a blog post about low angle planes. I've been thinking hard about this post for a while, because I have in the past advocated big time for my Veritas bevel up jack plane (BU jack).

I have to say that Richard's conclusions about the BU jack are spot on, 100%.

Does this mean I am recanting my endorsement of this tool? Absolutely not.
Richard's premise in his blog post is that BU planes work better than other planes at the extremes of the spectrum - basically that they do one thing really great. That is planing end grain.
This plane is really great at end grain.
I whole heartedly agree. They are much better at end grain due to the low angle possible with the BU design.

What about the rest?
Can one joint with this plane?
Well, I agree with Richard. Other planes do a better job at basic tasks than this plane. A 24 inch jointer does joint better than this jack plane. A dedicated jack with a cambered blade does better at hogging out lots of material than this plane. A #4 smoothing plane with a finely set chip breaker will do a better job at smoothing than this plane.
This thing works great shooting end grain. Did I already say that?
Then why do I endorse this plane so enthusiastically?

Well, I have to say that while those other planes do better at those tasks than this plane, the BU jack will indeed do them all.
I almost always do all my jointing with this plane.
A while back, I spent more than a whole year using only this plane and no other bench plane, for no other reason than to put my money where my mouth was regarding being able to build with an extremely limited tool set.

I had noticed that many great woodworkers had recommended "beginner's tool sets" that required many thousands of dollars to fill out before a beginning student could feel like they could do "proper" woodworking.

I thought that was baloney then, and I think it is baloney now. A jack plane (whether BU or bevel down, new or vintage), is a great first tool to get because of the versatility.

Other tools work better for those everyday tasks, but one plane instead of four can be a deal maker for a beginner.

After my exclusive use of this plane for the time I used it, I found out that "plane monogamy" (as Christopher Schwarz puts it), is a wonder.

Face it, there are all kinds of situations where even the largest hand tool shops require making a plane do a bit more than what's in it's name.

To be able to do these amazing tricks with a plane, one really, REALLY needs to know their tool.

I learned that it really is true that you can't buy skill by purchasing a new tool. One should learn how far they can push (get it?) a tool they have before deciding if another is needed in their situation.
Plus, using the same tool is faster: you already have it out.
There are a few things I do to make it easier on myself.

For rough work, I do my best to avoid having to thickness stock very much. My wooden jack plane with an eight inch camber on the blade hogs off wood like crazy and in no time flat. A BU plane is difficult to put a camber on the blade because of the angle of the bed. Taking 1/16" thick or thicker shavings isn't going to happen.

It will take medium sized shavings. If your wood is roughly the thickness you need it, and mostly flat to start with, it is a breeze to bring it to good working dimensions with this plane.

For fine smoothing, again, choose your wood wisely. This plane will easily achieve a finish quality surface without much work. Even without going crazy with steep sharpening angles. Make sure the blade is as sharp as you can get it, and you will be fine. At least until you try to plane against the grain. Even then, lighten the cut a little more and close the adjustable mouth as tight as you can.

For jointing, I find this plane to be long enough to joint nearly anything I can throw at it accurate enough for gluing up a panel. It does take some skill. One will get good at making edges flat eventually with this tool. Just keep checking with a good straight edge, and practice removing the parts that aren't flat. Follow that up with a fine shaving from one end to the other. I find it rare that I need to pull a jointer out for edge jointing anymore.
In conclusion, I would just like to agree with Richard again that this plane shouldn't replace everything in your plane corral. However, if you are looking for your first bench plane, this might be a good place to start.