 |
| The Easy Tool Rack. |
Of course I need to do this, and of course I need to make it unnecessarily complicated.
 |
| First, let's go get some wood. On the bus. |
I think I want to cut a notch in the back of the side pieces and nail the back board directly onto the sides from the back, and I want a through, wedged mortise and tenon for the front rail. I'll think about how to attach the top later.
 |
| My bowsaw does a good enough job roughing out the shape of the sides. |
In the hope of keeping these posts from getting too annoyingly long, I have figured out how to make GIF images, so hopefully you can see a little mini-slideshow of what I'm doing.
Once the shape was roughed out for the side pieces, I wanted to make them as close to perfectly the same as possible. I figured the easiest way to do that was to clamp them together and use spokeshaves to bring them down. My flat spokeshaves did a great job on the flat and convex parts, and I had to bring out a front-to-back curved spokeshave for the concave part.
I finished off the very bottom of the supports by marking the roundover with a coin, cutting a 45 degree piece off with my saw, and rasping it to final shape.
Once they were the same, I used a side-to-side curved spokeshave to put a gentle profile on it. Unfortunately this spokshave wouldn't touch the concave parts, but I do have a scraper I made a while back that happens to have the same profile.
 |
| A mini-slideshow showing the shaping of the side supports. |
 |
| After adding a chamfer to the top shelf, I added the roundover to the edge. |
 |
| I ripped the tool support to width. |
 |
| There's really no way to prevent this. |
I had a bit of a difficult time planing the faces of these boards, but it was easy to get them smooth with a card scraper.
 |
| This pine scraped smooth just fine. |
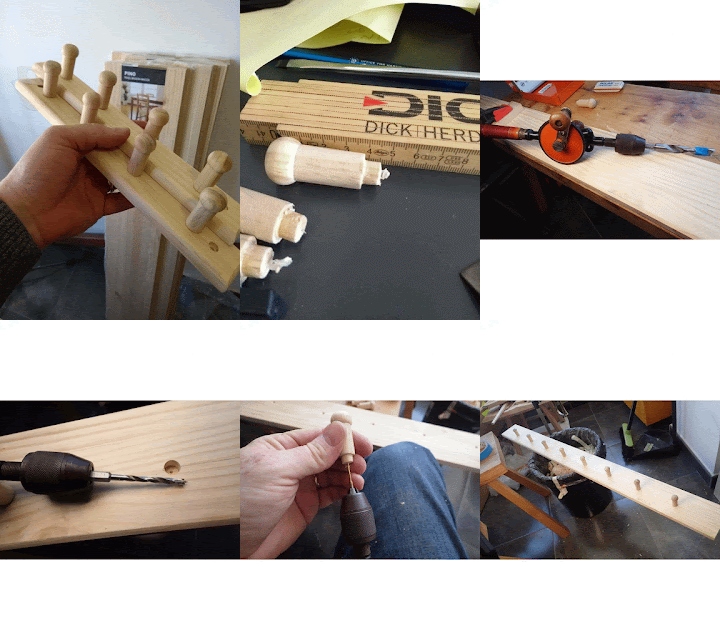
Luckily, they were just sloppily glued in place. All eight pegs came out with just a little bit of twisting with my hands. I feel sorry for whoever buys these things expecting to use them to actually hold something. I'm sure the pegs would pop out after a short time of light use.
It was a quick matter to clean them up by scraping the PVA glue off of them. They were unfinished, so they only needed some sanding.
To mount them to my rack I drilled a stopped 10mm hole in the parts I had marked with a pair of dividers. After that, I used a smaller bit to go all the way through. A little hide glue and a screw from the back hold these pegs securely. And I mean, securely. These pegs aren't coming off without destroying something on this piece.
 |
| Here's another mini-slideshow documenting the mounting of the pegs. |
 |
| Yet another GIF showing the routing of the mortises. |
 |
| Mocked up, it is looking good. |
Next up, milk paint.
You're on fire!
ReplyDeleteIndeed! I can hardly wait to see what gets finished next!
Delete:o)
Slow down! save some projects for the rest of us.
ReplyDeleteSeriously though this is one of those projects that every time I see it in someone else's shop background I think I need to make one. perhaps I can see that I should just make one in a weekend and assuage my incomplete project conscience.
Hey Jeremy! Thanks!
DeleteThis is one of those great projects that you will use and it also can get some momentum going in your shop. It's fun and you can make it as easy or as complicated as you like.
And don't worry about your incomplete project conscience. The Frau was pretty unhappy that I started another new project while I still have a few unfinished projects rolling around the shop.
Good job. It must be fun to move lumber on the public transportation system, but heh, you do what you got to do :-).
ReplyDelete"The Frau was unhappy i started yet another projects while unfinished one are piling up" Welcome to my world :-)
Bob, with a growing pile of unfinished projects ...
Hey Bob!
DeleteHaha! The best part of The Frau's unhappiness with my unfinished projects is she commissioned a gift today. I get to start another new project!