Monday, April 22, 2019

Japanese Toolbox-Style Humidor - Part II: The Inside

If you are a regular reader of my blog, you'll remember I recently finished a Japanese toolbox-style box intended to be a humidor.
My Japanese toolbox-style humidor.
I made it out of laminated scots pine (Pinus sylvestrus) and nails. I was a bit concerned that it might not work very well at keeping the humidity where it should be for cigars (I like 55% to 75% relative humidity).

Also there was a real possibility The Frau might steal it and convert it into some kind of jewelry box or something.

I was lucky in the fact that it wasn't stolen, and it seemed to keep the humidity where it should be.

The box seems to maintain humidity perfectly.
A proper cigar humidor needs to be lined with Spanish cedar (Cedrela odorata). The aroma of this wood is very complimentary to cigars. In fact, most fine cigars come in a box that has this type of cedar in it. That's why I kept my cigars in the original box, and put the whole box in the humidor.

It turns out that I can get plenty of this type of cedar through the mail from Comercial Pazos for a reasonable price.
Strangely, the Spanish term for Spanish cedar is Brazilian cedar.
The block of wood I got was 85mm x 65mm x 400mm. I needed strips of this in five or six millimeter thicknesses. That means it's time to resaw.
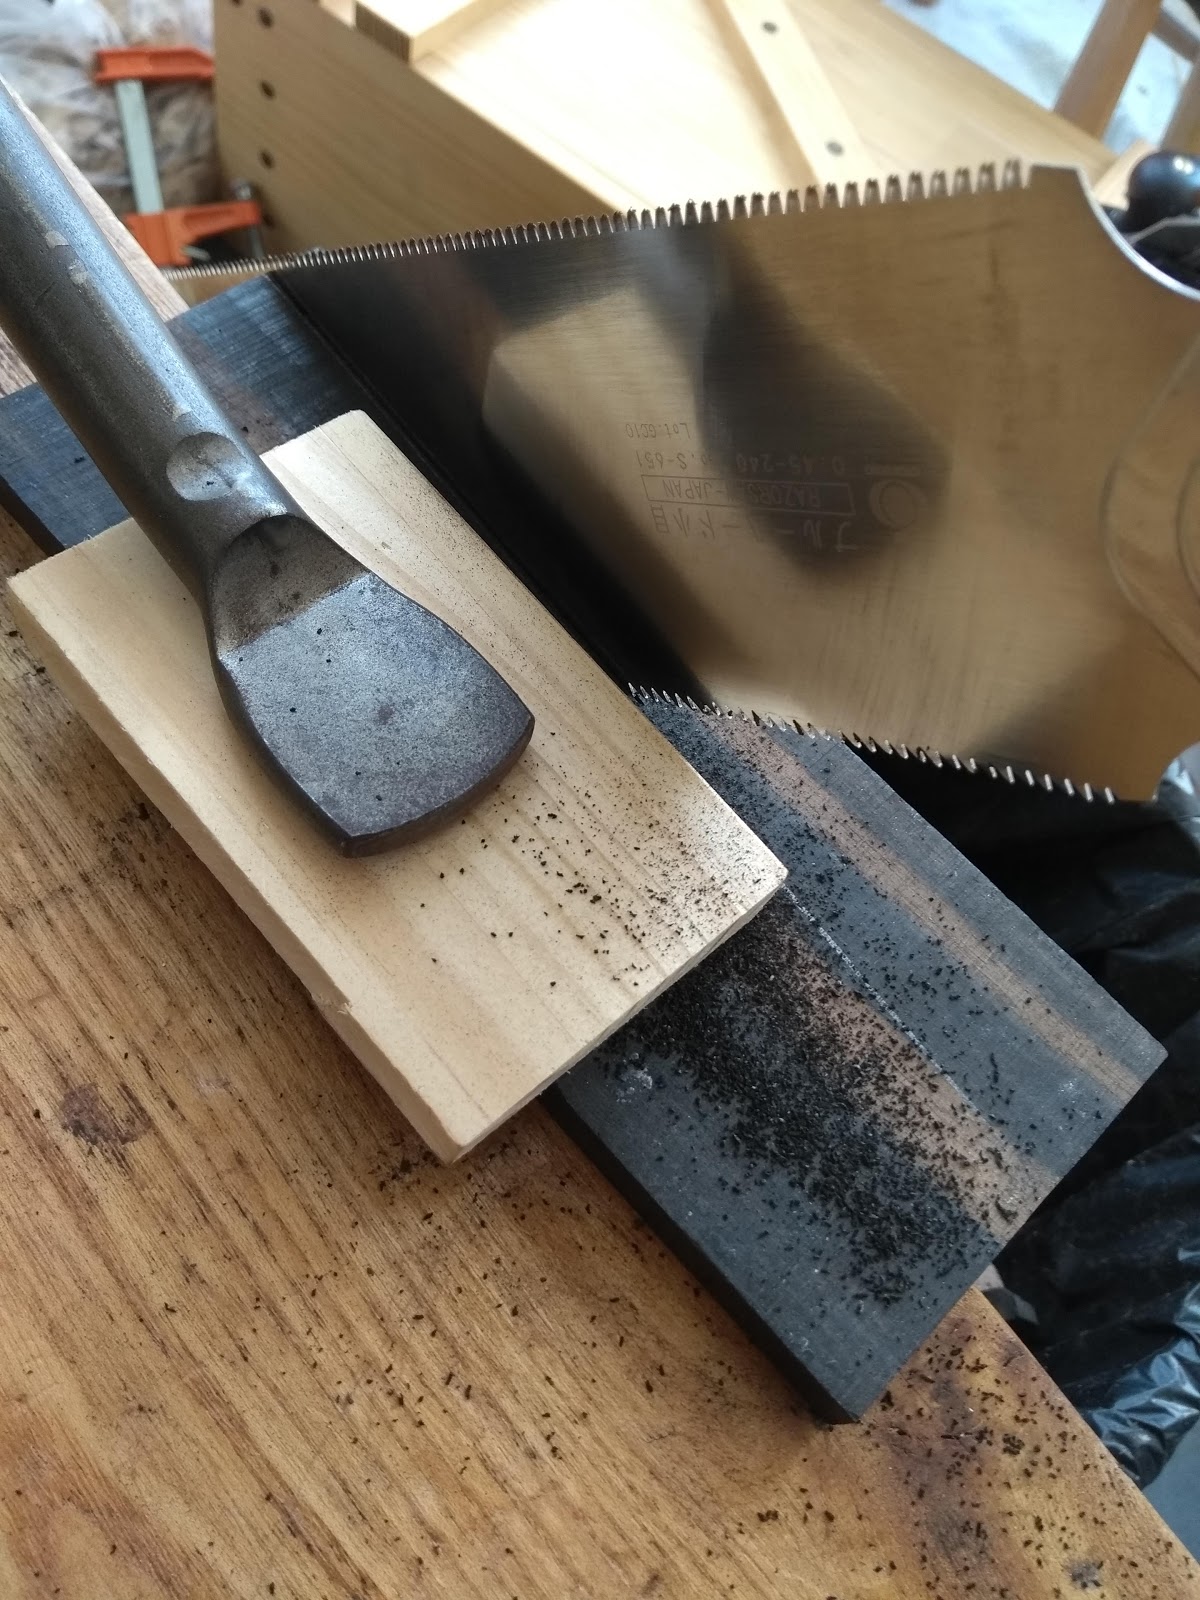
I use a sawblade clamped to my bench on a spacer the correct thickness to start a kerf.
This makes it easy for the saw to stay where it should.
Just a few minutes work.
Rinse and repeat.
While planing these to a smooth finish, I wound up with a bunch of awesome smelling shavings all over. I decided to keep them. I stuffed them in large tea bags and taped them shut. I suppose if I have to transport cigars in a Ziploc, one of these thrown in might help.
At a minimum they'll keep the bugs out of my sock drawer.
Once I had some pieces marked out for length for the sides and bottom of the box, I had some shorter lengths left over. After all that work resawing, I thought it a shame if I didn't use the scraps. I used them in the ends.

I edge glued them to a longer piece, then fit the whole thing in the end. This panel doesn't have to be particularly strong, because it will be captured by the pieces I'll put on the bottom and sides.

I chose not to glue any of the lining in, so that it can be removed and replaced if needed.
Self-made Leimholz used on the ends of the box.
Next was the lining for the floor. I was able to use only two pieces. I left a little room for them to contract and expand, but I don't really expect that to be a problem. Better safe than sorry, that is.

The side pieces went in next. I made them so they went up about half way to where the bottom of the lid goes. The cool part about this is the till will ride on these two pieces, so the till will be no narrower than the bottom compartment when it is all finished.
The lining in the box.
So far, I think it looks and smells great. It is all tight enough that it stays put with no glue. I also did not plane much on the faces that touch the pine. I left them pretty rough, right off the saw.

So far I think this is a fine upgrade to this cigar box.

Next up, the till.

If you haven't seen it, check out Part I.

Tuesday, April 16, 2019

No. 4 Plane Review: Part II - Stanley Made in England

English made Stanley planes seem to be less desirable then the US made ones. Why is that? Are they inferior?

Let's find out:
My new Made in England Stanley No. 4.
Before writing this blog, I tried to do a little research on when this plane was made. There really isn't a proper type study of Made in England Stanleys like there is with the US versions. The best I could come up with was this link by Time Tested Tools which calls this plane an English type 3, produced from 1945-1972 (Stanley first started making planes in England in 1937). To my eye it looks newer than that, but I'm not an expert. Please comment if you know anything about when English planes were manufactured.
It looked like this when I got it. Not too bad! Only the tab on the lateral adjuster is missing.
I'm still getting to know this plane, but so far I'm impressed. I was led to believe that the flat frog of the older Stanleys is superior to the newer one, with half the center hollowed out. Could it be that Stanley figured out what was really needed in the frog? I haven't found this plane lacking in anything, yet. On the other hand, it is still new to me.
After a little tune up it seems to work well.
I used this plane exclusively on a recent project with great results. I think the number one thing in getting a plane to work is making sure it is sharp.
Just as fine as my type 11 Stanley.
Let's get down to it and compare side by side. Overall, the fit and finish of the type 11 is much finer and far superior to the English one. All surfaces on the old one are smooth and crisp, where there are spots on the new one that look like they finish sanded it with asphalt in the parking lot during a cricket match.

Other differences are that the new one has a tall front knob and the type 11 has a low one.
Front view.
The rear totes are different, too. The type 11, however, has a user made tote that may or may not be the same shape as the original. I've been meaning to make my own tote for it, but haven't gotten around to it yet. The English No. 4's tote is comfortable in my hand, so perhaps I'll make a new one similar to this one.
Rear view.
I had assumed the English Stanley had a wooden tote. It looks like wood with a thick coat of some kind of muddy lacquer. It doesn't feel like plastic. It turns out that it is some kind of manufactured material.
The knob and tote are made of some kind of injection-molded composite material.
The other difference I noticed is the English one is just a tiny bit wider than the type 11. The new one is too wide to fit in the fitted compartment of my tool chest intended for my old one. The thickness of the walls of the casting look to be about the same, however.
Weirdly, they both are No. 4Cs. C is for corrugated sole.
Also, the mouth on the type 11 is finer. This doesn't really make a difference to me, though. Since I've learned to set the chipbreaker farther forward on the blade for fine shavings, I've not noticed a need for a fine mouth.

Today I decided go a bit more in-depth with my rehab of this plane, and work on the cosmetics. The first thing I did was polish up the brass with toothpaste and a gray scratchy on the parts that needed it.
After and before.
I don't often do this on old planes, but I figured this plane didn't look particularly old so it might be fun to make it look new again. I think the shiny bits turned out nice.

My time in the Army taught me that raw brass needs to be polished every day or it will start to tarnish and look muddy in a very short time. I thought I'd try an experiment and dip the newly polished brass in shellac to see if it would prevent the brass from oxidizing. I'll report later if it works or not. I only did this to the knob and tote nuts, not the blade adjustment wheel. I figured it was more important for me that the wheel felt right.
Here is the plane broken down (without blade and chipbreaker) after making everything pretty.
When using this plane, I would have to say that it works just as well as my type 11. The original blade and chipbreaker were in nearly new condition, so they weren't messed up and I didn't need to replace them. The original blade, however, does tend to need sharpening more frequently than my Ray Iles aftermarket blade.

The original blade sounds and feels a bit different. For lack of a better way to explain it, it has a dry, raspy note to the sound. I've noticed no difference in it's performance, as long as it is sharp.

To complete the comparison, I thought it only fair to give it a try with the Ray Iles blade and Veritas chipbreaker that are in my type 11. This was a nice upgrade. Although I can't say it cut the wood better, it certainly sounded and felt better. In addition, it was very secure when mounted in the plane. I usually tap-adjust the blade with a small hammer, and I really had to whack this blade to get it to move laterally.

That's good. I don't think the blade will shift in the plane in use easily.
After market goodies mounted in the plane.
In the end, what really matters is the surface of the wood. I find knots in pine can be difficult to get a nice, smooth surface on, but this plane did a superb job.
Knot too shabby. Har-har.
In conclusion, I don't think one has to feel ashamed of their late model Made in England Stanley. This plane can definitely hang with the big boys.

My guess is many other planes can, too.

Next up: Record No. 4

If you haven't already, read my post on the Stanley type 11.

Thursday, April 11, 2019

No. 4 Plane Review: Part I - Stanley Type 11

I think I have a problem. My problem is I love planes. I have more planes than one person needs. In fact, I've recently bought a pair of #4 smoothing planes when I already have a great one in my tool chest.

Oh, no! What am I going to do?!!!

I'll tell you what I'm going to do: I'm going to compare and contrast them over a series of blog posts.
Here's my current go-to user. A Stanley type 11. Or maybe a type 12.
First up is a plane I got in a batch several years ago. I was very excited by it, as I've never had a type 11 Stanley before. Since I had never rehabbed a plane up to this point, I thought I'd practice and rehabbed a Sargent 409 (Sargent's version of a #4). It turns out that the Sargent worked a million times better than I ever thought it could, and I used it for a long time and the Stanley sat waiting.

I brought the Sargent to Spain with me, but a couple years ago I took it back to Germany and swapped it out with the Stanley. I did a very mild rehab to it. I don't normally go crazy shining up and polishing planes, unless there is a problem. This one cleaned up very nice, and I've been using it ever since.

How do I know it's the coveted type 11?
Type 11s and 12s have three patent dates cast into the body.
Normally a type 11 has a small one inch diameter adjuster wheel, and the type 12 has a larger one.
Mine has the larger one. A type 12?
However I'm also led to believe that a type 11 has a low front knob and the type 12 has the high knob. Mine has a low knob.

Stanley sometimes used up old parts on new designs of the plane before completely switching over. It's also possible that parts of this plane didn't leave the factory together, but were cobbled together at a later date.

Whatever happened, I'm happy with the plane. I think it is a type 12, though.
Look at the glorious frog!
One reason that many people love Stanleys of this vintage is because these older planes have a smooth frog. Later, Stanley and other plane makers have routed out some of the metal on the face of the frog. I think they must have done this to make it easier (and cheaper) to flatten the frog, and keeping metal where they thought it was needed.

Who knows?

All I know is that this plane works well for me.
Strangely, the only place this plane says "Stanley" is on the blade, which I have swapped out.
I once thought that upgrading the blade and chipbreaker on a bench plane was pretty much necessary to get it to work nice. I don't believe that anymore. I will upgrade if the blade and/or the chipbreaker are in bad enough shape that spending money on new ones is less pain than rehabbing the old ones.

Old blades like the one that came out of this plane have awesome steel that is easy to sharpen and stays sharp. In the other hand, I'm not such a big fan of chipbreakers from this era. They seem to be easily bent, and most of them I see (listen to me trying to sound like an expert!) have something wrong with them, and they don't lay perfectly flat across the blade.

I often will upgrade the chipbreaker on an old plane. If I can, I'll add it to the original blade. My favorite chipbreaker is the Veritas one, because it seems to be a little more affordable than most of the other premium chipbreakers. I think if you really want to upgrade something on your benchplane, before buying a new blade try adding a new chipbreaker first. You might find that's all it takes.

In this case, the original blade was pitted and in bad shape. I looked for a replacement, and found that Ray Iles makes one. I ordered his regular blade for this plane, but I've seen that he also makes one that is the original thickness. I haven't seen any of the premium blade makers make one in the original thickness. I think it would be great if they did.
My after market blade and chip-breaker.
One thing I love about this Ray Iles blade is the face is hollowed out a little, so lapping it is a snap. Only the very front of the face of the iron gets polished on my stones. The steel is very good and it takes a very fine edge. Money well spent if you are more interested in using your plane rather than collecting them as an investment.
Someday I'll have to fix this.
The only thing that I really don't like on this plane is the rear tote. I think someone over the years replaced the original tote with a home-made one. Besides being a little bit funny in shape, it is cracked at the base. I've been meaning to make a new tote for it one of these days, but in the meantime I've just been using the snot out of it.
I suppose this makes it a #4C, as it has corrugations on the bottom.
The sole is corrugated. I haven't really figured out what the benefit is of this, other than if one wanted to lap the sole there is a lot less material there so that job should go faster. But, how often does one need to do that? I find they get in the way when you're trying to run the plane on the edge to make a chamfer. To do that you really have to skew the plane or the edge of the wood falls into the grooves.

So here's my take on this plane:

I honestly love this plane. As a smoother, it works like a monster. I really like the larger adjusting knob.

With a fresh stropping and the chipbreaker set very close to the edge, it can take an extremely fine shaving.

Why on earth would anyone buy another smoothing plane when one has this one?

Well, I thought it would be fun to test them out against each other. It can be difficult to find a plane like this. Can other planes perform as well? Let's test some and use this wonderful plane as a control.

Next: my new Stanley "Made in England" #4.

Saturday, March 30, 2019

American Trestle Table - Part VIII - Tusk Wedges

Short version: I made a couple of flat sticks prettier!
Completed wedges.
Long version:  While I'm in Spain and the table is in Germany, I can make some wedges for the tusk tenons that will hold the connecting trestle securely.

The tenon on the trestle is about 3/4", so the wedge should be about 1/3 of that. 1/4", however, seems pretty flimsy for this stout table. Therefore I pulled out a piece of ebony from my stash that finishes out to about 3/8". I think this will be just fine in the end. If not, I'll just plane them down a bit more when I fit them.
Hunk of 3/8" ebony from my stash.
I think if I had thought this out ahead of time, I would have made the mortises a bit wider to take a beefier tenon. I think a 3/8" wedge would do better in a tenon that is around 1 1/8" thick.

Too late now.

It should be fine in the end. If not, I can always cut off the tusks and mount the tenon in the mortise permanently like Christopher Schwarz did in his article.

I started by smoothing out the bandsawn surface on the ebony I chose for the first wedge. It turns out it was a bit figured, and very difficult to plane. I got there in the end.

At first, I was going to try to get two wedges from this one stick, but decided not to be stingy. I had some more of this thickness of ebony, so I pulled out another one, and cross cut it to length.

This time, I smoothed an edge, and drew out the final angle of the wedge on the rough face, and ripped it to final shape. This made smoothing it a bit easier, because there was less material to work with.
The second blank on top of the first.
After smoothing out the second blank, I realized it has a lot more blond wood in it than the first. I have another piece which matches this one, so let's get it out and look...
The third blank, with a nasty hork in the middle.
This one has a nasty dent in the middle, which I could not avoid. Instead, I lined up the first wedge, which is about 7 1/2" long, and put that defect right in the middle. It will be buried in the tenon, so will never be seen.

After crosscutting it where I wanted, I marked the wedge shape from the first one one the rough surface again. The shape is about one inch rise in 12 inches of length.
Ripping the wedge shape on the rough blank.
After the edges were smoothed out, I smoothed the faces.
Artsy smooth planing photography. - With my phone.
After all that, I have two very nice looking, unique wedge blanks. This wood should look really cool with the cherry table.
Getting there. I even put some wax on one side to see what it will look like.
I had considered making some angular designs to match the feet of the table, but in the end I decided strength was needed where it will be whacked with who-knows-what kind of hammer when it is set. I settled on a rather plain looking roundover, which should look perfectly fine with this table.
10 ct. for the toe, a whole Euro for the heel!
I drew a profile using coins as a template, then I used my paring chisel to remove most of the waste.
Paring was quicker than sawing.
I then clamped the two pieces together, and finished the roundover shape with a rasp, a file and then through the sandpaper grits to 320.
Starting the roundover shape with a rasp.

Finishing it with sandpaper.
One makes do with whatever workholding is available. This worked fine.
After this, all I did was gently break the arises with sandpaper, and slather on some of my famous Mediterranean Sea Water Sun Bleached wax blend.

I think they will look nice.
Glamour shot.
Next time I'm in Germany, I'll fit these bad boys to the trestle.

Part I
Part II
Part III
Part IV
Part V
Part VI 
Part VII

Wednesday, March 27, 2019

American Trestle Table - Part VII - The Trestle Joinery

Once I got the trestle flat, square and smooth, it was an easy matter to lay out some tenons and start cutting. I decided to make the tenon stick out 4" from the outside of the leg, so including the 2 1/2" for the leg, the tenon needs to be 6 1/2" long.
Looks like a good job for my big-honking BadAxe tenon saw.

One side done on both faces of the tenon.
It was clear once I flipped the board and started cutting the other side, that my tenon saw isn't 6 1/2" deep.
That's as deep as I can get.
A back-less saw is in order. The perfect saw would have been my Ryoba Dick saw, but that saw is in Spain. A pity, since it has such a narrow kerf. I pulled out the finest rip saw that I have, which is something like 12 PPI to finish the job.
This one gets deeper.
That took forever, so I think I wound up finishing the cut with my 5 PPI ripsaw, which worked great. However, The one face of that tenon was pretty ugly. Sadly I didn't take a picture of it, but it looks like my line got off a bit about half way down and the saw bent a little to the inside of the board.

The damage is still a little visible, so I need to decide how best to fix it next time I'm back. I could just plane it down, making the tenon much narrower than the mortise, which would show, I could plane that down and put a patch (I have the cutoff which would match the grain nicely) on either the tenon or inside the mortise. I also could cut an inch or two off of the end and make everything a bit shorter. I'm sure it would still look just fine. Perhaps I should just leave it.

On with the rest of the joints.

My crosscut saw and shoulder plane made quick work of sawing the cheeks off all together.
Cutting the tenon cheeks.
After this, I removed the top half of the tenon so that it would fit in my 3" tall mortise.
It fits well, but you can see some of the damage if you blow it up.
The cross brace that goes on the top of this joint is a little fatter at the top than at the bottom, so it will need some tuning to be perfect.
Here's generally what the joint will look like.
For the second tenon, I decided to do the crosscuts for the cheeks first, followed by removal of the unused part of the tenon. Perhaps a narrower tenon won't turn out so ugly in the end.
You can see here I crosscut the upper part of the tenon that will be removed.
This was much easier in the end. Actually, it might not have been easier, but for one reason or another, it turned out much cleaner.
The second tenon.
All in all, I would say this will turn out nice. The joints are tight enough to stand on their own with no glue or wedges in them yet.
The base.
I will drawbore and wedge the joints for the legs, and the tenon will be removable with a wedge to hold the tusk tenon joint. Should I make the wedge from cherry, or should I make them something exotic like ebony?
A preview of the completed table.
The base is plenty strong to support the top. It is not screwed down, so it is a bit rattly at the moment. The top does rock a little on the cross supports. Eventually I will screw the top down with buttons, and add a center cross support. Hopefully the top will flex enough that I won't have to do any more flattening on it.

The top does have a few checks that will need either butterfly keys or epoxy. I'm thinking epoxy will be the best answer in this case.

Sadly, I had to leave for Spain after this. I'm not sure when I'll get back to it, but it is starting to look like a table-shaped object.

Still to do:
  • sink mortises in the tusk tenons and fit wedges.
  • fine-tune all of the M&Ts to ensure everything goes together perfectly.
  • drawbore the leg tenons.
  • chamfer all the sharp edges.
  • make buttons and mortises in the cross beams to hold them.
  • address the cracks in the top and smooth the top surface.
  • MAYBE bevel the underside of the 1 1/2" top to make it look lighter.
  • add finish.
I wish I could just finish this project, but we'll all just have to be a bit patient.

Previous posts:

Part I
Part II
Part III
Part IV
Part V
Part VI