Saturday, January 25, 2014

Starting the Stool Build - 11:00

Sometimes life deals lemons.  In this case, I am stuck at work all day today and all day tomorrow.  No time to be in the shop at all.

How am I going to build a stool today?  The answer is:  I already did!

I freely admit that I completed this stool earlier in the week.  Monday was a federal holiday, and also the last day I had off before the build off.  You be the judge!

To keep with the spirit of the Stool Build-Off happening today, I will post my progress from Monday in real time, as if it were today.

A side effect of posting now having done the build on Monday is I only had to take some pictures of the project while it was in progress.  I got to spend the rest of the week setting up the blog posts to go with the build.  I think this results in a much better chance of my writing being intelligible as opposed to trying to write and post during the build itself.  I'm pretty sure I would not have been able to post anywhere near as much content if I did both simultaneously.

This series of posts will come out mostly every hour until the build looks complete.

Here is my progress at about 11:00 am last Monday:

I started the day yesterday with the intent of cleaning my shop and sharpening all of my tools so all I would have to do is get up, run down to my shop and start hacking away.

Intentions are good.

Here's what really happened:  I didn't get anything done the night before at all.  Even worse, for some reason I did not get to sleep until the middle of the night resulting in my early jump down to the shop not happening until about 10:30.

Oh, well.  We must all endure.

One of the reasons I was hoping to get started early is that one is not allowed to make noise in our apartment building except between the hours of 9 a.m. to noon, and then again from 3 p.m. to 6 p.m.

Hand tools are mostly quiet, except when it is time to bang on something with a mallet or a hammer.

Getting a late start pretty much killed any chances of pounding mortises before three o'clock.

Luckily, a few days ago I got my stock roughed out to size.  I started playing with my new Moxon vise and planed all of the legs into octagons.  Actually not octagons because the legs are not square, but wider on one face than the other, but with a deep chamfer on each corner.

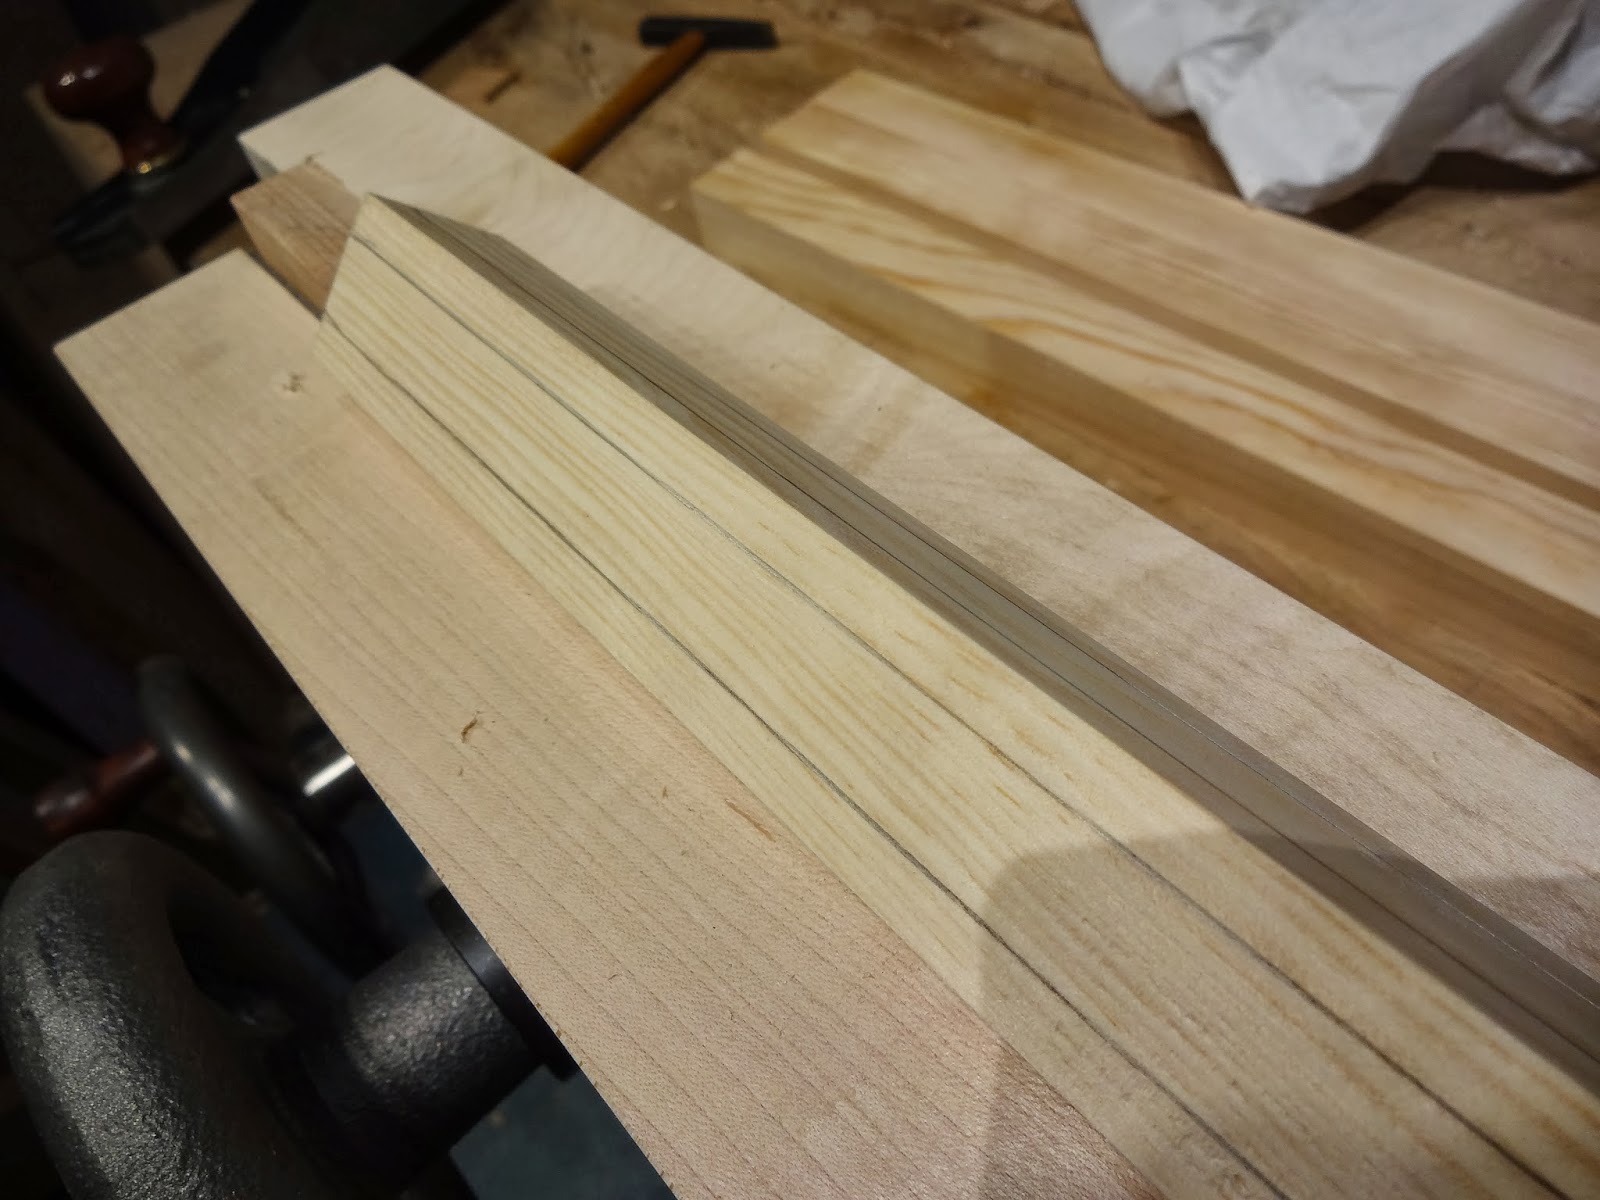
I marked out lines with a pencil to define chamfers.

First chamfer  done.  The Moxon works well for this.

Another view of the front.  I had to change what I was using for spacers to allow for optimum results.

One done, three to go.
Next up:  Making squares round.

View the rest of my build here.

Tuesday, January 21, 2014

Something Different With a Moxon Vise

The Austrian Christmas Chicken arrived a little late this year, and he brought a Moxon vise with Benchcrafted hardware.  He constructed it with maple stock,  and gave it to me as a present.

The vise clamped to my bench top.  Sooner or later I think I will put some holdfast holes in my bench to hold it.  For now, the clamps work perfectly.
I look forward to really getting to know this vise.  I have been meaning to make one for a couple years now, but haven't gotten around to it yet.  Thanks, Alex!

Yesterday I cheated on the stool build-off and built my stool early.  I work every day this week, including Saturday and Sunday, so there was no other time to build the stool.  I can't wait to blog about my build, but I will wait until Saturday to post about it.  The only thing about it I will say is it exceeded my expectations.

As far as this vise goes, I did find a use for it on this build.  Although my understanding is it excels at workholding for dovetails, I find it also makes a pretty darned good joiner's saddle, you know, a way to hold rectangular stock to plane it into an octagon or into a dowel.
Moxon holding a stick.

ready-built planing stop

The set-up for this.  Both scraps are the same thickness in this case.
So, there you have it.  It worked perfectly.  If you haven't taken two minutes to make a joiner's saddle, but have a Moxon vise, that is two minutes of your life you don't need to waste building another shop appliance.

View the rest of my stool build here.

Sunday, January 19, 2014

Preparation for the Shop Stool Build-of

Yesterday I had the great opportunity to eat real American steaks - with Brian and the Frau. Brian is an "intellectual woodworker" (and therefore talking with him is always fun) and he is a down-to-earth cook; his wonderful BBQ is the proof (beside the beefsteaks there are gorgeous tasting mushrooms).
While we were eating and talking about the Shop Stool-event on January 25th, I told Brian about my concern, that I can´t publish in social medias the pictures and therefore he invited me to his blog, which really honors me, because it´s an act of faith! So I am a little bit uneasy what and how to write (I am an Austrian and English is sometimes difficult :) But let´s dive into deep water!
Last summer I educated carpenter-apprentices in one week, 8 hours a day, how to work on a workbench with handtools. We built a shaker design step-stool and I have some boards in birch left, which I will use for the Shop Stool Build-of. Because of all the teaching, I was not able to make a full shaker step stool for myself. I am not sure, if I am cheating, because I have already tails on two boards but I am not going for a price: The 25th will give me the opportunity to work one day focused on MY stool and it will be fun. That´s my motivation to take part in the game! 
.

Saturday, January 11, 2014

Planing and Prep Work

If you haven't heard about Chris Wong's Shop Stool Build-Off yet, it sounds fun.  The idea is that on January 25th as many people as possible build themselves a new shop stool and post pictures on social media. I recommend that everyone go there and register.

I have absolutely no time for a new project at the moment, but what the heck?  I'm in!  I have no idea how I'll get anything done, as I am lucky enough to be at work both Saturday and Sunday that weekend.  My plan is to push the definition of Planing and Prep Work in order to let me do it.  It will probably mean that if I get a chance, I'll build it ahead of time, and post about it that weekend.  Not sure if that is cheating or not, but for a prize I'll at least get a new shop stool.

I have been doing some thinking about this project, and I think I know what I will do:

Improvise.

Think about it.  It is a shop stool.  I know some of you are out there coming up with the awesomest design ever, but at the end of the day I want this stool to be of use to me in my shop, not stolen by the Frau to be the perfect accent piece in her reading nook.

That means to me that it should be a fairly simple design with nothing too radical. I don't want to break down into tears when I inevitably drop a hammer on it.

Also of consideration is that it should be achievable to complete it in a day or two.

While I'm at it, let's add that it should be made with wood I already have.

I pulled out some bits from the scrap bin that would be appropriate and came up with the following:

Way too much scrap.  I feel like it is starting to take over my shop!
I had a couple nice 8/4 boards of flame birch, a nice wide scotts pine board, and a bunch of stuff for legs from cherry, oak, pine, beech, and who knows what else.  It really is a shame my shop doesn't have a wood burning stove.

I settled on the flame birch for the seat and some steamed beech for the legs.  That should make a really nice looking stool!

Too nice?
After ten minutes of planing this flame birch, I came to the conclusion that there is no way this project could be completed in a day.  This stuff is hard, and the grain is all over the place.  Really, this is overkill for a shop stool.

Out comes the scotts pine.

This is more like it!
I ripped four pieces appropriate for legs in just a few minutes.  Don't get me wrong, I am sore now, but it is do-able.  This stuff is easy to work.  I'm feeling much better about my decision to switch woods.  As a bonus, the stock I ripped was pretty much rift-sawn resulting in legs with the desireable bastard grain.  The grain should look the same on all four faces of the legs.

The top was from a nice wide board that still had the pith in it.  I ripped down the center to remove the pith and wound up with a seat that will be about 7 inches by 16 or so.  The only problem is that it is perfectly quarter sawn, which looks nice, but I notice chair makers usually use flat-sawn wood for Windsor chairs.  I guess I'm about to find out why.

I was able to avoid all the major knots, so this stool should look real nice with totally clear pine.

I butted a bench hook up against my planing stop and clamped it in the vice.  This resulted in a much wider planing stop which made it a snap to plane all of the legs together.  I have no idea what their measurements are, but they are all the same.  Perfect!

Gang-planing the legs.
So far I think I have some decent material to work with.  I'm looking forward to this build as I have never dealt much with all of the crazy angles and the shaped seat I have in mind. You'll have to wait to find out my design, though.

Future Stool Of Awesomeness.
I had a little extra time in the shop today, and wanted to make a tool to help with my stool's seat.  The very first Krenov-style plane I ever built was this scrub plane:

Scrub plane in beech and maple.
While this scrub plane works, the mouth isn't quite as gaping wide as I would like resulting in an occasional jam-up that is annoying.  Last year I picked up a German horned scrub plane at a flea market that works about five million times better, so I really don't need it.  This is a perfect candidate to re-purpose into a compass plane for hollowing.  It has a Hock blade in it that has an 8 inch radius.  I should be able to cut away some of this plane to make it work.

I started by laying out a curve.
I really probably should have done some homework on compass planes before I started this.  I have no idea what is really needed as far as the geometry of this plane goes, so I just went with what looked right.

Saw away everything that isn't a compass plane.
My bowsaw makes cutting curves like this a snap.  Saw to the line, and clean up with whatever you have.  I used a block plane, a file, and a spokeshave.

Cleaning up with my #51.
I think I'll call it "Moby Dick."

But does it work?
I tried it out for about five minutes on a scrap piece of pine and came up with a dished out surface.  Not ever having had used one before, I don't really know if it is particularly good or not, but I am happy that it actually works.

Kind of hard to see, but the plane scooped out the center section of this piece of scrap.
So that's about where I'm at.  Basically all that's left is to put it together!  Stay tuned on January 25th to find out how it will turn out.

View the rest of my stool build here.
Sunday, January 5, 2014

More Saw Handle Scans

Happy New Year, everyone! In celebration of me leaving my camera at work - with all the photos I meant to start posting over the weekend, here is a post unrelated to anything I am currently doing. I actually have been meaning to get these scanned and put up long ago, but you know how it goes.

The Mother Lode

A while back I went nutso on British eBay, and wound up with a huge stash of old tools.  Some fantastic ones, some not so great.  I found out that when buying backsaws on eBay, the phrase, "just needs sharpening to be put back to work" means something completely different to me than it does to most sellers.

All kidding aside, once you win the bid, there really is no way to know what you'll get until it shows up.  My advice:  don't bid much.  I think I got all (or most) of these saws for around ten pounds each including shipping (to a local UK address - thanks Travis!).

My intent is to add to the online archive of scanned saw handles for posterity's sake.  Feel free to use them as a pattern for making your own saw handles.  Check out some other saw handles here.  When you print them out, the grid lines are exactly one inch squares on the actual handles.  The beauty of computers is this makes it simple to enlarge or reduce the images in size for the exact size you need.

I would love if any readers were able to provide any further information about these saws in the comments.

The first is a fairly unremarkable handle, whose best virtue is the ease in which it can be mass produced.  I thought it was a Spears & Jackson, but there is no evidence on the saw to indicate that.  The medallion says, "Warrented Superior."   Perhaps someone is into restoring old saws for the sake of historical accuracy.  However, the saw has a nice, hefty steel back, and a sawplate that is dead straight.  This is a good candidate for rehab.

10" rip, 14 PPI
The next saw is indeed a Spear & Jackson, with a Leapfrog logo.  I think this was probably a good saw that wasn't top-of-the-line.  A heavy brass back and a handle painted black.  This is a decent sized tenon saw, and the handle fits my hand better with a four finger grip.

14" rip, 12 PPI
This next saw is one of my favorites from the group.  The steel back says "I. Sorby, Sheffield," and has the outline of a jester.  No idea when this saw was made, but it does have split nuts.  Another easy rehab.

10" rip, 16 PPI
The next saw could be the poster child from the upcoming TV special, "Fun With Wire Brushes."  The heavy brass back says, "G. H. Charlesworth, Sheffield, England."  This saw has a nice feel, but I suspect it is a replacement handle.  Regardless, the sawplate is straight and I might try to save it.

12" crosscut, 12 PPI with lots of cows and calfs
This last one is my favorite.  It has a medium weight steel back, split nuts and a massive hang angle.  It is stamped, "I. Colbeck."  It appears to be very old, but unfortunately also starred in the abovementiond upcoming docu-drama.
12 1/2" rip, 12 1/2 PPI
Enjoy! If you use any of these scans, please leave a comment and let us know your plans!

Monday, December 16, 2013

Walnut Dining Table

I have no idea why, but this project has elicited very little excitement from me.  I'm sure it will be cool when I am done, but the motivation to work on it has been low.  I bought the lumber about 18 months ago and basically all I have done to it in that time was run all the boards through a surface planer.

I decided that this has to change, so I recently started working on it again.  I am hoping that putting it up on the blog will give me that extra "have to" to finish it.

Lately, I got the boards laminated together for the top.  I spent a couple of days when I first got this lumber laying it out to make it look pleasing, and I think I did OK with what I had available.  It was now just a matter of jointing the edges and gluing them up.

Doing a big table top (this one is a bit over 150 cm long and 90 cm wide) increases the complications with gluing up a panel exponentially.  Add to that, that I wanted to do it all with my LV BU jack plane just because I could, and I was busy for a few days.

Edge jointing for the laminated table top.
Most of the joints went together easily, but there were a couple that took a while to get right.  It is weird how that works.  All went OK and I got it all glued up pretty much to the standard I envisioned.

Last weekend I got to start working on flattening.  I started on the underside.  There were a few boards that were proud of the others, but overall it was a good glue-up.  I was happy.  I continued to use my BU jack, but I did use a toothed iron to go cross-grain for heavy cuts.
Toothed iron for cross-grain material removal.
I haven't ever flattened a panel this big by hand before.  My bench top is less than two feet wide, and that makes a big difference.  Pushing this plane across the grain for more than 90 cm was a real workout.

Oh, I forgot to mention, the table had a bit of twist in it that I had to plane out, too.  Luckily the underside doesn't have to be that pretty, as it was definitely functionally flat as opposed to a glass-smooth surface.

Now it is time to plane the show surface.
When I started the show surface, I knew from experience that there was a lot of wood to remove, but I had to be careful not to let any of the massive tear-out occur that happened on the underside.  After a few careful passes with my toothing iron, I gave up.  This particular walnut has some spots that either are soft or the grain is going crazy, or both.  There is no way I can bring the surface down with this plane making it look neat with no tear out.

Did I mention I was doing this at the Army's woodshop on my post?  No?  Well, I was working this piece at the Army's woodshop on my post.  This small shop has few machines, and pretty much none of them would I use on a piece of furniture I would put my name on.  Especially, there is not a machine that will surface a table top.

But...

There was an old Stanley #5 there that was rescued from the dump who knows how long ago.  I asked the owner if he minded if I grind a radius in the blade, and he didn't as he has had that plane for decades without ever having used it.

I ground an 8" radius on the blade, and honed it to a state of "sharp enough."

I am amazed.  I haven't ever used a vintage Stanley like this before, and it worked pretty much perfectly to flatten out this panel without gouging out giant chips from deep within the middle of the panel like the toothing iron did.
Stanley #5 and an iron sharpened with an 8" radius for rough work.
I have used in the past my scrub plane, which has a 3" radius.  I would say the difference is stark.  The scrub with the 3" radius is perfect for actually reducing the thickness of a board, where this did a fantastic job of doing the rough part of flattening this giant panel.  It is a thick top at 40mm, but I wasn't looking to bring it down to 4/4, just bring it down to a state of flat-enough-for-a-dinner-table.
Here is where the top stands now.  Note the wavy lines left from the jack plane.


I have taken the parts for the legs home to my own bench to get them ready.  I am laminating the legs together.  Each leg will be however square I can get them laminating two 40mm thick pieces together.  Probably about 75mm square or so.  I am planning on veneering some walnut veneer on the edges of the legs that show the lamination joint, similar to how I did the legs for the in-law's oak table I finished about a year ago.

Not sure if you can see it, but this laminated leg has veneer on one face to make quarter sawn figure show on all sides.

The Frau votes against this idea, she thinks that it will be obvious that some of the leg faces are veneered, but I think it will look better than showing that big lamination seam.  I'll have to test it to find out.  In the end, I think it would have been better to spend a bit more money on some thick stock to make the legs from one piece of lumber.

The other thing I haven't settled on yet is the final design.  More on that in a following post.

Monday, December 2, 2013

Building a Panel Gauge Part III - Completion - SLIDE SHOW

Artsy photo of my version next to the vintage model.

This project was one of the most enjoyable I have ever done.  The thing that made it so great was when I started, I didn't have a clue as to how to do it.  I didn't know how to box the insert, and I had no idea how to make the oval shaped profile on the beam.  The joy in this project came from figuring those things out and watching this project take shape.

I have put together another slide show of the last part of this project.  I couldn't help but take a bunch of artsy photos of the completed project.  This one is just too easy to take pictures of.

In fact, while it is sitting in front of me, I can't quit staring at it.  My wife said it is too nice to use.

Toss the feathers - Otter's holt (Aislinn) / CC BY-NC-ND 3.0
I haven't tried it out yet, so I'll have to see how it works.  While working on this project, I thought a lot about how this gauge was put together and how that design must perform in use.

When I first got the vintage model, I thought it was a left-handed version.  I usually hold the stock of any marking gauge in my right hand, as I'm right handed.  This one looks as if it is meant to be registered on the left side of a board while being marked.  When I used it, I just turned it around and used it "backwards" with the horn facing forward. Then I saw this picture in Salaman's Dictionary of Woodworking Tools:
Left handed?
It is the same.  Perhaps those old timers knew something we don't?  Then it hit me.  If the board to be marked is placed on a saw bench, it can be marked registering the panel gauge on the left side and marked on the right.  After marking, it does not have to be flipped end-for-end to start the rip, as you would have to do if registered from the right side. You can mark the board with this gauge and rip right away without movin g anything.

This is faster!  Mary May talks a lot about learning to be ambidextrous while carving so you don't continually have to adjust what you are working on.  This could be a result of the same principle.

I also have a concern about using a blade as opposed to a scratcher for marking.  A blade should leave a nice, neat line, but there is always a danger of a knife blade following the grain of the wood where a scratching blade would not.  After all, ripping will require cleaning up, anyway.

Lastly, this blade only works in one direction - forward.  Being a single bevel blade, I forsee problems if I try to pull the gauge toward me.  I'll try it out, and if it is a problem I may try re-grinding the blade to a spear point configuration. The great part about this single bevel blade is it should be easy to sharpen freehand.

AAR:
  • Ebony is rather enjoyable to work with.  At least in these small quantities.
  • Not all maple is created equal.  This beautiful piece must be from some softer species of maple.  It is very lightweight, and works easily with hand tools, as opposed to the maple I usually use.
  • There is no point on hanging onto a special piece of wood for that "perfect project."  It turns out, the project you are working on is the perfect project.
  • The wedge holding the blade is so small because it is intended to not get in the way of anything.  It might interfere if it had a mechanism to prevent it from falling out.  The problem is, eventually it will fall out.  I can envision in 100 years some woodworker picking this thing up at a yard sale for 50 cents, wondering how to make such a small replacement wedge on a table saw and putting it back on the table for some other sucker to buy.  Perhaps a manager will want to nail it to the wall of his restaurant.
  • Making a custom scraper is a cheap and easy way to shape parts.  However, grinding metal with a power tool is much faster and easier than using a file.  I used a Dremel wheel on my cordless drill (I got rid of my Dremel tool).
Just in case you would like to make one, here are the specifics: The scratch stock is part of a 2 1/4" circle.  You can use the template for marking out the beam mortise, and the scratch stock also is used to shape the head stock, as opposed to rasping a chamfer or roundover. I used a #7 Jennings bit to start the beam mortise.  The original beam was 24" long.  Mine is a bit longer. The beam's wedge is 3/16" thick. Here's a scan of the headstock:
Enjoy!