Showing posts with label Beginner's tool kit project. Show all posts

Sunday, July 8, 2018

Japanese Tool Box


I finished something!
I have had a very inspiring few weeks since my last post. I traveled to Germany and crashed Christopher Schwarz' French workbench class at Dictum, met several woodworkers, carved my first spoon, and started a staked side table project while there.

I'll not write about any of that today. Instead, you get to see the Japanese tool box that I built a couple of days ago.

One of my Instagram friends that I was finally able to meet while in Germany suggested that I build a Japanese tool box. It sounded like a great idea since my Dutch tool chest was starting to get cluttered with too many tools.

The DTC is fantastic, but it works best when everything is neat and orderly. Something I typically am not good at. The Japanese box will hold some of the tools that I don't frequently use.

Because most of my tools will stay in my DTC, this box doesn't need to be particularly big. My longest tools, my Ryoba saw and my jointer plane will not live here. I might put my oversize, giant Dick saw in this box, but it does break down, so that shouldn't be a problem.
Available suitable lumber for my new box.
I have some plastic wrapped, laminated wood lying around that I had intended for another project lying around. This will work perfectly. They are 1200 mm long. The wide one is 300 mm wide, and the narrow one 200 mm. These will be perfect for a box that will be around 600 mm long.

The very first thing I did was some internet research. I happily discovered that Greg Merritt built one of these a year or two ago, and posted his usual impeccable drawings on his website. I relied heavily on his drawings, but I used nails and skipped the housing dadoes. Nails, no glue and no fine joinery sounds like a fun way to build a cool box.

I probably should have read his blog a bit more carefully, and I would have prevented a few problems. Instead of joining the carcass together, then nailing the bottom on, I started by nailing the sides to the bottom (after sawing to length and smooth planing).
I wouldn't recommend starting this way.
I thought it would be simpler considering that I have no bench and my workholding is limited. It made things a bit more complicated as I had to be extremely precise in sawing the end pieces to length. In fact, I had to scrap the first pair of end boards and make a new pair. Thankfully, I had enough wood.
I toenailed most of the nails to add mechanical strength.
To make it look nice, I stepped off the spacing for the nails with dividers and drilled pilot holes for the Roman nails with a tapered drill bit. I used regular 8d cut nails on the bottom, so the heads could sit flush or a little below the surface allowing the box to sit on the floor without messing up the floor.
Cut nails are incredibly strong compared to wire nails.
Assembling the box was relatively straightforward. All of the visible nails were stepped out with dividers and have a big, decorative head.
The box is nailed together, awaiting all the sharp edges to be chamferred.
One note about the handles: if you build a box like this, take Greg's advice and use nice thick stock for them. I used some spruce or fir or something for mine, and they are 1 5/8" thick. This leaves an extremely comfortable handle that really lets you grip the box. Even though it is small for a box of this type, loaded up it could be very heavy, and balancing a heavy box on the tips of your fingers is not fun.

The endcaps are nailed on with an eye toward overkill. The nails go in the box's sides, ends, and handles to keep the endcap firmly in place securing the lid. I imagine this part of the box doesn't take so much stress, but nails aren't that expensive.
Lots of nails - because I can.
The last thing I did was construct the lid. The lid drops in, then slides under the endcap to lock it. I followed Greg's instructions and it works perfectly. For joining the battens to the lid, I clinched the nails. I love clinched nails, they are very strong.
Clinched nails on the lid.
I didn't really mention it, but before nailing any part on, it was smoothed with my #4 and burnished with my pollissoir. If it was an edge that would stay, I chamferred it with a plane, then burnished. After everything was assembled, I spent some time chamfering the edges that needed it, and burnished the remaining spots.

I had originally planned to paint this chest gray. However, I have changed my mind, in no small part to the good people who left comments on my Instagram post. The traditional finish for one of these chests is to leave it as is after burnishing.

Paint would not work because of the sliding lid. The paint would either come off on the parts that rub, or cause the lid to bind and not open at all.

This is a tool box, after all, and will get it's share of abuse over time. Hopefully it will prevent the tools inside from taking that abuse. Over time it will darken up and get more beautiful.
The top of this cabinet I built last year is the same material as the new box. Wood darkens over time.
I call this box finished. I might decide to deepen the chamfers on the corners and the bottom to help protect against bumps and dings, then again I might not. I also might make a sliding till, or some boxes that live on a rail inside, but the box is small enough that I think they could get in the way. How the tools in this box fare over time will determine what I do inside of it.

If you build a box like this, I highly recommend Roman and/or cut nails, and Greg's fantastic drawings. I also recommend this project for woodworkers of any skill level: it's a great first project.

Thursday, January 18, 2018

Winding Sticks

It's been quiet on my blog. Not because I haven't been doing anything, but because processing rough lumber by hand isn't so interesting. I'm hoping to get back to blogging about my brown oak Shaker side table once I can do some actual joinery.

One thing I have been missing while I'm trying to cut out some legs for the table is a pair of winding sticks. I decided I must have some for this project, so I made a pair.
My version of winding sticks.
I had some nice sticks of air dried sycamore, as well as some reddish mystery wood for inlays. It could be goncalo alves, but I'm not sure. The hope is that these two woods will contrast nicely for years to come.
Two sticks of sycamore, with center buttons installed.
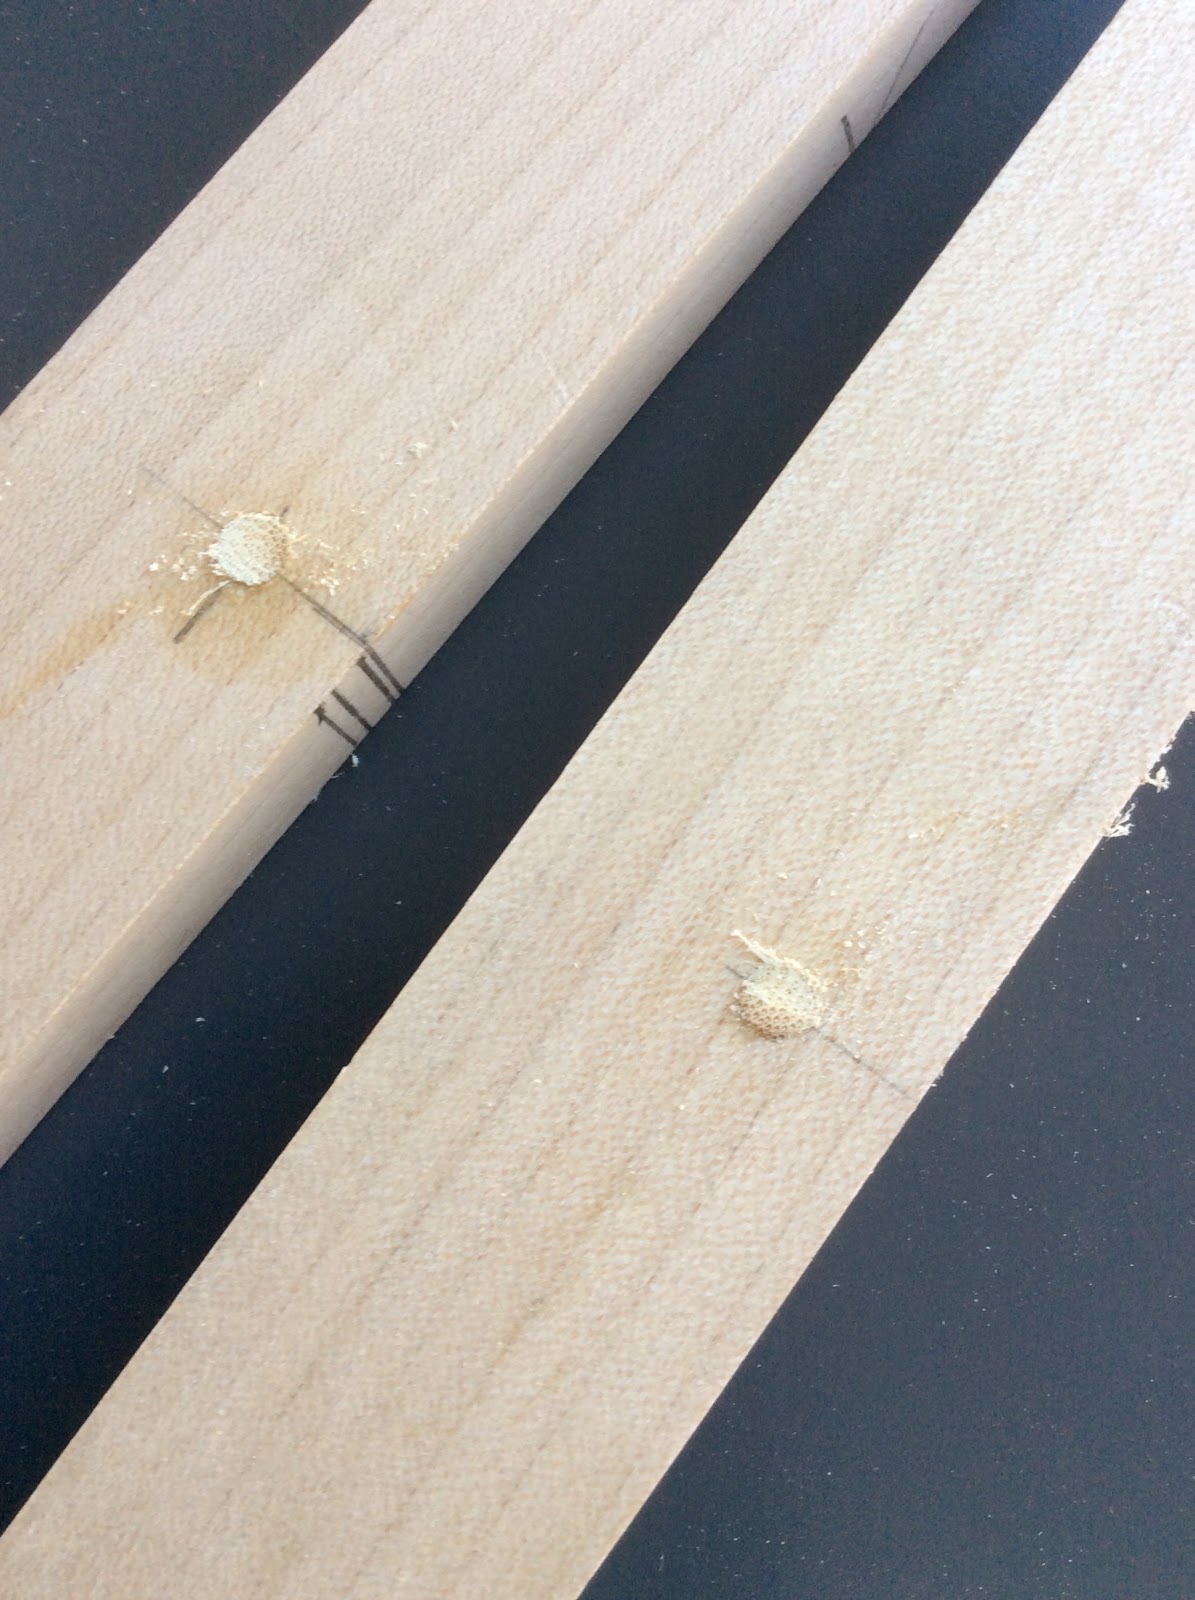
For center buttons, I decided to use the quick and dirty hillbilly method inspired by Greg Merritt, which means bamboo skewers. I found some really big 4mm ones a while back and have loved using them for things like this.

I used my eggbeater drill, and after accurately marking the center point on each side of each stick, I drilled in half way from one side, flipped them and drilled the rest of the way on the other. This method worked perfectly for me. Zero tearout, and the skewers filled the holes perfectly.
Bamboo skewers to mark the center points of the winding sticks.
I could have made some dowels of the same wood I used for the inlays, but I already had the bamboo dowels. Less work won out. It's a light color similar to the sycamore, but they are clearly and easily seen. The purpose of them is to give yourself an aiming point to center them. If I am edge jointing a piece of wood and want to check for twist, I stick the winding sticks on the edge of the board. The dot makes it easier to balance them in use.

I chopped out space for the inserts with a chisel and mallet, used hide glue and clamped them in.
Clamp on the insert.
I left the rough parts to the outside, and glued the flat parts to the cavities I just made. I figured there was no need to plane them twice.
All glued together.
If you were wondering what ever happened to that raw linseed oil that I processed with sea water last year, it turned out real nice. I decided to use it on this project.
My home-made BLO.
This was a great little project, and a good opportunity to practice accuracy. They are far from perfect, but they will work until they warp too bad. Then, I can make some more!

UPDATE: I wasn't too happy with one of the inserts, so I removed it and replaced it. If you would like to see my blog posts on that, see the next post.

Sunday, October 2, 2016

Benchless School Box Build - Part III - Stock Preparation

This build is going slow not because my workholding methods are slowing me down, but my lack of shop time is. I've run into an unexpected mental barrier to woodworking in our new apartment.

The barrier has to do with the fact that my "shop" is actually our home office. Any mess I make in there must be instantly cleaned up, and when I'm done, all woodworking materials must be put away.

This is much different than the way I usually work. Even when I'm being good in my home shop and keeping everything neat and tidy, I leave my project on my bench, and my tools go in my easily accessible tool chest.

Here, it's a bit different. When I'm done, cleaning sawdust isn't too bad because I pretty much sweep after every operation. Tools, however, can not be left out here. They go to the bottom of a bin in a cabinet.

This isn't the worst thing in the world, but I find that getting 15 or 20 minutes of work in isn't so attractive an option of my spare time when half of that is preparing and tearing down my workspace.

I think I can solve these issues with a couple of projects to do soon, such as a sawbench and a Dutch tool chest. Mostly, though, it is just a matter of changing my work routine and making these processes more efficient.

Enough excuses, let's get on to my build:

Some of you may have been wondering in my last couple of posts on this build what I meant by using a tiny piece of fiber board as a bench.

Well, the answer is that more than anything, it is used as a stop to allow me to work on the floor. The spacer board lets me plane to the end of the board, using the wall as a stop, without my plane bumping into the wall stopping the cut.
Edge jointing with my new "bench."
I have to say, some care must be taken to find a part of the floor that is flat enough that the board does not rock when planing. This tile floor is pretty flat, but it isn't perfect. With just a little trial and error, a proper place to plane is found.
Such concentration!
I do find that planing this way I must slow down comparing to doing it on my bench. It's not so bad though. If it takes a minute to joint a board like this rather than the usual fifteen seconds, it's not really that slow.
Not the most comfortable, but it works.
This position is far from ideal, but it does indeed work. I would say if you are learning woodworking by doing it on the floor, you are giving yourself a bit of a disadvantage, but it can indeed be done.

Notice that I am just resting the board on the ground. Nothing is holding it up straight. I wanted to try this build without any clamps, but I think if I had one to help steady this board to edge joint, it would be easier. I feel like I really have to balance things to get it right. The trick is just to go very slow.
Two boards edge jointed.
Really, in no time I had these two boards edge jointed. A bit of liquid hide glue, and a rub joint is all that was needed for this.
This panel will eventually be the lid to the box.
How about smooth planing the faces?

Well, with my stopping board, this is also possible.
Face planing.
The stopping board is much thinner than the pine boards I am planing, so it isn't a problem. I was worried that the hard tile floor might mar the opposite face I am planing, so I used a towel to protect it. This works just fine.

The next issue I had was shooting the end grain square. My new shop is so new, I don't even have a proper shooting board. I have some ideas of one to make that would work on the floor, but I want to get on with this build. Here's what I came up with:
Shooting end grain.
It might be kind of hard to see what is happening here, but everything is loose. My "bench" is used to slide my jack plane back and forth on without damage, and some of the stock I have for trim on the school box is used to elevate the board I am planing in order to allow the blade to make contact with all of the endgrain. I used what I had at hand to space the board to be planed far enough away from the wall that the plane wouldn't stop before the end of the cut, and the towel protects my plane if I am a bit too aggressive.  This gets the cut square in one direction only (the width of the cut), unlike a regular shooting board which will also automatically square the cut along the length of the cut.

This means that one has to be careful, and plane to the line I have scribed that hopefully was square when I laid it out.
Here you can see I am getting close. I am planing very close to the line I marked across the width.
Another swipe or two, and this is what I have:
Finished cut.
Next, I sized out some of the parts to finished length. This required some cross cutting, and I have to admit I've been thinking about a few different ways to do this.

I tried out this method, which seems to work. I used my dining chair which we are using for an office chair at the moment as a traditional saw bench. The only major difference being I have a Japanese saw, which is only a little more awkward in this situation.
Cross cutting with a kitchen chair.
I used my spacer board to protect my chair, give support to my cut, and help make sure I wasn't sawing into the front of our brand-new kitchen chair.

It's not a bad idea to triple-check that there is plenty of clearance before sawing this way.
Please don't cut into our new kitchen chair!
Something to keep in mind, is that the board you are cutting likely will NOT be level to the ground when cutting, so a bit of adjustment must be made. In my case, I left plenty of room to fix an unsquare cut with the shooting board.

Clean up.
Here are the parts to my school box.
Now how to figure out workholding for dovetails?

Saturday, May 28, 2016

I Made a Marking Knife


I like it.
After screwing up my latest attempt at the Henning Noorgaard table, I thought I would need a quick and easy project to boost my woodworking self-esteem. I happened to have a Hock marking knife blank rolling around, and determined this was the perfect time to finish it.
Materials for this build, a marking knife blank and a hunk of wood.
I had a piece of ebony that has been rolling around for a while. Probably about three to four inches wide, and about ten inches long, and around 3/8 or 1/2 inches thick or so.
A closer look.

Even closer. Wow. It looks like there are a couple worm holes. I hope those were there before.
I really don't need another knife, as I have a perfect one already. A Blue Spruce with a curly maple handle. I can't say enough about this knife, other than it is perfect and I love it.
Blue Spruce.
I think that the plan will be to get my knife to feel as much like the Blue Spruce as possible. That is, without a lathe.

I forgot to take some pictures at this point. I cut the ebony blank to length, and then plowed a 1/4" groove on either side to a depth a little more than half the thickness of the blade. Next, I ripped both grooved pieces off the ebony blank and kept the offcut.

I mixed up a small batch of epoxy, with a bit of black tint in case there are any gaps.
I slathered epoxy on both halves...

inserted the blade...

and clamped it up.
After a day in the clamps, this is what I got:
Epoxy is cured.
I think this could be done a bit neater with some proper layout. I decided just to taper the handle on opposite sides until it looked right, then taper the other two sides to match.
Wow. I have it clamped in the vise. Neat.

Two square.

Four square.
These are pretty much the only layout marks I used. Some pencil scribbles that really don't show anything.
Precision layout.
Once it was foursquare, I just planed some chamfers on the edges, and rounded the top with a rasp, a file. I sanded the whole thing to 600 grit, pollissoired the crap out of it, and applied Renaissance Wax.
I like the look.
Here are a couple more glamor shots.

It is a little less than perfect, but I love the way it feels in my hand. There is one bug hole that goes all the way through. It can be seen in the last photo. But, I guess that makes it look more like wood and less like plastic.

This is a fun project, and I look forward to using the knife. Being O1 carbon steel, it is easy to sharpen. The big difference between this blade and the Blue Spruce is the Hock is much thicker. I'll let you know if that is an advantage or disadvantage.

So far the big disadvantage with the Hock is the price. It is not much cheaper than buying the Blue Spruce complete! I might be interested in making one from untreated tool steel, as that stuff is only a couple dollars. However if the point is to have a home made tool, I really like this one.

Saturday, April 30, 2016

Henning Norgaard Couch Table Part IV - Progress in a Photo Essay

I forgot that I have made some progress on the couch table that I haven't posted here. I think I was still ripping sticks out at the conclusion of the last update about it. The beginning of this series can be found here. Part II, here.

UPDATE: working video added.
Pile o' sticks.
Well, I've made some more progress. Rather than make you read a bunch, I'll just show it in pictures with titles.
Glued up the top.

Ran all the sticks through the planer at Dictum after ripping them by hand.
End grain shavings.
Preparing to fill the knot holes with epoxy. This is the show side.

This is the underside.

It only takes a drop of this stuff in the epoxy to make it BLACK.

Watching the paint dry.
Dried epoxy from the top side.

Excess epoxy went in the cracks on my oak bench.

It looks good after flattening.

The epoxy planes well and blends in.

Starting to smooth the glue-up.
Cross-batens to keep everything flat. I used regular Spax screws for this.
Marking the sticks to length.
And cutting.
All lined up. You can see clearly the rift-sawn grain. This is why I sawed everything out by hand. All four faces of each stick look the same - no quarter sawn grain next to flat sawn surfaces.
Marking out the first lap joint.
And sawing.
Not too bad. I find lap joints among the most difficult joinery to do by hand.
Glamour shot of the DICK saw.

Making progress.
Now for some lap joints in the middle.
Sawn.
And pared. I decided to only use basic hand tools for this build. A router isn't really necessary, and fewer tools means faster work for me.
This is what it looks like.
Tight enough to stand on it's own with no glue.
Very tight joint on this one. Only 23 to go!
Mocked up so I can see what joints to cut. and where.
Making progress.
For a diversion (and during approved noise-making-hours), making drawbore pins.
Here's the result, so far.
More progress.
Cutting in batches now.
Getting closer!
Deepening the mark before a first-class-sawcut.
Done with the joinery. Yay!
The first dry fit. I made these lap joints this way for looks, and forgot about their strength. Everything is supported with the spring clamps. Not ideal.
Here's a close-up of the offending joint.
After being frustrated with that, I took the whole thing apart and realised of the sixteen sticks, they all are one of three different patterns.
I can re-arrange the sticks so the laps are now self-supporting. Whew! I'll just have to tweak a couple joints since they were all hand fit before. This table is going to be so much easier to make next time!
The dry fit is so stable, it supports the heavy oak top!
Next up is tweaking the joints so they will all fit in their new places. Some work needs to be done to the top - I think I will thin the top a bit so it isn't thicker than the sticks. I will finish plane all the parts and treat them to a fantastic finish.

With the end in sight, I think that the finishing bit will take a long time. When all is done, I will lightly drawbore all the joints and drive a peg and glue each one for strength. I am pretty sure this will be a stout little table!