I started
this project back in April of 2013. I have no idea why, but for some reason I got stalled on this project and moved on. Since that time, this poor table has looked like this:
 |
| State of this project for nearly three years. |
It's not like I forgot about it, my shop is so small I have to move this thing every single time I walk in the shop.
It's just that there always seems to be something more important to work on.
Now that I am in between projects, I vowed I am going to finish this freaking thing before I start anything else. Man, do I want to start something else!
Don't get me wrong, this is a fun project, and I have yet to run into any problems with it that I am unsure of what to do next. Also, we really need this piece in our house. It is a really nice design!
I guess the only way to jump back in the saddle is just to buck up and do it. First up, I'll finish the panel I glued up for the top. I can't believe it is still straight!
 |
| A perfect use for my panel gauge. |
After marking it to size, I planed it to width and crosscut it to length. Now it is time to smooth the top.
I have been playing a lot lately with my #4 bench plane. It is a Sargent #409, and is nothing special. However, I feel like I have finally dialed in what I should be doing with the chipbreaker to get the best results.
 |
| Smoothing with my Sargent bench plane. |
I am really coming around to this plane. In fact, I recently fell of the eBay wagon and went crazy. More on this in a future post.
I really like that it's versatility. This board had last been scrubbed with some kind of jack plane to thickness. The surface was pretty rough. I started with a fairly deep cut using the smoother to take out the humps and the worst of the tear out.
 |
| Using a heavy cut, tear out like this didn't last long. |
Once I started getting close to a uniformly smooth surface, I sharpened the blade, set the chipbreaker close (but not too close), and started on the most wispy shavings you can imagine. In no time the surface was glass-smooth.
 |
| I wish you could see the sheen on this just from the plane. |
I eyeballed a chamfer around the edges after bevelling the bottom to make a nice, even 9/16" edge from the top of the board. This bevel gives the top a more delicate look, rather than the original 3/4" thickness.
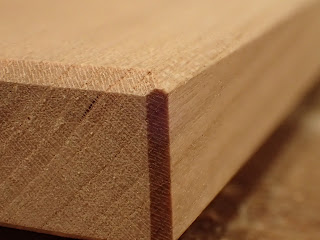 |
| The chamfer I did with the #4, except I used my block plane on the short edge. |
I couldn't remember how Christopher Schwarz screwed down the top. The runners were in the way. My solution was to use a screwdriver bit in my socket wrench.
 |
| Necessity is the mother of invention. |
Now that it is all together, I realized the edges of the rest of the table needed to be softened. My normal way is to use a small chamfer. This would have been easier if I had done it before the glue up.
I used my block plane and some careful work with the chisel for these chamfers. They are small enough where it is difficult to see them, but they sure can be felt.
 |
| Funny shavings making chamfers here. |
A little work on the drawer front, and it is beginning to look complete.
 |
| All that is left is to complete the drawer and apply finish. |
One problem with the timeline on this project is the cherry has oxidized and darkened considerably over time. The new parts do not match.
 |
| You can really see which parts are newly planed. |
I am hoping a couple of days in our sun room will even up the color. I would really rather not have to stain this piece.


Happy New Year Brian and to your family
ReplyDeleteThe Sargent's No 400 series are indeed very good planes, as you found out. And being "Not Stanley" command a lesser price (SHT, lets keep that among ourselves before the secret is out :-)
I really like that panel gauge you are using, did you build it? And if so any blog entries about it?
I may have seen them before but at my age everything is Random Memory Access..
Bob, going out with Rudy on poop patrol :-)
Ah Ah, just noticed the search feature on your blog, and sure enough, panel gauge got me some hits..
ReplyDeleteAnother project for my growing list... Hopefully, 2016 has a long June also :-)
Haha! Indeed Robert. I had a lot of fun ,asking that panel gauge. The knife on it makes it a bit finicky. I'm thinking of making another one, because it was a great project. Dig in there far enough, and you will find a scan of the original, in case you'd like to do a reproduction.
DeleteCheers, and happy New Year to you and yours!
Good stuff, Brian, and Happy New Year. The table looks very elegant. I'm sure it'll be great to have that space in you shop and a nice table in your house!
ReplyDeleteThanks, Matt, and same to you!
DeleteI'm not sure which one I'm looking forward to more.
Is that block plane a Millers Falls #47?
ReplyDeletegblogswild, why yes, I believe it is! Good eye.
DeleteThis is my favorite block plane, with the knuckle joint which is so much more comfortable in the hand than any other, in my opinion, and the Norris adjuster, which is much easier to use than the alternative.
That looks like it turned out great. It can be so hard to pick up a stalled project for some odd reason and get back into the swing of it. I do like that panel gauge more every time I see it. One of these days (years) I'll have to give it a shot.
ReplyDeleteI think this panel gauge would make the perfect project to christen your new oak bench!
DeletePerhaps, except I have a set of 6 kitchen bar stools scheduled (trying to figure out if it will before or after the bench.) last time I worked on the bench I began (perhaps coincidentally) a downward spiral on a shoulder issue, so I'm hesitant to get back at it, but it would be nice to have a bench again...
DeleteA big-ass oak bench definitely will not do your shoulder any favors.
DeleteThen again, neither will an epic kitchen project.
:)