This build so far has been perfect. As far as I know, no one has finished their chair for the June chair build. Including me.
There's still plenty of time, though, I think you probably still have a few hours depending on your time zone!
I have no problem with this. On the other hand, maybe that's my problem. Woodworking as a hobby is at the mercy of whatever else life is throwing at us.
The good news for me is that I made some real progress today, as it has been more than a week since I have been able to spend any time on this project.
Here goes:
 |
| Mark all to length at once. It's faster and more accurate. |
First, I needed to deal with my sticks. I cut them to length, octagonalated them, rounded the corners, then scraped them with my roundish scraper. Not perfect dowels, but I think I like it.
 |
| It's amazing how good results you can get with accurate layout. |
 |
| Back to my Moxon vise for the octagons. |
 |
| Finished off with a pollisoir. |
I wasn't quite sure the best way to layout and drill holes for the back, as this one will be much different than my last chair. The answer presented itself in Peter Galbert's book!
 |
| I spent five minutes making this jig, and most of that was digging through my scrap bin. |
I did do it a little different, though. Peter suggests using string with a notch in a protractor to find the rake and splay angles for this. I decided to eyeball the sightline, and match the resultant angle with my plastic cheapo angle finder. This worked perfectly.
 |
| I also spent ten minutes looking for a piece of string in my shop. |
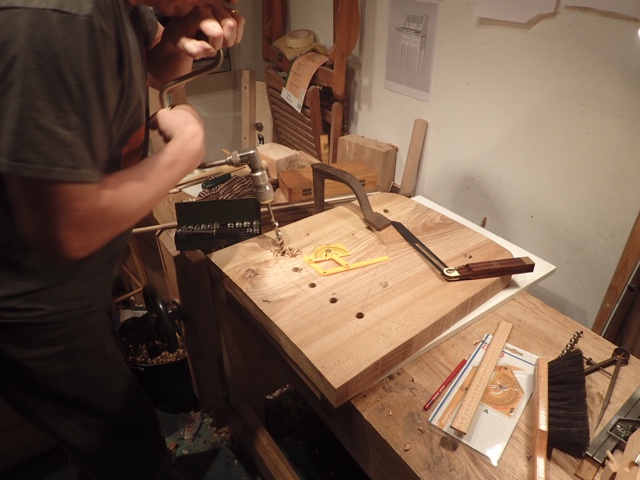
I decided to drill straight through the seat blank, and intend to wedge the straight sticks from the bottom to hold everything tight. This requires super hyper accurate boring.
 |
| I had success by checking my angle about every turn or two. |
Things are starting to look chair-like!
 |
| Look! A piece of wood with sticks in it! |
I really enjoy this part of the build. Making the tapered mortises is an opportunity for dialling in the leg angles to absolute perfection.
 |
| Maintaining the perfect angle on the sightline. |
I was a bit apprehensive about my leg angles that I chose on the fly. Looking at photos of old Welsh stick chairs, the coolest ones seem to have crazy rake and splay angles. I used Drew Langsner's recommendations for the last chair I made. These were a bit conservative, in my opinion. So I went crazy. Splay angles are 25 degrees, the rear leg's rake angles are also 25 degrees.
I am happy with the look, except I suspect the chair legs will be a little less then 30 inches apart from each other when the legs are cut to size. Maybe next time I'll move the legs in even farther.
 |
| Really starting to resemble a chair! |
The next part I have been looking forward to since my last chair build. I got a new adze from Tim Manney, and have been itching to try it out.
Caleb James posted a video of Peter Galbert
demonstrating this technique the other day, so I thought I would do it just as he said.
 |
| The idea is to start by driving cuts to depth, followed by scooping everything out across the grain. |
This tool is great. I only had about twenty minutes before I had to quit making noise, and was able to get the seat to a depth of about 9/16" in elm. Peter Galbert says he can do this in about five minutes, but he was working with pine. I'm sure I'll be able to finish it up in no time in the morning.
Drew Langsner says to go shallower when using a hard wood, but I decided to go deep on this seat. One reason is that it is so thick, the leg tenons don't come all the way out.
 |
| I took a break long enough to take a close up of Tim Manney's adze. |
Even at this point, it is comfortable.
 |
| Pay no attention to the mess in the background. |
If you have started a chair or have finished one, send me a pick and I'll post it. Here are a couple pictures of some chairs that I have seen so far:
Here is Steve Voigt's
Birdcage Side Chair.
Ray Schwaneberger's chair is coming along.


It's looking good, Brian. Build like the wind.
ReplyDeleteHa ha, thanks Dyami! I'll have to get back to it tomorrow.
DeleteLooks great! that adze is really cool, I tried it a bit at handworks and was quite impressed with it's speed (Tim was already sold out). Whenever I get to try my hand at a prototype chair I have sketched, I'm really intrigued by the Mario Rodriguez tablesaw jig method, so I'm going to try that. Though I need a reamer first... well actually I need some empty shop space first...
ReplyDeleteHey Jeremy.
DeleteMy iPad ate my first reply to your response. I still need to get used to that thing. Overall, I'm addicted.
Anyway, what I meant to say was that I think you should't let a lack of chairmaker's tools keep you from building a chair. You can always use straight tenons if you don't have a reamer. Now that I have done a chair or two, I would suggest you look for a travisher first.
The splay of the legs is radical, and I mean that as a compliment. It gives it a very bold, striking look. Very interested to see how it comes out!
ReplyDeleteHi Steve! I was going for badass, hoping the joints won't fail. Many old Welsh stick chairs have such angles, but for some reason they are seldom seen nowadays.
DeleteWe will soon see why!