Wednesday, March 13, 2019

Japanese Toolbox-Style Humidor

The finished humidor.

I've recently found myself with a box of fine cigars. The great thing about cigars is that it's a great thing to do socially. I.e., you sit around with good friends who also smoke cigars, and contemplate how good life is. That's really all you can do while smoking a cigar.
A fine cigar with a great friend in a good beer garden. What could be better?

I've never smoked cigarettes. I'm sorry, but that seems to be a filthy habit. I shake my head when I see smokers outside in the snow getting their nicotine fix. That doesn't look like any fun at all. I have no problem going all winter without a cigar. In fact, I enjoy smoking only once or twice a year these days.

Rant over.

I tried to just put a humidifier in the box my cigars came in, but it turned out to be hard on the box. Those boxes are for presenting cigars, and the joinery isn't up to the demands of the differences in humidity. Plus, I was having a hard time keeping the humidity up to 55%. Good cigars need it a bit more humid, around 70% is ideal.

I looked around and had enough left over laminated pine to make a small Japanese toolbox style container, so that's what I did.
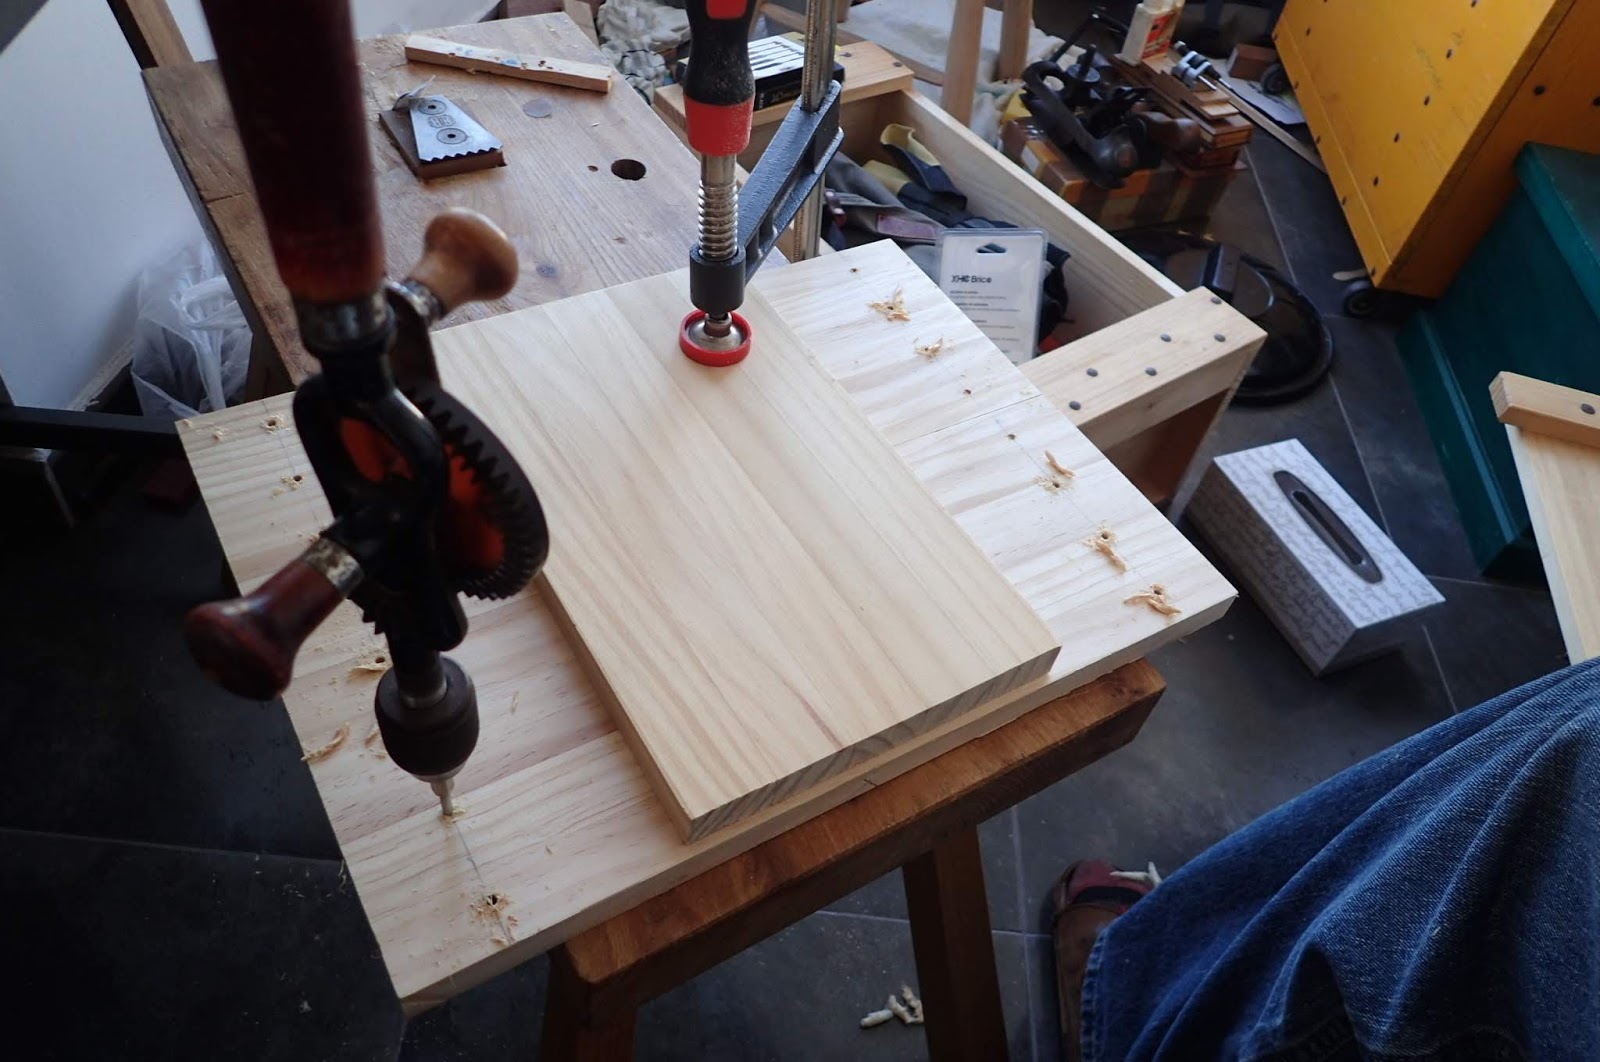
Drilling pilot holes for the nails.
I built a Japanese toolbox once before, and I borrowed heavily from Greg Merritt's fine tutorial. I did this one nearly the same, only to a smaller scale.

Measurements of this box were determined according to how much wood I had available, with the stipulation that it was big enough to put the cigar box I have inside.
I used Roman nails, except on the bottom where I used regular cut nails.
Really, I should have cut dadoes in the wood to house the joints, but I didn't do that on the last one of these I made, and it is holding up fine with heavy loads. This box is just meant to sit and hold dead leaves.

One thing that I changed was the handles. The handles should be solid blocks that go from the outside of the end wall to the very outside edge. I didn't happen to have anything appropriate, so I used 18mm stock and just bumped it out to be flush with the end.
I changed the handle to get away with thinner stock.
I think that this will be no problem for this small box, but if you make a bigger box for heavier loads, it could be worth it to laminate something together to make a solid block for the handle.

I was so proud of my nailing skill up to this point, as I hadn't marred the surface of the box yet. Well, that ended when trying to attach the end caps.
Woopstie!
This is the Frenchiest of all French marks. So far, I've left it. Perhaps someday I'll saw it out and attempt a repair. For now, it's just a sign that says, "Hand Made."
Marking where to drill pilot holes.
I think last time I left the cross battens on the lid a little over-length, then trimmed them to perfection after they were nailed on. This time I cut them to length first, and struggled getting everything lined up. Eventually I got there.

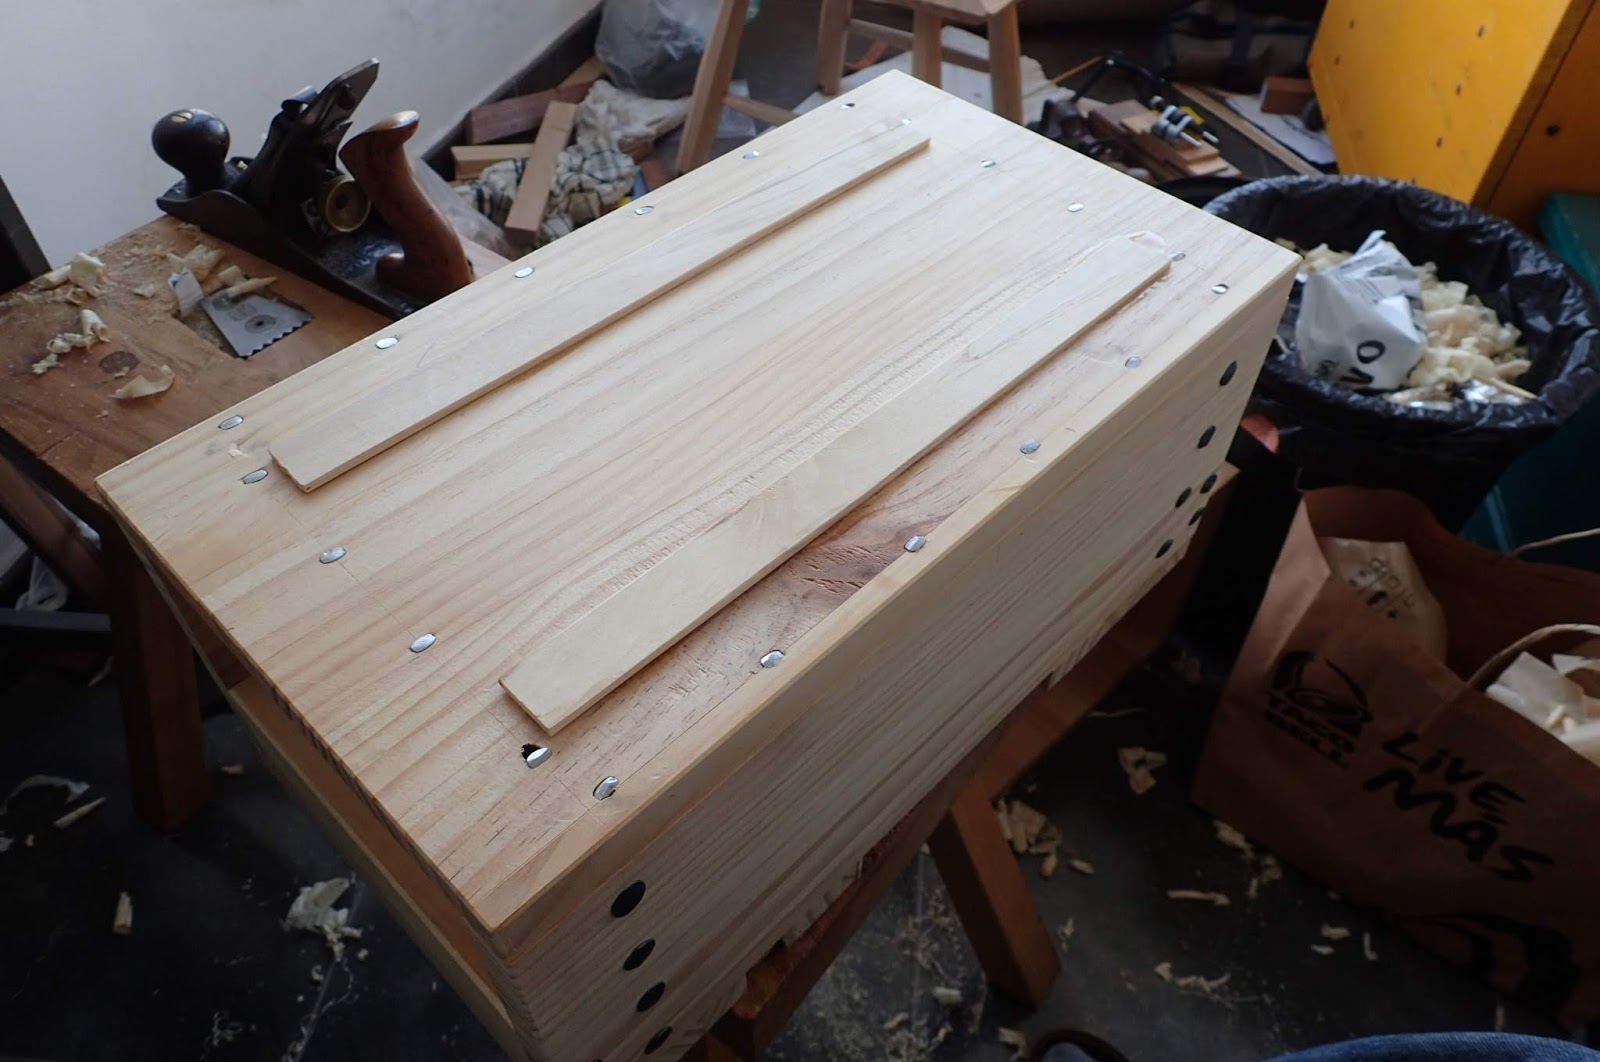
Since this is not a work box, but something that will sit on furniture, I needed a way to keep the nails on the bottom from scratching whatever it is sitting on. I happened to have a thin piece of scrap sycamore, so I ripped it in half and glued the strips to the bottom. These will keep the nails away from the surface of whatever it sits on without looking like I added feet.
My clever feet.
It turned out kind of cute, I think. The Frau thinks the lid looks like the letter "N," which is the initial of her last name. Don't be surprised if this humidor eventually turns into a jewelry box.
The little one next to it's older brother.
These two boxes are made of the same wood. The older one has about nine months worth of sunshine which darkened it considerably. Neither of them has any finish at all, other than planed surfaces and a bit of polissoiring. After chamfering off all of the sharp edges, it is done.
Cigars go in there.
I have no Spanish cedar here to line it with, but I do in Munich. Someday it will get a proper lining to make the cigars happy. For now, I'll just leave the whole box in the bottom and hope the humidity doesn't cause the lid to swell shut.

Tonight I leave for a short trip to Munich. That means more work on the trestle table. This was a good warm-up. Stay tuned!

Sunday, January 20, 2019

Different Linseed Oils Tested - Surprising Results!

I love boiled linseed oil (BLO) as a finish. Also paste wax. For me, I finish 90% of all my projects with one or the other, or both.

Over the years, I've tried several different kinds, with the exception being raw linseed oil. I've never used it as a regular finish. It's time to put them to a head to head test.
The contenders.
For this test I used four different batches of oil:
  1. raw linseed oil 
  2. Off-the-shelf BLO
  3. Home-refined linseed oil - batch 1
  4. Home-refined linseed oil - batch 2 (from the previous post)
Test material is some brown oak scrap.
To test these finishes I used some scrap brown oak I had laying around. Brown oak reacts very well with BLO, so I knew the finish would be dramatic as opposed to using something like maple, which doesn't darken as much with BLO.

I took a single stick of brown oak and cut it into four pieces, so they all should be very similar. After cutting it and thinking some more, I decided I needed one more piece as a control. I got another piece from a second stick of brown oak originating from the same tree, only this one is a bit more quarter sawn than the others. I don't think this affected the results much.

First, I should explain how I apply a BLO finish, which may or may not be how you do it. I see some people really take care in applying it, using many coats and sanding between coats.

Not me.

Normally all I do is slather a bunch of oil on the wood with a rag or a paintbrush, or whatever is handy. I wait ten or fifteen minutes, then I wipe off the excess and buff it out with a clean rag.

It's not often I use more than one coat this way, unless there are obvious dry spots. Usually, after several months, the oil finish starts to get a bit dingy looking, and a fresh coat of oil applied the same way freshens it up.

For this test, I decided to apply one kind of oil on each of four different scraps, front and back. I then waited a day or two and applied another coat, just to make sure everything was applied nice and even.
The first coat of oil absorbing into the wood.
Here is what I expected to happen with this test:
  1. All of the test pieces would eventually look very similar.
  2. The raw linseed oil would take much longer to dry.
  3. The store-bought BLO would look like an inferior finish.
  4. My home-made versions would be clearly superior in every way.
Let's see if my expectations are reality.
I honestly can't see the difference after the first coat.
I expected all of the finishes to look about the same. What I didn't expect was that all four of them were dry enough to move onto the next step at about the same time. I've always accepted what I've read about raw linseed oil taking up to 30 days to cure. My experience here is that while the store-bought BLO was dry to the touch after buffing the fastest, the others were dry to the touch only a matter of a few minutes later.

This I didn't expect at all.
My home-made paste wax.
I also made some paste wax. I used one part beeswax and three parts of my original home-refined linseed oil, less 10% which I replaced with orange oil to make it smell nice.

My plan with the wax was to leave one side of the test pieces finished with only the linseed oil, except for test piece #5, which is left in the white.

The other side of all five sticks would get three applications of my paste wax. I apply a light coat of wax, wait about 15 minutes, then buff it off with a clean cloth.
The sticks with the unwaxed sides up.

Closer view of the BLO-only sides. They all look the same, except the unfinished one.
The wax went on beautifully. My only complaint about the wax is that it got a bit too runny for my taste as I was applying it. For the last application, I added 1% carnauba wax to my recipe which firmed it up nicely. Next time I might try 2%.

I applied the three coats of wax and left a day or two for the wax to cure between coats. I was a bit surprised that the wax darkened the un-BLO-ed piece nearly as dark as the others. Giving it some thought, it makes sense because most of the paste wax is my home-refined linseed oil.
All five pieces with the oiled and waxed sides showing.
The finish with the wax looks great, and feels very smooth, and has a beautiful soft matte sheen. The oiled-only side looks great, too, but feels a bit more like bare wood.
Close-up of the oiled and waxed sides.
To most clearly see the differences, I took some close-ups.
Home-refined oil #2 and wax on the left, wax only on the right.

Home-refined oil #2 without wax on the left, unfinished wood on the right.
What did I get out of this test?

I spent a lot of time and effort making my home-refined oil, and raw linseed oil doesn't take significantly longer to dry on wood.

Really?

Clearly, I'll have to use raw linseed oil a lot more in the future to see if it really is this easy.

I  used a high-quality raw linseed oil with no additives. It is the same thing as flax-seed oil, if you'd rather get it at the health food store.

All of the finishes look pretty close to the same. If this is the only concern of yours, I'd go for the big-box BLO. The other oils are much nicer to apply and use, because they don't smell of artificial chemical dryers that make BLO stink. After a few days of air, the finish will completely cure and be odorless.

If you are worried about a food-safe finish, the natural oils probably all will be safe. However, Bob Flexner says that any finish is food-safe once it's cured. I have no problem using BLO on a cutting board, but you might be more picky than me.

Another bit of information I've found out since my last post, is that one woodworker used a refining process similar to mine for his raw linseed oil, but only left it to cure in the sun for one day, rather than all the months that I did. A super clear version of linseed oil might be desireable for painting, but perhaps it isn't as valuable of a quality for a wood finish. My next batch of home-refined oil will reflect this.

But first, I'm going to find out if raw linseed oil will work for me. That way, I can get all the benefits right out of the jug it came in.

If you have experience with BLO, sun-bleached linseed oil, raw linseed oil, stand oil, or something like that, I'd love to hear your thoughts in the comments.

Sunday, January 6, 2019

Making My Own Cold Bleached Linseed Oil: Part II

About two years ago I wrote on this blog about an experiment refining my own raw linseed oil. This post generated more feedback than any other I've done. It's weird that I haven't written about this stuff since.
Today I bottled up what I made in my second batch that I started about a year ago.
Take your pick: a Maß or a caña.
I was able to get about two and a half liters of the finest BLO type finish I've ever used. I love this stuff because it doesn't smell like chemicals (but it does smell like the Mediterranean Sea), It covers wood nicely, and it dries quickly (and then is odorless).

I think a better name for this stuff should be: Refined Linseed Oil. It's great that it can be done at home.


This time I did things only a little differently. I started by buying a five liter jug of raw linseed oil (good stuff from a boutique shop). I couldn't find the lid to the big jar I used last time, so I went and bought three more.

I bought plastic ones because they were cheaper. This was a mistake. It worked out alright, but I was continually worried that they would come apart while shaking, and there was indeed some leaking. Next time I'll make sure to use glass jars.
Plastic jugs for refining the oil this time. Do yourself a favor and use glass jugs.
Just so you can see the difference, here is a picture of the stuff I made last time next to the jug of raw linseed oil.
Refined vs. raw.
Last time I went to collect sea water and sand from the beach when it was a bit stormy. This time I got some water and sand that was much cleaner to start with. These materials are easier to clean before starting the refining process, and the final product smells only a little like the Med, as opposed to smelling like sludge water from the harbor.
These raw materials were far superior to what I used last time.
A bit of sand in the bottom of each jug, a liter of seawater and a liter of linseed oil in each jar. Shake like crazy and wait. Plus, I still have about two liters of raw linseed oil to make some more.
Freshly shaken mixture.
After a while you can see the oil floating to the top, above a layer of fat that we are refining out of the oil. The clear stuff is seawater and there is sand on the bottom.
After an hour or two.
This time I left each iteration to rest a day or two. You can clearly see the layers in this photo.
A day or two later.
Here's an interesting photo: It shows how quickly things start to work. The one on the right I haven't shaken yet, the one on the left was shaken and rested about five minutes, and the one in the middle I have just finished shaking. I think this was after the first shaking, I racked off the oil on top and mixed it with plain seawater - no sand.
Different stages.
After doing this for a few weeks (and couldn't be bothered doing it any more), I put the resulting oil in glass jars and put them in a sunny room where they wouldn't be bothered. They stayed here for about ten months. I left the lids off completely for a few weeks, then just rested them on top to help keep debris out.
Let's wait for the sun to do it's part.
The idea is sunlight does the last part of the process, which is to make the oil lighter in color. I think if all the fat is rendered out of the oil, the sun will eventually turn the oil colorless. The color I am at is just fine for woodworking, artists making oil paints might want it a bit clearer.

It could also be that the area I put the jars didn't get quite enough direct sunlight. The sun shines in that window only a few hours every morning.

Once I collected the jars from their resting space, I filtered out any debris that was in the jars. I just ran the liquid through a clean shop towel, and in about ten minutes it was all done.
Straining debris from the jars of oil.
Much of the debris in the oil already collected on the bottom of the glass jars, and since I poured the oil out as gently as I could, it stayed there.
It looks like Weinstein - the debris that is sometimes at the end of a bottle of wine..
I decided to keep the oil in plastic jars that I bought especially for this purpose, because they do better on the bounce test with the tile floors in our apartment. I'll keep an eye on them and if the plastic starts to degrade I'll switch them over to metal or glass containers.

It was an accident that they now look like the urinalysis cups that we used when I was in the Army.
New batch on the left, old batch on the right.
I have enough raw linseed oil left over for one more batch.

I really like this stuff. It has no harmful chemical driers, and only smells like seawater for a day or two after it is applied to a wood project. So far, it works just like BLO, without the toxic smell. With the exception that I haven't come across the need to apply more than one coat.

One might find it a bit thick, but you can mix it with turpentine to thin it out a bit, something I've done with BLO before on first coats. Usually, however, I just slather it on my project, wait a few minutes, then buff it out with a dry cloth.

The first batch I have been using by itself, and I plan to experiment with this batch mixing it with some other things to try some other finish recipes that usually include BLO. I'll report how it works.

I would certainly recommend this to anyone who wishes to try something a bit different. I think the resulting oil is of higher quality, and a lot safer and pleasant to use. The process is simple and easy, but it does take some time and patience.

If you have no access to sea water, I'm pretty sure a heaping tablespoon or two of table salt in tapwater would work just fine. I've also been told an alternative to clean sand is kitty litter. Perhaps I'll try it this way someday when I get back to Munich.

Check out my original post for more info on the process.

Finally, some of the comments on the last post suggested a much simpler alternative to this process is just to buy plain old stand oil. I'm told it is a similar product. I promise I'll get some and do a comparison one of these days. I've also been told that it is a bit different than regular stand oil, and is instead comparable to this oil (the German translates literally to "sun-thickened linseed oil), which is 234 Euros per liter at the time of this writing. For obvious reasons, I'll not be comparing my oil to this stuff.

Give this a go if you'd like to try it. I'm sure you'll be happy with the results. If you do, please let me know your experiences with it.

Tuesday, January 1, 2019

American Trestle Table - Part IV - Notes for the Pause

I was able to get a surprising amount of shop time in over the holiday. Sadly it wasn't enough to finish this table before I go back to Spain. I'll have to finish it up next time I'm here - probably this spring.

Lucky thing my client won't need the table until at least after September. Maybe later.

I did some real thinking about what to do since I made mortises in the upper supports rather than cut joinery for bridle joints. I decided to go with what I have. The tenons will be plenty strong (probably stronger than bridle joints), but to make them look less weird, I sawed about 1/2" of depth from each of the supports. This will give a little bit of  distance between the top of the trestle's mortise and the horizontal edge of the support.

I think if I hadn't done that, the bottom of the support would touch the top of the trestle's mortise and look weird.

Let's get to it:
Layout lines for the lower tenon on the leg
Layout is critical for this. I'm not used to committing like this. Whatever I mark now is the final height of the table, period. I decided to make the table a standard 30" height. To get that, the end of the bottom tenon must be 30" from the end of the upper tenon - less the 40mm thickness of my table top.

Considering that I already had a mortise in this beam, The end of the upper tenon had to be exactly six inches above the bottom of the trestle's mortise. This is because the trestle is six inches thick, and the bottom of the trestle rests on the bottom of the mortise.
Exactly six inches above the bottom of the mortise.
So the pictures are in the wrong order. I marked the end of the upper tenon, then marked the length of the entire leg (the end of the lower tenon). After that, I marked the shoulder line for the lower tenon and cut the tenon.
I missed my honking BadAxe tenon saw. It's perfect for this kind of joinery.
After some tuning of the tenon with my router plane, the tenon fit perfectly.
Three more to go.
While doing all this, I had been suffering with an Ohio O7 jointer plane that wasn't quite working right. I never had the time to rehab it, so I was just using it with a Hock replacement blade.

The problem was I was getting some chatter. But not chatter like I had ever seen before. The wave of this chatter was really slow. You couldn't really see the bumps, but you could sure feel them.

It turns out there was a nasty hump on the face of the frog. Likely this plane never worked well for anyone, even when it was brand new.
A few swipes on my stone shows a nasty hump.
I got the frog 90% sorted, and it made a world of difference with the jointer. It's still not perfect, but it got me through sizing the beams.

Next I sawed the upper braces so they were a bit thinner, as I described above.
A well tuned ripsaw is a wonder.
After this workout, I did it again on the second one.
Two of these rips is a lot like work.
After cleaning the rough surfaces and planing to exact thickness, I cut tenons on the uppers the same as I did on the lowers.
Look! Some sticks!

Now that all of the mortise and tenons are cut, it's time to fettle them. It's been a long time since I used a shoulder plane for this job. I learned how to do it with a chisel for the sake of having that skill. It's a great skill to have, but I decided to pull this shoulder plane out one last time before I sold it.

Holy Moly! I forgot how easy this made tuning tenon shoulders. I was done with four perfectly tuned tenons in about twenty minutes. I'm sure I could have done it with a chisel, but it would have taken hours to get them to the level of perfection they are at with this tool.
I suppose my LN large shoulder plane has earned it's place back in my tool chest.
After that's all ready, I marked out the taper of one of the upper supports. First I marked the centerline on the middle of the the mortise, then I was able to mark out an equal length to each side from there. The end of these braces will only be one inch thick, so I am now able to mark the taper to give an even taper all the way to the leg beam. It's just a matter of cutting it out.
Another job for the rip saw.
I was only able to get the one support roughed out before my shop time ended.
When I get back to this project in a couple months, I'm sure I'll forget what I was doing, so this post is mostly a reminder for my future self.

Future self: the next thing that needs to be done is to plane the taper on this brace down to the line and smooth it out and cut the ends to length at the angle I marked. Then once the other is done, the taper on the feet can be done. But not so aggressive of a taper!

Once everything is shaped and smoothed, the beams can be planed to thickness so the surfaces all meet. Next is a chamfer.

I suggest to my future self to make the trestle and fit it before drawboring and wedging everything. You know how you are!

As far as the slab top goes, it needs just a little bit of work: a big chamfer on the underside to thin out the look of it, and some epoxy for the little cracks in the center.

Hopefully I won't forget I wrote this here until after I've done something irreversible.

Sunday, December 30, 2018

American Trestle Table - Part III: Cutting Half-Laps for Mortises

The last of the cherry laminated beams is now in the clamps. Hopefully today I will get in the shop to clean them up, plane them square and start cutting tenons.
Danger, Will Robinson! More on that later.
Since I cut a total of twelve half-laps for the six mortises, I thought I'd do a little photo essay on how I did it. It is pretty simple, and hopefully once the tenons are cut everything will fit perfectly and look beautiful.
  1. Too bad it rarely works out that way.
  2. I shouldn't have cut twelve half-laps for six mortises.
The key to getting these to line up perfectly is to be accurate with your layout of the joint. I did everything in pairs: two half laps, which I then glued up to make a laminated beam with a mortise, followed by the next.

I marked where the lines should go with dividers in order to eliminate measuring mistakes, used a marking knife to make a line, deepened it with a chisel and notched out a triangle of wood where my crosscut saw could sit to start the cut.

Once the ends of the lap were defined with the saw, I made a few relief cuts to aid in chopping out the waste in the middle.
Two precise cuts, and a few eyeballed relief cuts in the middle.
To rough out the waste, I start by using a chisel and a mallet. I only go half of the depth required at first, to see how the wood is going to behave. The first chopping goes down a ways, but not all the way through. I'll turn the piece over and do the same from the other side to avoid blowing out wood on the other side, which might show on the final piece.
Halfway in and halfway down.
After knocking out chips from the whole width, I go back and move my chisel again to the 1/2 way mark. Since this is half of the half, it is a little lighter of a cut.
Move the chisel back to take about half of what's left.
I keep going back 1/2 of the remaining thickness as long as I dare, then I get really close to the line and make an angled cut to add a bit of a chamfer that will hopefully help avoid blow out later.
Roughing out a bit of a chamfer to help later.
Now, I turn the board over and do it all again.
Second time, same as the first.

Here's what it looks like when I'm ready to move to the next step.
Using a mallet on a chisel to bash out waste like this is efficient for rough waste removal. What I do now is use the chisel with hand pressure only to knock down some of the high spots, which will save time with the router plane. If I'm not using a router, I will do this part very carefully, checking my work often, until I am down to the lines and everything is square.
Chiseling across the grain with hand pressure only to refine things a bit.
Make sure to keep all of your body parts behind the pointy end for safety. For control, you can hold onto the chisel with your off hand to guide the cut.
Guiding the cut with my off hand.
When I'm as close as I dare, I finish off the joint with a router plane. We've saved a lot of time by roughing out the joint to this point with a chisel, and this plane is going to flatten and measure everything to perfectly flat for us.

Take light cuts with this tool, it should be thought of as a fine finishing tool for joints like this.
The end result should look something like this:
Taa-daaaaaa!
Feeling pleased with myself only lasted an hour or two: I exclaimed a profanity while sitting on the couch watching TV with The Frau later that evening. It only then dawned on me that the feet only were to get this kind of joint, the braces at the top were supposed to get a bridle joint.

The bridle joint allows the grain of the leg to appear to go all the way up to the table top, leaving room for your eye to see the mortise for the trestle by itself.

Structurally, the mortise and tenon on the top brace will be fine, but now the mortise and tenon for the trestle will be right next to the now visible joint for the cross brace.

I'm committed now, since I have no more cherry on hand to do the braces over again. We'll see if I get that far before I have to leave again for Spain. But, in the end, it is a small detail that might not look too bad. We'll have to see.

I can always paint it like I originally planned.