Saturday, October 31, 2015

Woodworking Trip to China

I have so many pictures, you might think I went there for a year.  In truth, I was only there for seven days, and it wasn't really for woodworking, although you might not know that from my pictures.

I have lots of other pictures, too, but since this is marginally a woodworking blog, here are some of my photos that had something to do with woodworking.

First up is a KFC on Wangfujing Street.  What could say "woodworking" better than fried chicken?
I don't think this KFC is in Kentucky!
China has an old woodworking tradition, along with many other hand-crafts.  In one department store on the touristy shopping street, I ran across this display of an antique loom.  I couldn't tell you what it says, other than "Do Not Touch," as I don't read or speak Chinese, but neat to see nonetheless.
A neat display of a wooden loom.
The Frau and I spent a whole day in the Forbidden City gawking at all of the cool old buildings.  This was my first time being exposed up close with ancient Chinese architecture.  You can probably tell I was impressed with joints and details by the photos I took.
This is just part of a door.

Part of the same door.

Here is the whole thing.  Likely the doors on this palace have been here for a very long time.  "A very long time" in Chinese history is a lot longer than in Western culture.
The corner roof joints on Chinese buildings are famous for their beauty and strength, and like any good wooden building joint, uses no metal fasteners. 
The little water beasts on the corners of the roof are to help protect the buildings from fire.  I suppose they work, as this building hasn't burnt down yet.

Here I was a bit closer to a building to show the corner joints.
The undersides of the roofs showed some more highly decorated architectural details.
Keep in mind this is a building intended to be occupied by the emperor.
What about woodworking for regular people?  Well, if you have been reading my blog, you'll know I could be just as impressed by that.  One of the reasons we ate at one restaurant was the furniture that was in use.  All of this furniture had good, old fashioned joinery.
This chair is very similar to many others that I saw there.  Mortise and tenon joints, along with frame and panel construction.  The weirdest thing about this one was that it's seat was  only about ten inches off the floor.
And the table was extremely sturdy.  It was a bit short for what we in the west would use to eat on, but perhaps that helps.
Don't ask what the bucket was for.  Every table had one, but we didn't ever see it in use by anyone.
Just for your curiosity, here is our bill for dinner that night.  Four main dishes and two bowls of rice came to about $16 US.
This makes it tough for us illiterate dullards to check the bill.
I was pleased to see so many trees there.  Even in town, although most Beijingers would say there aren't enough.
We spent one day at the Great Wall.
We did indeed do plenty of touristy stuff.
Gratuitous shot of me being a tourist at the Great Wall.
There were plenty of trees that I recognized in Beijing and the area, including birch, oak and maple.
Oak leaves

A maple leaf at the Great Wall.
It was so beautiful that day,  I couldn't help but take lots of pictures. 
Here's one uncharacteristically devoid of crowds.
Being me, I had to visit a flea market.  This is near the famous Dirt Market.

I actually found some hand planes!

And some bow saws.  These are all new tools, and I didn't want to bring them home.
I did find some old tools.  In fact, I bought a set of dividers that I forgot to photograph.  I'll have to do a blog post on those later.
There is an old wooden plane in this photo.  Can you see it?
This place was too big to comprehend, and I think one could spend many hours here.
Interesting architecture on the buildings in the market.
This whole market was very organized.  The stalls were all set up according to what it was they sold.  This would make it easier if you went there for art, teapots, coins, or whatever.  Everything easy to find.
Does this count as hand tools?
I did get some photos of some wooden ware.
I think the stumps in the bottom of this photo are ebony or similar.


Carved panels.
Plenty of other stuff, too.
Lots of pottery.
More close-ups of architectual details.  This time at Bei Hai Park.
The colors and painting of some of these buildings is gorgeous.


Look!  Dovetails!

More obligatory tourist pictures.

Trees in the Lama temple.
I get the feeling the Chinese view trees (at least most of the ones I saw in Beijing) as sacred, and something that should be preserved at any cost.  When I first arrived, there was a worker shoring up a tree on the street with pallet wood and a pneumatic nail gun trying to save a branch with a big crack in it.
Here at the Lama Temple is a typical view of a tree being supported by a metal pole.
I think we in the west would cut down many of these trees for safety and try to grow new ones.

I just couldn't quit taking photos of architectual details:
Another corner roof joint.

The paint accentuates the structural details.  I think in the West at the time, we were trying to cover these bits up.
Here is a beautiful stove in the Lama Temple complex.
These temples had many people burning incense.  One would think burning incense near wooden buildings could be hazardous.
Perhaps not too hazardous, as this is what they had for fire safety there:
Chinese fire extinguisher?

More obligatory tourist poses.
A walk through a traditional Beijing Hutong revealed some neat everyday furniture. Here are a pair of what look like saw benches.  However, I don't know they were tools, as there is a lot of ornamentation on them.
I really like the double tenons offset for joinery.
I liked both the door and the sign for this business.
Weirdly, I ran across this dovetailed chest just sitting out on the street.
Dovetails.
Above that was a six board chest, and next to it was another saw bench looking piece.
Cool furniture left to the elements.
Here is a close up of the bench. 
More double tenons, this time in a row.

The Frau really liked this door.
Everytime you run into a traditional building, it is hard not to take pictures.
This one had some metal pillars, but the roof is wooden.
I love the painting.


Here is a neat doorknocker near the Temple of Heaven.
Being a tourist again:
Many people were getting their photo with this tree, so I thought I would get one, too.
If you ever get a chance to visit Beijing, I give it a hearty recommendation.  There is lots to see there, and most of it is so different to what we know in the west.

Wednesday, September 23, 2015

Two Asian Woodworking Videos

The first is a two part series on making a fenced rabbet plane remarkably like the French planes in Roubo.  It is in Chinese, which I don't understand, but I bet one could make this plane without understanding the language.  I also love his work holding.
It turns out he has a channel, and there are several videos with different projects on it.
The second is in Japanese.  I don't understand this language, either.

I have been experimenting with the burnt wood finish inRaney's article in the April issue of Popular Woodworking. I was interested in watching the Japanese do it. I think they use cedar, and they use a tool very much like a pollissoir.
Enjoy.

Fingers In the Till - Ratty Old Swedish Jack Plane

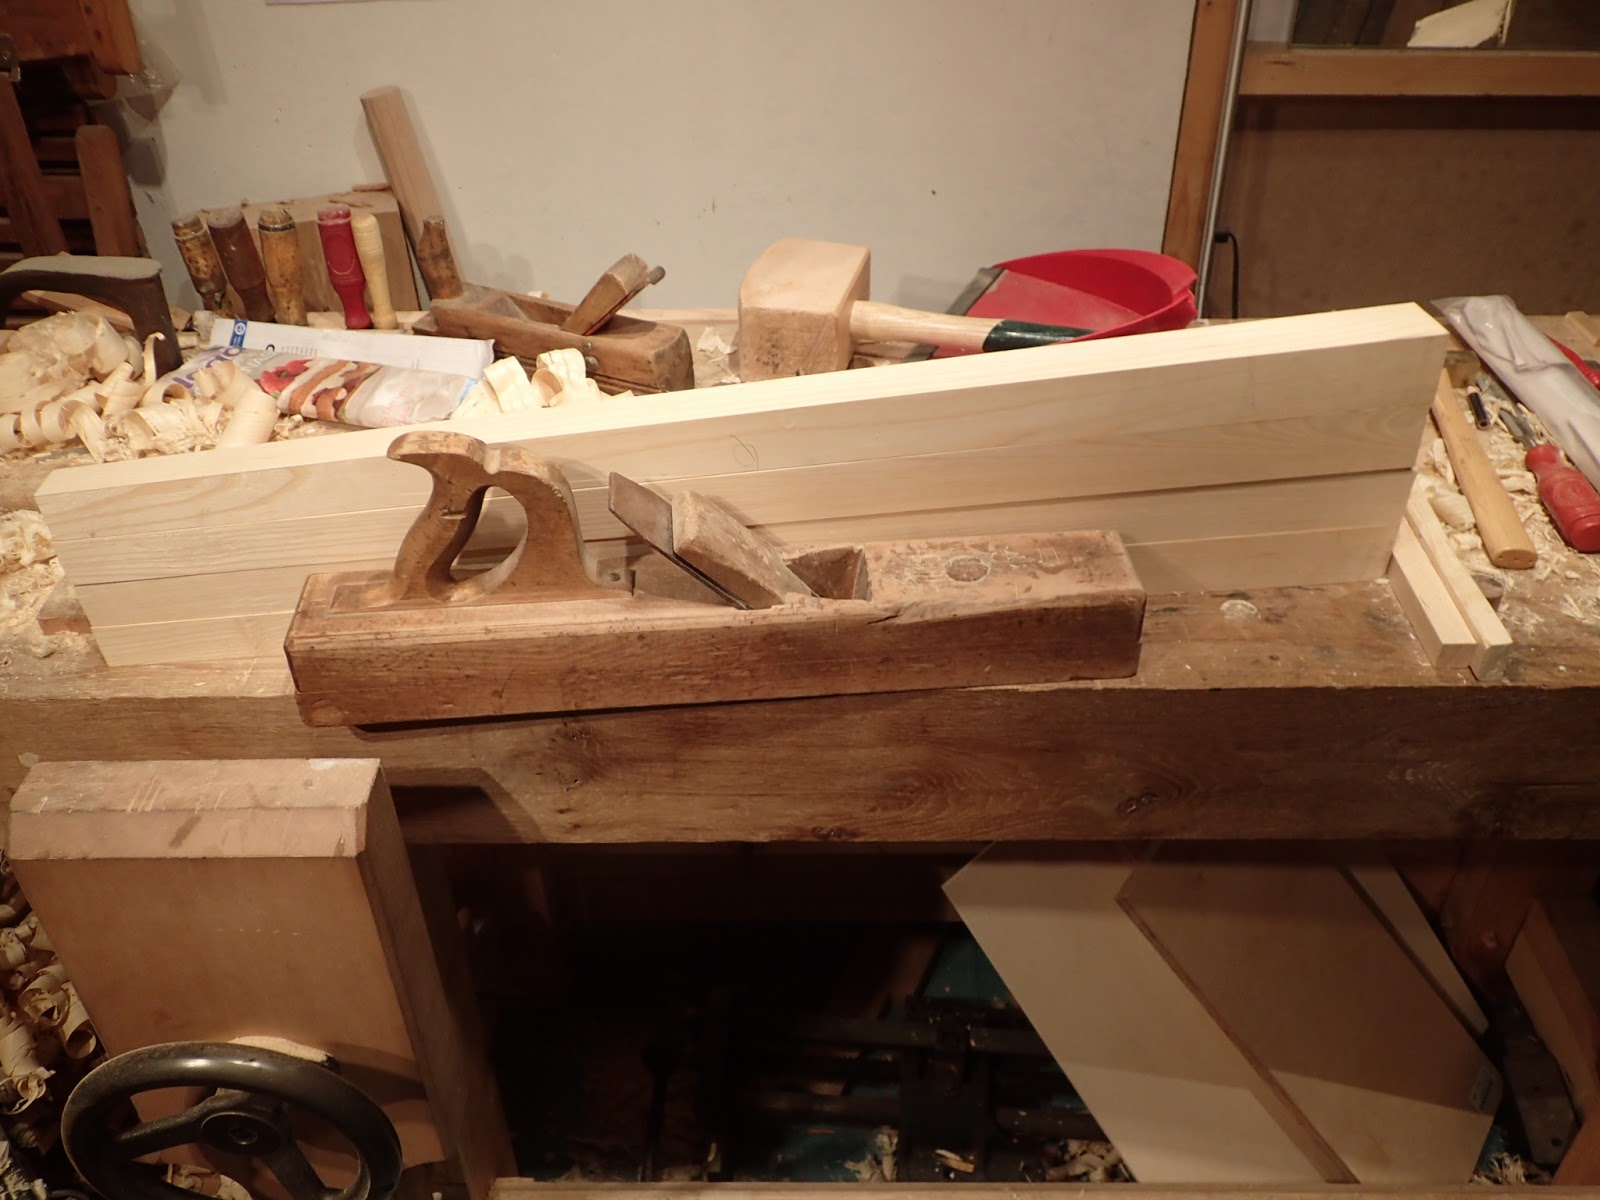
This has to be one of the ugliest planes I've ever seen.
This plane will win no beauty contest.
Last year while building chairs with Mulesaw in Denmark, Jonas' parents came to visit one day to see all the commotion.  Jens also brought along a trunkload of vintage tools from his frequent visits to Sweden.  Many of those tools followed me home.
Jens and Jonas.  The Swedish Hoarde is on the bench.
In this pile of tools were a ratty old jack plane, and a somewhat nicer try plane.  Both beech, and both with EA Berg double irons.

My intention was to rehab these planes one of these days and see if I could use them.  Nothing happened because I like my Veritas BU Jack so much and I never really needed these planes. They sat collecting dust waiting for me to someday get to them.

To make this long story even longer, I have been watching David W.'s series about building a wooden try plane.  I wound up with a ginormous slab of quatersawn 12/4 beech the last time I was at the lumberyard, so this project has launched itself in to the "do soon" category.
12/4 beech on the roofrack of a VW.  That's not something you see everyday.
I have been psyching myself up to build a wooden jack plane, and maybe a try plane because it looks like a fun project.  David W. makes a good case for them. Honestly, I really want to try one (get it?  "TRY one.").

In the meantime, my list seems to add three projects every time I finish one.

While I was working on tapering some ash legs for a staked desk, I was thinking about the thick shavings I saw on YouTube with that wooden jack.

The other day, I got as far as tapering my foursquare legs to a tapered shape on one leg, and two sides of another before I was worn out with my BU jack.  Today I wanted to finish that up, and maybe get some octagonalizing done on them.

I had forgotten about this little wooden jack plane until I saw it when I walked in my shop today.  I thought, "Huh!  It's too bad I didn't rehab that plane already or I could use it for this project.  Perhaps I'll just see if the iron could be sharpened quickly and see what this thing can do."

Instead of that, I gave the iron a couple taps in the mouth of the plane to set it to a course cut to see what it would do.
A shaving in the mouth.
HOLY CRAP THIS THING CUTS FAST!
I would break my arm making shavings this thick with my BU jack.
Jens must have sharpened this thing before he brought it over for me to look at.  I can't believe how well it works.

It feels light, is easy to push, takes incredibly thick shavings with no tear out (unless going really bad against the grain), and made quick work of tapering the rest of the desk legs.

I actually finished the whole job of tapering the rest of the legs without ever taking the blade out to sharpen. I think the double iron forgives a multitude of sins in this matter.

The mouth of this plane is a little different than an English or an American plane.  Everything is very triangular, but I suppose it works.  The plane is 20 inches long and has a blade 2 1/8 inches wide.
Here is a view of the mouth.  You really can't see anything in this photo.
I think you still can't see anything of worth.
This one is a little better.
This plane looks like it was made from a rejected piece of firewood.  The annular rings go at a 45 degree angle to the plane, rather than quatersawn, like a quality plane would.
Can you see the annular rings?
The bed looks like someone thought it would be fun to plane a board with a nail in it.  Over and over again.
Not pretty.
The mouth is wide, as expected, and there is a big chip in the back of the mouth that is just cosmetic.  In fact, the whole plane is a cosmetic disaster.
You can even see rays in the grain on the sole!
The rest of this plane looks like it fell in a garbage disposal.
Maybe they thought they could set the wedge with a felling axe?

Another glamour shot.
I have fallen in love with Swedish steel lately, and was happy to see this Shark logo on the blade.

If you can see through the rust, there is an EA Berg logo there.
Cosmetics aside, this plane works well.  I was able to finish tapering the desk legs with far less effort than I did with the BU Jack.

Don't get me wrong, I love my BU jack, especially the versatility of the plane.  But, this old woodie does the one thing a jack plane should - remove a lot of wood fast.  I don't think I would use this one for shooting, or smoothing, jointing or any of the other things that the BU jack does pretty well, but for a single purpose tool, this one nails it.
I used it to taper these legs.
Just to see if I could do without my BU jack, I got out my old Krenov jack plane to finish the tapers and the octagons.
I made this Krenov jack plane a couple years ago, but it doesn't get much use.
This plane, unlike the vintage jack, is optimized for very fine shavings.  Next time, I'll know better. 
Very fine shavings, indeed!
It actually makes a good partner with the vintage jack.  Rough off the bulk with the rough plane, and this one smooths and joints in one fell swoop.  At least good enough for staked legs.
Finished tapered octagonal desk leg.
The moral of the story is, if you find an old, ratty jack plane, rather than let it go for firewood or something to screw to the wall at AppleBee's, try it out first.  You might be surprised.

Wednesday, September 16, 2015

Irish Chair

My friend John recently made a trip to Ireland with his wife and children to visit family.  He sent me this note:

Hi Brian,

I took some photos of a nice Irish chair at my Mother-in-Law's house to share with you! 

John

----------------------


I really like the simple lines of this chair, and the neat ornamentation on the back.  Here is my reply to him:

----------------------

Hi John,
 
Thanks for these pictures!
 
There are a couple cool things to note about this chair.
 
First, it indeed is a true Windsor chair, i.e. a solid seat plank with everything else growing from that.  The legs and spindles all pierce the seat, probably with a tapered tenon.  I bet it's rock solid.
 
Second, the seat plank is made up of a single, wide board as opposed to several narrower boards glued up to make a wide enough plank.  I would guess that this is an indication that the chair is very old.  A newer chair (especially one that was made for the masses as opposed for the wealthy) would have used a laminated seat blank.  It has been a very long time since it was more economical to save the labor and use a single seat blank as opposed to  now, when the labor is minimal compared to the expense of a wide board.  I wonder what kind of wood it is?  It looks like the seat could be elm or ash, and the arm bow something else like maple or sycamore, but really they could be anything.
 
Third, the legs (especially the front legs) are more upright and pierce the seat near the edge - this is very much in the English tradition, as opposed to the Welsh, and John Brown thinks this makes for a very ugly, blocky look.  Who can say, but it was very popular to do that in certain regions.
 
If I had to guess, I would say this chair was made in a factory.  The legs and spindles were all turned on a lathe, and have very simple ornamentation, indicating this is more of an "everyperson's" chair as opposed to a fancy one intended for the rich.
 
One of the neat details of this chair is the shaped cutout on the arms directly in the back.  It makes for a nice look, and simplifies the lamination of the arm bow somewhat, as the joint doesn't have to be tight or anything, there is a gap that is clearly intended.  The crest is glued on top and holds everything secure.  What a neat shape - very distinctive and unique.
 
Note that only the front posts on the arms actually pierce the arm rail.  That is because those take more stress than the other sticks in the back.  Often, these posts are bigger or shaped different than on other chairs for exactly that reason.  I think it interesting that the others don't pierce the arm rail.  It could be that they are just trapped loose in there and aren't really providing strength.  I would have to examine it in person.
 
The wedges on all of the piercings go the same direction - left and right.  That is because the grain of the wood goes fore and aft.  The wedge doesn't work to split the wood, it uses the strength of the grain to hold the tenon tight.
 
Also, it is normal in the UK for Windsor chairs to be finished natural, where in the US this type of chair is painted more often than not.
 
Is there a story with this chair?  Does your mother in law know how old it is, or how she came by it?  It would be neat to see the underside of the seat.  It also would be neat to see if there is a maker's mark on it anywhere.
 
Thanks! 
 
Brian

----------------------

So how about it, dear readers?  Is there anything you notice about this chair?  I think it is a neat example of a chair that is still in use after who-knows-how-long.

Monday, August 31, 2015

Saturday, August 29, 2015

What I've Been Up To

There hasn't been much activity on my blog lately because the Frau and I have been doing a renovation of one of our apartment's rooms.  If any of you have had a project like this, I'm sure you know why not much woodworking goes on during this process.

Add on the fact that I have chosen not to spend any vacation hours for this project, and it gets done only during evenings and weekends.  That next project is just going to have to wait!

The first thing we did was empty this room - which essentially is what I would call a rec room - of 15 years worth of crap that we've collected.  Jeesh!  Who knew all that stuff would fit up there?

We hauled about 12 car loads of stuff down to a local storage shed, and probably an equal number of carloads to the dump.

The gross old carpet had to go, too.  Unfortunately, it was glued down.  Doubly unfortunately, my father-in-law did a particularly good job of gluing it down when he installed it.

Lucky for you, there are no photos of all this.
But here is one of the room after the carpet came out.
We laid down a quality underlayment, and used a really nice looking oak parquet.  This one has a thin layer of oak on top, a layer of some softwood, probably fir, on the bottom, and a layer of MDF in the middle.  Over all, a good looking and (hopefully) stable product.

One of the challenges was there are two cubby holes like this in the room.
I have laid several parquet floors in the past, and I usually use my DeWalt 18V circular saw to cut the parquet planks to length when the end of the row is reached.  I decided this time I was going to try hand tools, and decided my trusty Dick saw would get the job.

This ryoba saw worked fantastic for this!  The kerf is way thinner, so less dust is generated.  Plus, the sawdust doesn't fly all over the room like with my power tools.  Less noise, so the building's strict noise policy is not violated, and I think it really is no slower than using the power saw.

The only time I got a power tool out was the jigsaw, which I chose to use for the rip cuts.
Here is the toolkit I used to install the floor.
Overall, the floor came out meeting our expectations. 

We like how it looks.
The next step is we have some built-ins being custom made for this room, then fill them up with all the crap we have in storage.  The idea is this room will look nice rather than just collect all of the stuff that doesn't have a place to be put away.