 |
| Plate 19 hollow and round planes in cherry. |
I should be posting about chairs, as it was my idea to do a community chair build in June. I still have time, don't I? Sometimes life gets in the way of well thought out plans, and things don't seem to work out.
I do, however, have some lumber for the chairs. I have some elm seat blanks for some Welsh stick chairs, and I went to the lumber yard the other day and bought some "smoked" oak. This stuff is cool, it looks black all the way through. It should make some neat leg and stick stock.
Ray Schwaneberger has been dutifully building a child's Windsor chair for the June build, so if you would like to see someone talented building a chair, you can start at his blog, Rivings and Shavings.
Anyway, before I can start my chair, I had to finish an old project that has been languishing on my bench. Sadly, this isn't the only one. The good news, is this project was really close to being complete, and I just had to know if these would work out.
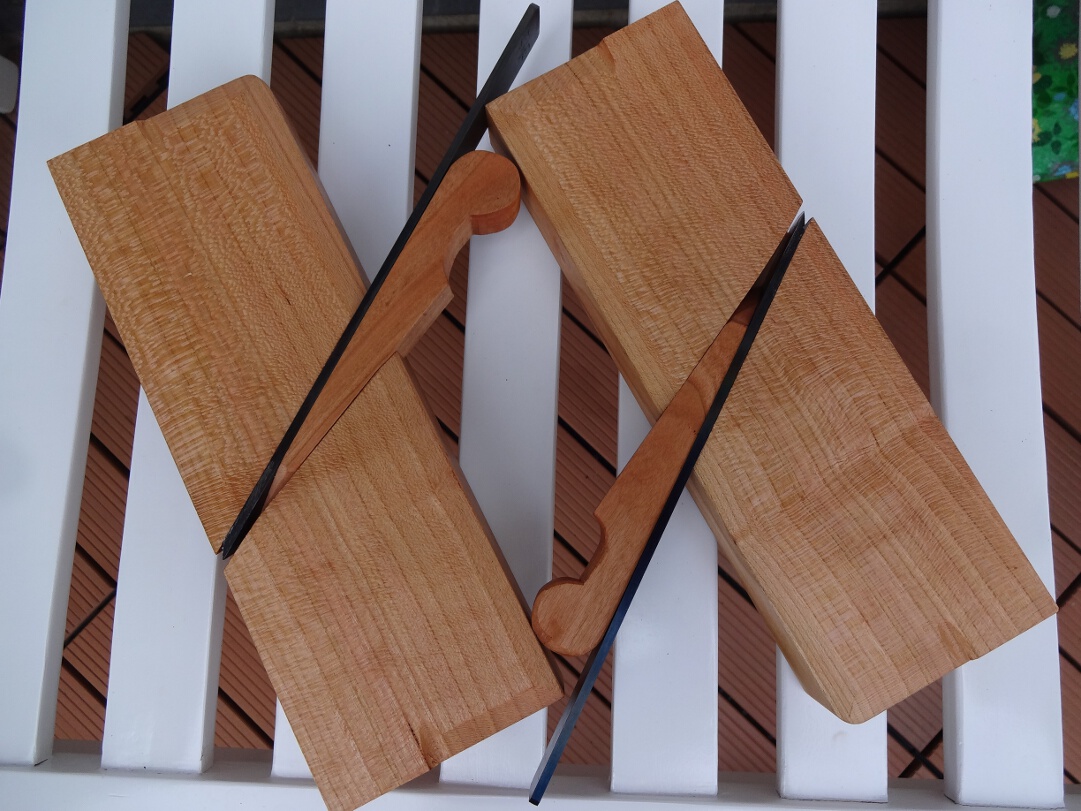
Here they are, enjoy a few shots of tool porn:
 |
| The main feature of these is the open mortice. |
 |
| I chose to give them English finishing touches, rather than French. |

 |
| I called these #12 in size, as they describe a circle with a 3/4" radius. |
 |
| They are a little tricky to set up, as the irons and wedges should be resting as far to the left as possible. |


Yes, they do! At least the round does. I still have to sharpen the hollow and fiddle with the wedge for ejecting shavings.

 |
| Here is an example of an escapement from a modern French moulding plane I recently got. |
The big advantage of this style of plane, is that it is far simpler and cheaper to construct. Although I started some moulding planes a while back, I never finished them after I blew out the blind side trying to sink the mortice.
I used stock that was about 1 1/2" thick for the 3/4" iron. That was roughly what it looked like in Roubo's plate 19. I think this is plenty stout, and probably would work if it was a little thinner.
I have some ideas for features to add to this style of plane which will improve functionality and further simplify construction. In other words, stay tuned as I try building a few more sets of these to fill out my plane till.
That is, as soon as I finish a chair.
Those are ver nice! The woodchoice helps a lot of course, purdy stuff. I am curious how they'll work out in practice.
ReplyDeleteHi Kees, thanks for the comment!
DeleteI love cherry. I think it is my favorite wood to work with hand tools. I am also curious how they will work out. Funnily enough, I decided to make my first set a pair of #12s, which probably are not the most useful size for what I intend using them for. I figured this would be good practice. Next I think I'll make either 4s or 6s.
wow! congrats Brian! they really stand out and the finish is nice!
ReplyDeleteThanks, Aymeric! I really look the look of BLO on cherry.
DeleteI agree that some clearance by the mouth might help.
ReplyDeleteThe other nice thing about this style is that you can see exactly where the wedge is hitting or not hitting and how the shaving is interacting with it.
Thanks for sharing the journey thus far, Brian!
Hi Ethan! If that clearance is necessary, I'll have to figure out how to make that cut.
DeleteYou are right, though. When I made the wedge, I didn't have to check anything for square. I just had to show it to the mortice and I could see where bits of wood needed to come off until everything was perfect.
Matt Bickford once recommended that you shouldn't build planes, as the tolerances are way tighter than any woodworking you have ever done before. I know what he means now, bedding the iron took a good bit of fiddling, even with this simple design.
Looks like they finished up nicely. I've done nothing on my set recently, but they are still hanging in the back of my mind, as are the designs for a chair that I am NOT building in June, but will probably have to mock up soon as it's consuming my thoughts when I should be remodeling...
ReplyDeleteHi Jeremy!
DeleteI hope your kitchen is coming along. I know EXCACTLY how you feel, as I still haven't started my chair. I'm hoping the design I have in mind facilitates a quick build, as I finally get to start my June chair on June 22nd. Not a whole lot of spare time to finish it in June.
The good news for both of us is, those unfinished projects will still be there when we do get time to work on them!