I seem to have adopted the bad habit of not posting regularly anymore. I suppose it's time to fix that.
Please bear with this post as it is a bit longer than usual. I didn't realize I did so much to my chest since the last post. If you'd like to skip through, this post has three main sections: 1) Layout of the main compartment, 2) Saw racks on the lid, and 3) Painting a bad ass bit of graffiti on the lid.
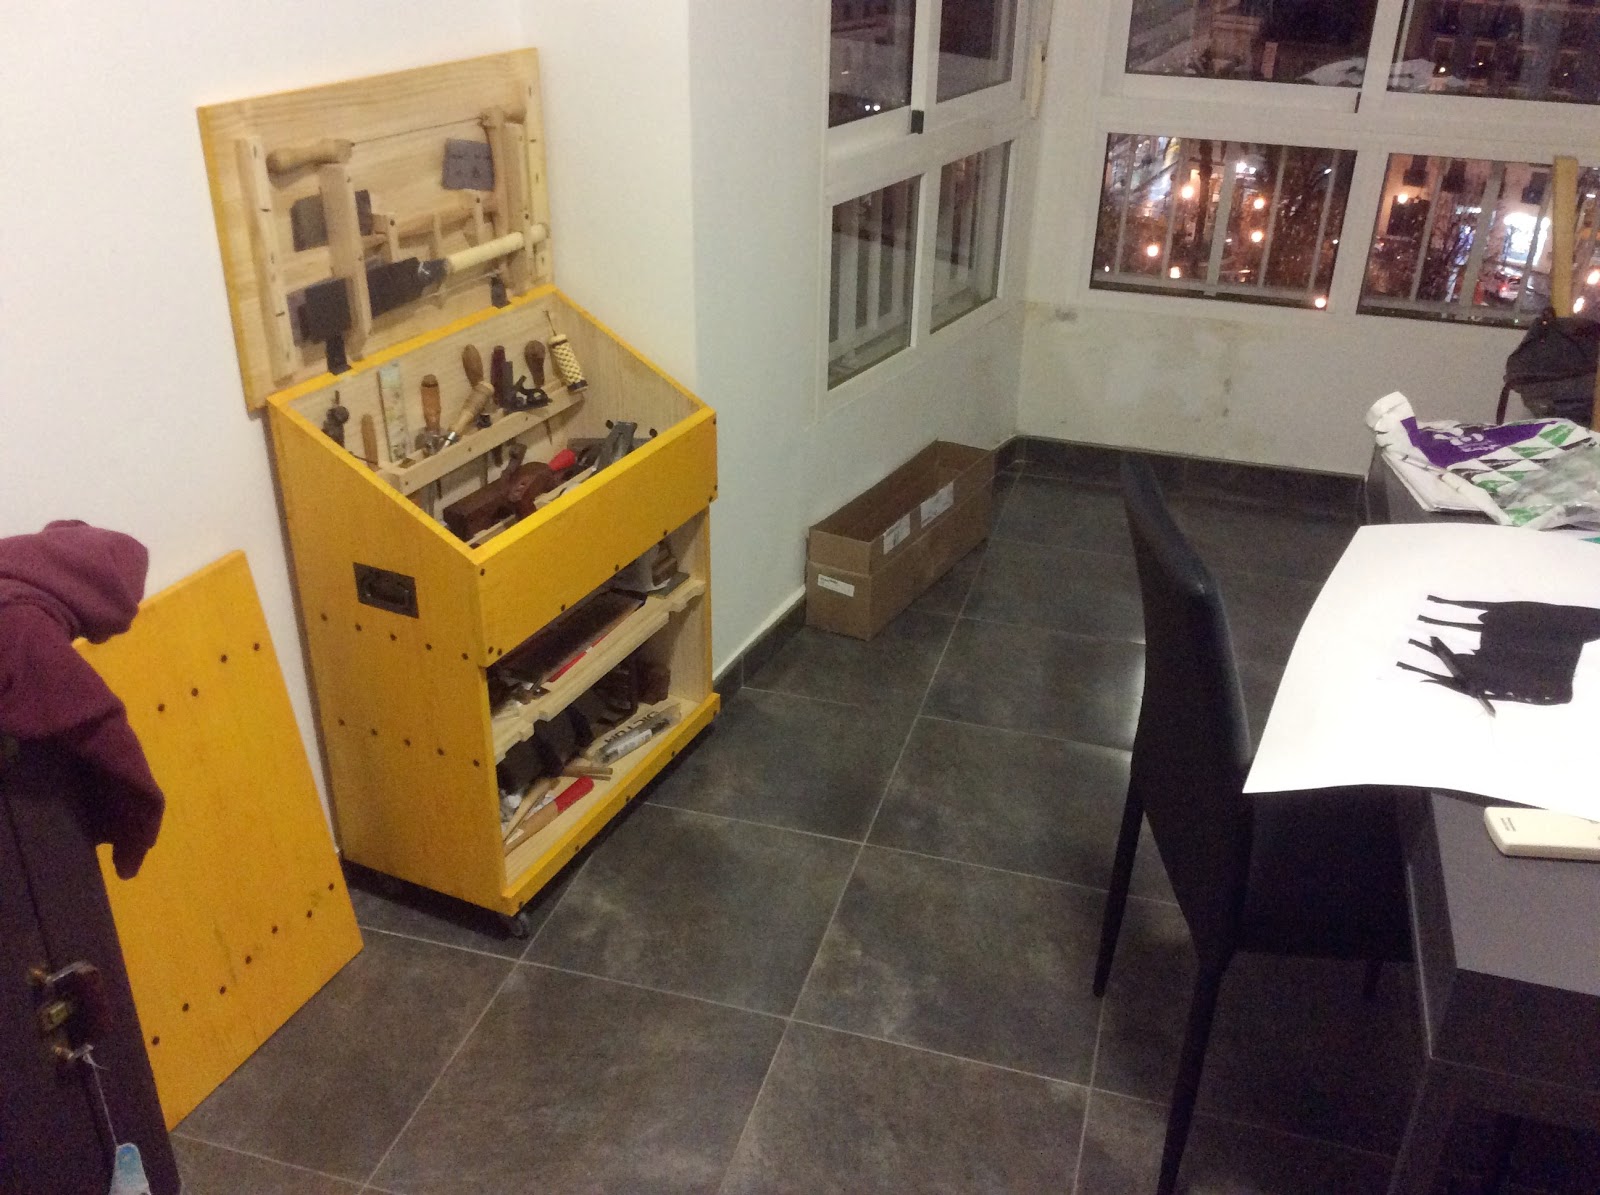
The chest now parked in it's spot.
While I was back in Germany over Christmas, I decided to use my shop and work with some appropriate hardwood. I want to upgrade the locking mechanisms of the chest. I had originally made all these parts with the same pine from which the rest of the chest is made. I decided that these parts could potentially take some abuse, so here we go.
First was making new lock pieces for the fall front out of ash.
The locking mechanisms were simple, and the measurements were standard that I used. When I installed them, I glued some bamboo skewers into the old screw holes and started over. I didn't want the old screw holes to take things out of alignment.
Next, I found an old hunk of American birch rolling around since I bought it online years ago. It happened to be the perfect width I needed, and it was flat sawn. If I cut a hunk off the end, I will wind up with two quarter sawn sticks that should be nice and stable.
Resawing the birch.
I decided that I wanted to make a heart design for the opening on the top which functions as a grab hole. No reason other than I thought it was cute.
To do this, I left my stock double thickness, and did the piercing to the whole thing at once.
Drilled 5/8" holes for the hearts.
Fret saw the rest away, followed by a little rasp work.
Once the piercing is done, resaw to near final thickness.
5 point teeth right in the middle of my heart.
Two identical hearts.
Once I got back to Spain, I planed them to proper thickness and cleaned them up.
My face planing set up.
Then it was just a matter of unscrewing the old fall front locking bits and attaching the new ones.
This works a little better for the final pass.
A coat of beeswax and they are done.
I think they look cute.
Next was plane storage. I just nailed this together with butt joints.
Hehe, I said "butt."
I used Roman nails on the ends, and cut nails in the middle. This was a lot of trouble, and I would recommend avoiding all that and use wire nails. This till is trapped inside the chest, so it does not need to be particularly strong.
Someday I might make a new one, but it seems to work.
On the front of the chest, I just nailed a small spacing strip to the front to hold the jointer away from the front of the chest. This makes it easy to install the locks, as the jointer will always be out of the way.
Plane till fit. It is in with a friction fit, no nails to secure it to the chest.
Next I wanted a rack for my chisels, marking gauges, screwdrivers, etc.
I like the flexibility of a loose rack rather than individual holes for each tool. To each his own.
My thought with this was to use Spax screws where they would be covered up, and more expensive brass screws where they would show.
First hanging tool rack completed.
Here is a view of the front of the chest from the inside.
I made a second rack and screwed it to the first. I left it a bit short in case I needed some more room for something tall.
Second rack installed.
This second rack has really opened up some space for growth. The one was just a little tight for my tools, but with the second, there is now room to spare!
Tools in the chest.
I thought I'd offer some close-ups.
Now for the lid.
First things first, I wanted a rack for my Dick saw that would allow the bow saw to be mounted behind.
Once I was happy with the thickness of my supports, I clamped one side down for the handle opening.
Clamped and laid out for the cut.
Once the saw cuts were made, chisel to depth.
Test fit. Perfect!
Now to lay out an opening for the latch.
Voila!
For the blade, I ripped the other bracket down a line I marked, then glued in three heavy shavings I got from my jack plane.
Once this is cleaned up, it will be great.
Once those parts are ready, I'll mount the bow saw.
This was really pretty simple.
It turned out I needed to bring it a bit higher, as the hinges were in the way of the saw. I did this with a couple of little spacers you can see in this photo.
Here is a photo of everything installed.
Another one with the saws installed.
Problem?
As you can see, things didn't go perfectly to plan. As I mentioned above, the hinges and the screws pushed the bow saw out just enough to make things tough on the Dick saw.
The answer, some spacers!
An easy fix.
Here they are installed. Everything fits perfectly now!
Those gaps left by the spacers leave some room to store some more tools!
Notice I have some scrapers in here.
The open chest in it's spot.
Next up, some beautification treatment. Since I'm not in Germany, the Posthorn won't be as appropriate as a Toro!
First step, make a template!
Second step, mark centers and rough in an oval.
Third step, drive some nails (there's particle board under there).
Fourth step, tie a string as long as the distance of the long axis of the oval (distance between the two other nails). Put the loops on the top nail.
Fifth step, use a pencil to draw where the string crosses the line.
Other side.
This is where we are now. Drive nails at those spots.
Sixth step, attach one end of the string to each new nail.
Seventh step, trace the oval!
Keep tracing...
Keep tracing...
Done!
Once I had an oval traced out that I liked, I divided it into thirds and cut out the top and bottom.
Finished template.
Now stick it to the chest...
And spray the crap out of it.
Haha! This is fun!
Now attach the second stencil, and spray.
Toro!
OK, I promised video.
If you are still reading this, kudos to you. I wanted a video about ten minutes long, but wound up with one more than twice that. If you're a glutton for punishment, and want to see how I loaded the tools in there, here is a pair of videos.
Enjoy!
And part two:
Now you should be mostly caught up. Next post(s) will be about the Wall Shelf Build Off! Or, you could see what I'm doing with the hashtag: #WSBO on Instagram.
I had a very nice Christmas and holiday season with family and friends in Germany. Since I was home, I thought I would take the opportunity to bring back to Spain some more goodies which should help fill out my tool chest here.
I wound up having to pay extra as this duffel bag was nearly 30 kilos!
This is difficult for me, as I would really like to bring a LOT of stuff here, but it just doesn't make financial sense, and I can live without many things.
That being said, I do have a nice batch of "nice-to-haves" here now.
Noticeably absent are any western saws. They didn't quite rate high enough on the list of priorities to replace anything in this bag. I am making do with my Ryobi Dick saw. Also missing are more chisels. I find that the three I have (in sizes kinda small, kinda medium and kinda big) are all I need at the moment.
Unloading the above bag, I thought I would document what was in there after I took out the boring stuff like t-shirts and underwear.
This first photo shows from left to right, my home-made tapered tenon cutter ala Tim Manney that I made a couple years back to match my tapered reamer that is already here. Not shown is the blade that gets attached with a c-clamp. There is also some sandpaper backed with foam that Pedder gave me, a few belt buckles for leather work, a couple of maroon and gray scratchy pads, some ebony scraps, a hunk of wenge, some leather wax, and a buttload of slotted screws and Roman nails that I got from Dictum. I bought three bags of the biggest ones they had which are 2 1/2" long. They should be great for clinching.
Next, I brought back my spokeshave roll which I left there after taking it to Denmark. I finally found the blade to my adze, which was safely hidden in a pocket of the tool roll I forgot was there. - Do yourself a favor and don't get old.
I also brought my 5/8" WoodOwl bit which should be great for staked furniture. I also bought some new tiny Proxxon drill bits, and I bought a new tapered drill bit for pilot holes for the Roman nails. For good measure, I threw in my flush cut saw, too. It's small and light.
This wasn't in the bag, I had brought it here a few months ago. I think it is a type 10 #2. There is a few things wrong with it for collecting, but it should make a fine user. It came with that ugly front knob, so I replaced it with a vintage replacement. This plane will hopefully soon get rehabbed and put to work.
My plow plane and a set of blades in a case I made for them long ago.
A mongo 1 7/8" skew rabbet plane. I haven't had good luck with this one yet, but perhaps I can get it working well. This picture also has a pair of dividers (I love me some dividers), a French side-bead plane, and a low-end block plane probably made by the Ohio Tool company.
I have been really missing my 6" adjustable square, so I brought it back. I chose these planes as they aren't my nicest and best ones, but should work well and can be sold when I leave Spain. There is a Sargent VBM 409, which is the same size as a Stanley #4 (I rehabbed this one a while back and it works great), and a #8 sized Sargent jointer. I'm not sure exactly which one it is, I'll have to do some investigating. I got it in this condition as a bargain from eBay. The previous owner rehabbed it, and did a fairly nice job. It should be easy to get this thing working well. I have never used such a big jointer before, so I look forward to getting to know it.
Last of all, I got some wood in the bag. There is a pretty board of black wattle that was sent to me from Austrailia, a chunk of mirabella from Denmark, some quarter sawn oak, and a few bits of American birch for an upcoming project, and also to replace the pine locks in my chest with. I just feel better about a hardwood for these. While I was at it, I made some more of the lock pieces that are attached to the drop panel of the chest out of ash. I'll use these to replace the pine ones that are currently on it. A little overkill never hurt anything. Also in this photo is The Essential Woodworker book, and a bunch of cribbage board pegs.
Not bad for a buttload of tools in a checked bag.
Next I'll have to set up the insides of my chest. I have to figure out how to get all this stuff in here.