Now that all the stock is prepped, it's time to do dovetails.
First, let's admire my workspace:
I can't get enough of the view here.
Moving from my tiny 100 square foot basement woodshop to working with no workholding in a home office does have it's advantages. I really, REALLY like working with natural light. The view above shows the extent of my workspace, but we are looking east in this view, and you can also see there is a north facing window. This means a lot of natural light, without much direct sunlight.
And in Alicante, Spain, there is a LOT of sunlight.
Moving on...
I had some interesting thoughts trying to decide how to cut dovetails with no bench. I figured I would try it using my body weight as a clamp. That should provide more than enough stability, thanks to German beer.
Here is my first set up.
Why not just use a chair?
Ever wonder why it's called a Dick Saw?
I think this might actually work well if one had a western backsaw. With the Ryobi Dick saw, the body mechanics were weird. I couldn't get a good grip on the handle and I felt this was no accurate way to make a saw cut. This is the only saw I brought to Spain.
Time to step back and think.
Luckily, the Frau is out of the house at work. I think I have an idea.
Well well. Look! An IKEA sideboard that is anchored to the wall with lagbolts!
Don't judge me, I'm 100% sure you wouldn't have asked your spouse for permission to use your new sideboard to cut dovetails on, either!
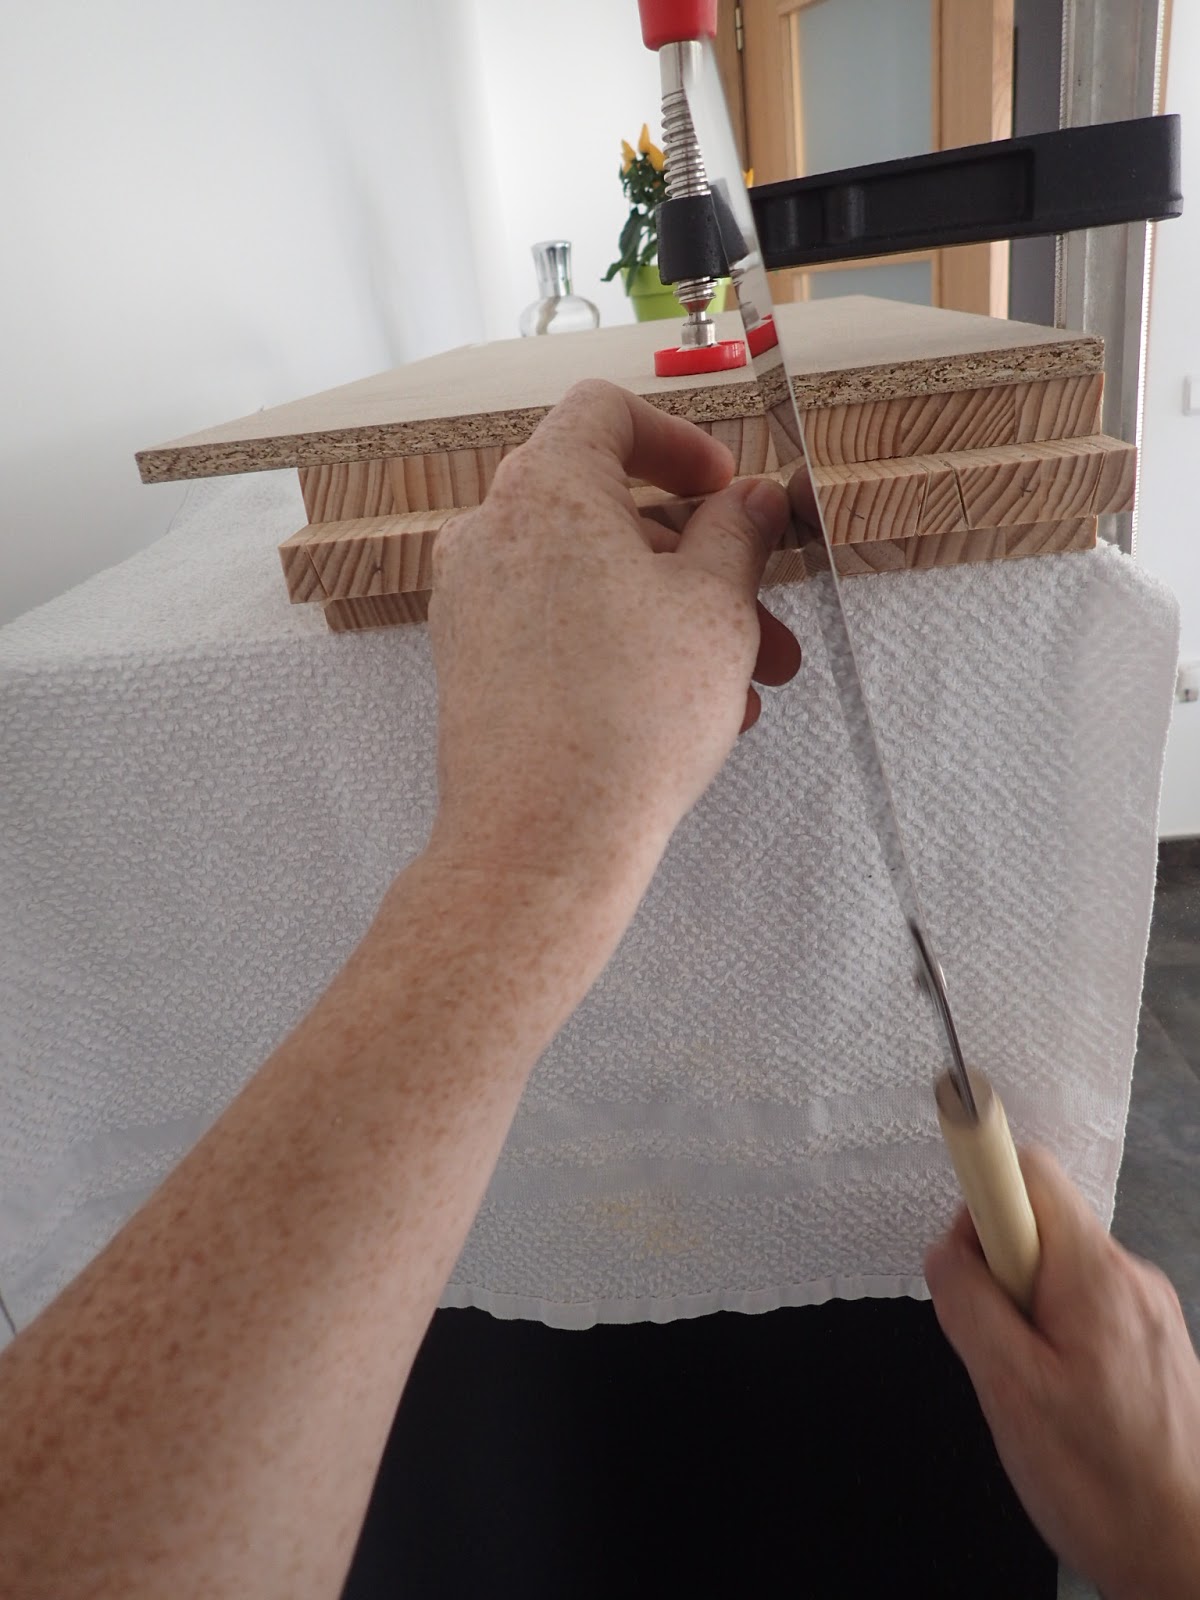
Here is a cringe worthy picture of my setup.
I actually think I did a good job of protecting it from scratches.
This is an ideal setup for use with a Japanese saw. The only modification I made after this was to pull the towel down so it was draping under the cut. An errant cut with the saw would bump into the towel first, rather than screw up this rare veneer.
You can check, I did give myself permission to get a clamp in the first post of this series.
One clamp is all it takes. A Crucible holdfast would work better, but hey! You work with what you got.
Let's have some fun with the self-timer.
Lucky thing the Frau never reads my blog, or I would be in trouble!
My new joinery bench in action.
Action shot.
The results of the first board.
Greg Merritt left a link to a video on YouTube in the comments of my last post. It showed a Korean master cutting dovetails with a setup very similar. Only diffierence in setup I saw, is he was using a very heavy board, and needed no clamp. After cutting the first side at a 45 degree angle, he flips it over and finishes the cut from the other side.
Basically, I guessed at what was happening on the bottom. Turns out a few of the cuts were a little short, but I guess that's better than them being too long!
The book says to chop the waste out with a chisel, but since Jeremy suggested I throw in my bowsaw, I figured I'd use it to saw them out. I like that better.
My Spanish saw collection.
Of course, I took some action shots.
I've never cut pins first dovetails before (also I've never used a Ryoba for dovetails before). I think I like this method for marking out the tails. Everything stays put while I can see what I'm marking.
The board on the side is aligning the boards to be joined together.
Time for an unrelated photo of something that has no relevance to this post.
This is really all you need to know about drivers in Spain.
Back to scheduled programming.
Now it is time to clean up the waste that I roughed out with the bow saw. Usually I would use a holdfast to clamp the board flat to my workbench, but since I don't have one, it's more beer powered workholding.
No one said I couldn't have nice tools.
Here is another use for my fiber board bench. I'll just chop away directly on the floor.
Incidentally, the chisel in the photo is a B.O. Liberg 1" Swedish chisel that was given to me by Kim Malmberg from Finland as a bonus in a tool exchange we did. He turned the handle himself. I find it very comfortable, and the chisel is very easy to sharpen.
One down, three to go!
I was surprised, because I don't make dovetails too often. All of the dovetails went together more or less off the saw. There was very little trimming to get them to fit.
Action photo.
Another close up of my set-up. This time with the towel, which you should never forget.
I hope you understand that I didn't get too many photos of the glue up. Over all, it went very smooth. Since I only have one clamp, I used it on the one spot that was showing a little gap. I think these dovetails will turn out much better than I expected them too.
Next up - how to retroactively install a till which should have been arranged before the glue-up!
Great work Brian. Maybe if you don't already have a kitchen / dining table you could make a workbench that does double duty! The vise could be used with a T-shaped assembly of wood as a serving tray holder. Think of the possibilities!
Adapt and overcome! The dovetails look great but you are living dangerously using the furniture like this. I would have to start sleeping with one eye open. ;)
Maybe a spiffed up version of this is what you need: http://www.popularwoodworking.com/workbenches/schwarz-workbenches/ron-herman-kicking-it-estonian-style
Actually I was thinking Herman's version would be perfect for your situation. Spiffy it up and add a cushion and it will fit perfectly in your apartment. Plus you won't be facing the death penalty if you cut into it at some point. ;)
Come on, who needs traffic pylons? And if they are in your way.... If you would build something like a roman bench (maybe not that heavy) you could use it as seating as well. Don't know if you have a balcony. Perhaps you could use it there.
The fashion here seems to be to enclose your balcony in order to increase the livable space in an apartment, and that is what has happened to our place. But, the office seems as good a place as any.
From a fellow used to the German drivers... I get it But Spanish drivers compared to Italian are great!!! :P
And the sun over Alicante stays almost all year long, and HOT, You'll see!
Have you checked the Tom's Fidgen 'sawyers-bench'? As a bench it have a lot of potential http://www.theunpluggedwoodshop.com/sawyers-bench-germany.html
I equate this to the local at the no-college-students bar back where I went to school who would play pool against anyone, using an old shovel with a bit of duct tape on the end to protect the balls.
Any time someone says they can't cut dovetails in their shop, I'm going to direct them to this post.
Have you given any thought to the milkman's workbench?
Hi Ethan! Thanks for the kind words. That was exactly what I was going for. Although I do have some nice tools, the saw is a run of the mill, all purpose Ryoba. 30 Euros from Dictum. It is the same saw I use for ripping and crosscutting rough stock. The point being, one should use whatever they have.
I'm considering a milkman's workbench, the problem being storage. I think first up is an oversized sawbench. But, I wanted to build at least one real project with none of that.


Great work Brian. Maybe if you don't already have a kitchen / dining table you could make a workbench that does double duty! The vise could be used with a T-shaped assembly of wood as a serving tray holder. Think of the possibilities!
ReplyDeleteNow you're thinking!
DeleteAdapt and overcome! The dovetails look great but you are living dangerously using the furniture like this. I would have to start sleeping with one eye open. ;)
ReplyDeleteMaybe a spiffed up version of this is what you need:
http://www.popularwoodworking.com/workbenches/schwarz-workbenches/ron-herman-kicking-it-estonian-style
You might be on to something, there. I would love to make a roman workbench, but it's a lot more likely I'll be able to find lumber for Ron Herman's.
DeleteCheers!
Actually I was thinking Herman's version would be perfect for your situation. Spiffy it up and add a cushion and it will fit perfectly in your apartment. Plus you won't be facing the death penalty if you cut into it at some point. ;)
DeleteGood idea. We are all agreed the death penalty should be avoided.
DeleteNo workbench, few tools (but nice ones!), a towel, and great-fitting dovetails. There must be significant skill in that mix, too.
ReplyDeleteThanks, Jefski. Never under estimate the usefulness of a towel.
DeleteThis post felt like I was reading The Hitchhiker's Guide to Woodworking.
DeleteAlways know where your towel is.
You caught that, good!
DeleteCome on, who needs traffic pylons? And if they are in your way....
ReplyDeleteIf you would build something like a roman bench (maybe not that heavy) you could use it as seating as well. Don't know if you have a balcony. Perhaps you could use it there.
Cheers,
Stefan
I really like the idea of a Roman bench.
DeleteThe fashion here seems to be to enclose your balcony in order to increase the livable space in an apartment, and that is what has happened to our place. But, the office seems as good a place as any.
Very well done Brian! Amazing what one can do when the will is there! Congrats on your determination!
ReplyDeleteThanks, Aymeric! I'm not done yet, but I feel like I've turned the corner.
DeleteFrom a fellow used to the German drivers... I get it
ReplyDeleteBut Spanish drivers compared to Italian are great!!! :P
And the sun over Alicante stays almost all year long, and HOT, You'll see!
Have you checked the Tom's Fidgen 'sawyers-bench'? As a bench it have a lot of potential http://www.theunpluggedwoodshop.com/sawyers-bench-germany.html
Hi António! You can drive as fast as possible in Italy, and there will always be someone behind you in a Fiat honking for you to get out of the way.
DeleteThe saw bench you directed me to has a great idea! A removable shave horse attachment!
you forget to mention a Fiat... "falling apart"
Deletedisclaimer I drive a Fiat Punto (my 4th I crash the other 3 not my fault though) LOL
Let me guess: they were all crashed in traffic circles.
DeleteI equate this to the local at the no-college-students bar back where I went to school who would play pool against anyone, using an old shovel with a bit of duct tape on the end to protect the balls.
ReplyDeleteAny time someone says they can't cut dovetails in their shop, I'm going to direct them to this post.
Have you given any thought to the milkman's workbench?
http://www.popularwoodworking.com/workbenches/schwarz-workbenches/the-milkmans-workbench-in-use
Hi Ethan! Thanks for the kind words. That was exactly what I was going for. Although I do have some nice tools, the saw is a run of the mill, all purpose Ryoba. 30 Euros from Dictum. It is the same saw I use for ripping and crosscutting rough stock. The point being, one should use whatever they have.
DeleteI'm considering a milkman's workbench, the problem being storage. I think first up is an oversized sawbench. But, I wanted to build at least one real project with none of that.
Cheers!
You might be able to hide something like this:
ReplyDeletehttps://wesleyworkswithwood.wordpress.com/2016/10/04/my-fathers-workbench/
in an EKIA closet.
Sylvain
I like the idea. I wonder if it's stable enough to plane on?
DeleteGreat progress!
ReplyDeleteI have to hurry up to complete my build before you do :-)
Cheers Jonas
I figured I was going to be saved by your Honey Do list. I suppose I need to get my act in gear!
Delete