Sunday, August 31, 2014

Day 3 Stick Chair Build - Little Things

What I imagined we would be able to accomplish today was a little bit different than what we were actually able to do. I was thinking that it would be neat if I could get my legs shaped and driven home, along with a good start on the upper half of the chair. This would leave me tomorrow with a bunch of extra time for doing something unexpected like knocking out all the parts for a Roorkee chair.

Reality can be an annoying thing.

Shaping the legs isn't complicated, but care must be taken to get them to look the way you want. I think Jonas and I both underestimated how long it would take, even with every Danish cowboy trick we could think of.

Executing the final cuts on my seat blank.

I chose to use as much of the blank as there was there for this chair, resulting in a little bit of live edge remaining.

This Lee Valley spokeshave really worked well cleaning up the endgrain on this elm.  Alcohol really helped too - I mean rubbing alcohol on the endgrain, what did you think I meant?

Entertaining ourselves in the shop.  A little immaturity helps you stay young.

The Viking Hoarde.
Jonas' parents stopped by for the day.  Mr. Jensen has a hobby of collecting quality tools at auctions in Sweden.  He brought along a box of goodies for us to pick through, and I came out with my very own hoarde of essentials I didn't know I needed.
Jonas and his parents.

Yes, alcohol really does help with the endgrain.
Back to work.  I didn't even think about the fact that I wasn't done shaping the seat yet.  It wound up taking me until lunchtime to finish it.  This was another one of the little things that I didn't account for when thinking about today's plan.
Beveling the underside of the chair to reduce the profile and give the chair a more delicate look.  Here is a good view of the different colors in this chair blank.  The dark stuff on the near side is extremely hard and of a completely different feel than the rest of the wood, which is challenging enough.  I roughed this profile with a drawknife using slicing cuts, and crept up to my line with my jack plane.

Jonas showed me how to make tapers on the jointer using Glen Huey's technique.  Trust me, I was very mindful of where my body parts were while using this beautiful but scary old machine.

Olav seems to be able to do twice as much work in half the time as me.

Jonas chose to turn his legs round on his lathe.  I think they turned out nice!

I used my Moxon vice to hold my legs for octagonalizing.

There is more than one way to taper a cat.

After shaping the legs, I roughed out the tapered tenon on Jonas' lathe.  He has a gizmo on his that will copy any shape, including the six degree taper we are using for the tenon.

The bottom two are started with the template cutting thingie.  After that, I flipped them around in the lathe so I could get closer to a finished shape.  The top one was finished up with a six degree rounder.

Once you commit to boring the holes, you should follow through with confidence!  Notice I have John Brown's book and Drew Langsner's full size drawing close at hand.  I did not stage those in the photo on purpose, I was constantly referring to both.

After boring a hole, I use a reamer to make the tapered mortice.  The lines and layout gauges in this photo helped me to dial in to the exact perfect angles for the legs.

Driving the legs home.

It's starting to look like something to sit on.

Jonas and I both are making some progress.


It was interesting keeping my eye on what Jonas was doing today.  We both chose very different ways to do our legs.  One could learn a lot from him.

Even though we didn't get done with as much as we thought we would, we actually got a lot done.  I would rather take my time to do the job right than rush through the project not achieving the level of quality that I expect.

Saturday, August 30, 2014

VIDEO - Jonas' Insane Idea - Stick Chair Day 2 addendum

After roughing my chair's seat by hand with an adze, I might try to come up with a different idea if I had to saddle a settee, which requires removing about five times as much wood. But, when Jonas first told me he wanted to saddle his bench with a plunging circular saw cut dragging it sideways across the wood, I thought he was crazy. Then he said he wanted to do it freehand, I thought I would have to call an ambulance.

Genius, or nuts?  You decide.
 I have to say I was wrong. He makes it look easy and as natural a way to use a circular saw as could be. I'm not sure I would ever try it, but I might. If you try this, please be careful and take very light cuts.


Please visit Jonas' blog: www.mulesaw.blogspot.com

Elm is Awesome - Stick Chair Build - Day 2

Elm is a pain in the neck.

Elm is easy to plane, and then all of a sudden it tears out just as you do one too many swipes.

Elm is gorgeous.  It is strong, resists splitting, and is a traditional wood for these kinds of chairs for these properties.

One of the interesting parts of my seat blank.
 Today was a productive day for Olav, Jonas and I.  Jonas and I decided we wanted to try to get our seats saddled today in order to free up those tools for other woodworkers joining tomorrow.  Unfortunately, life happens and none of the other woodworkers who were going to join us will be able to come, so it will just be the three of us.

Jonas did some amazing things that I have never even heard of to get his settee blank ready.  His bench is going to be absolutely stunning.  Check out this video of him saddling his bench seat with a circular saw.


Enough artsy talk, have a gander at some pics:

Jonas set this nice try plane up as a long scrub.  It was perfect for this job.  The elm behaved exceptional for this, that is except one of the more 'interesting' parts of elm had some nasty tear out that required some care in eliminating.

With all of the figured parts, I decided to use my toothing plane after scrubbing to get everything nice and flat.  I then used my 50 degree (62 degree total) blade to smooth with not much tear out, besides the one spot from scrubbing which was eliminated during saddling.

I bought this short-blade-honing-guide-adapter-thingie from Lee Valley.  I didn't realize it only worked with a Lee Valley honing guide.  It turns out that if you set it up this way, it works perfectly fine, even though you won't find this method in the directions.

That high-angle blade really does the trick on any kind of grain.

We ripped some ash bending stock during one of our few side adventures today.  Jonas really can work this mill efficiently.

My blank after smoothing.  I guess these photos aren't really in order.
 
After smoothing, I roughed the saddling with an adze.  As per Chairman Brown, I had it vertical in a metal vice that Jonas had.  After a couple whacks, I realized it needed a bit more support, so I put this bit of scrap behind the blank which made things a lot better.

Money shot.

Bent.  I guess his real name is Bernie, and begs for apples.

Saddling mostly complete.  I cleaned up my less-than-skillful adze work with Moby Dick, and finished the shape with a scorp, a travisher, a couple of spokeshaves, and a few scrapers.
Elm is awesome.

Thursday, August 28, 2014

Modern Danish Welsh Stick Chair Build by an American living in Germany, Day 1

I made it to Denmark!  Last night after a drive only a little more than twelve hours, I pulled into the Mulesaw compound when the weather and the light were just perfect.

The Mulesaw Family Compound.
What a beautiful place this is.

I actually beat Jonas home.  When he finally got home from work, we went out to the shop and spazzed out over tools and chairs and stuff until early in the morning.

After a few hours sleep, we got up and got the shop ready for our chair build.  Altogether there will be either four or five people building Welsh Stick Chairs here over the next few days.  Unfortunately, not everyone could make it today, so Jonas and I figured we would rough out all the parts so all everyone would have to do Saturday is pick out their parts, and start shaping them.
Jonas' shop.  There should actually be room for a few people to build in here!
We started by roughing out seat blanks.  We took our time laying out seats on all of the different boards we got, avoiding anything bad in the wood like barbed wire (really) and punky wood.
This is what happens to your hair when you are at sea with no one to make an appointment at the barber for you.
Jonas has an amazing set-up here.  About six weeks ago, he cut some 8/4 elm from a log he got just for this purpose.  A chainsaw made easy work of the blanks as soon as we figured out where to make the cuts.
We wound up with seven seat blanks, and a blank for a settee.  Some of the seat blanks have grain going fore and aft , and some of them have the grain going starboard to port (a little sailor lingo there).

Mrs. Mulesaw snapped some candid photos of us, so I figured fair is fair.  She's moving horse manure out of the stables.
One of our distractions today is we decided we wanted to test steam bending.  This decision cost us a lot of productivity, but we got to try a bunch of cool things.  The first thing we thought we would try was to rive an ash log for straight grain steam bending.  There was an ash log nearby, so we figured we'd give it a whack.
This was interesting.  This log is right next to our waste from the seat blanks.
Not doing this often makes you tired fast.  After a few whacks, we traded off until the log was apart.
He-man!
It turned out that log was so twisted and knotty, there was no way we were going to get anything resembling a stick we could steam out of it.  This reaction wood likely will go in the burn pile.
Ash log #2.  Notice how good a man with sideburns looks with a broadaxe.
The second log was a lot straighter, but straighter doesn't necessarily convert to straight enough.  We needed to go hunting for straight grain in the air-dried pile.
Hell Boy in the rafters.
We found some stuff, and were joined by Olav, a local German Zimmermann who thought it would be cool to build chairs with us.  I'm glad he did, and it is neat to see an educated aproach to this rather than what we've been doing.  It'll be cool to see what he comes up with.
Jonas the Furry with Olav the Great.
Jonas had an interesting idea for a steam box, which included a galvanized pipe standing on end.  In the end we broke two sticks and learned what not to do.  Tomorrow, we learn even more what not to do.
The french-fry steaming contraption.
We finally got all of the legs roughed out, with some focus provided by Olav.  Not only that, we got a metric buttload of sticks roughed out, too.  After all that, I had to do some work on my chair.  I came up with a pattern for my laminated arms, and roughed it out on the band saw before resawing it.
Resawing my arms.  No body parts were harmed in the production of this photo.
Elm is a gorgeous wood.
Book matched arm blanks.
It will be interesting if my thoughts for this arm scheme fulfill the thoughts I have in my mind for it.
Great Danes!
Olav is going to work on a couple of seat blanks that wound up with pith in them at his shop and bring them back later.
Steam failure #1
Did I mention that elm is gorgeous?
An interesting bit I am considering implementing into my piece.
That's about it for today.  More finding out what not to do steaming tomorrow.  Oh!  I almost forgot.  Jonas cut up an entire log for me for a tiny piece that I needed, and I wound up not needing it.  More about that later, with a video or two.

And Saturday, beware of the Wrath of Snakeye!  

And check out Jonas' blog for his version of events.

For the other posts in regarding the Welsh Stick Chair project, click here.

Wednesday, August 20, 2014

Stick Chair Build - Materials, Tools and Timeline

It's weird how time flies.  only a week or so to go before our Great Welsh Stick Chair Extravaganza in Denmark!  I had intended to drag out a whole series of blogposts intended more than anything to help me organize my thoughts, but as I am not one who normally does so well with organizing and planning things, we'll just cram all those thoughts into this one blog post.
18th Century child's painted 5-legged stick chair made from oak and elm.
Photo courtesy Welsh Vernacular Furniture.

Materials:

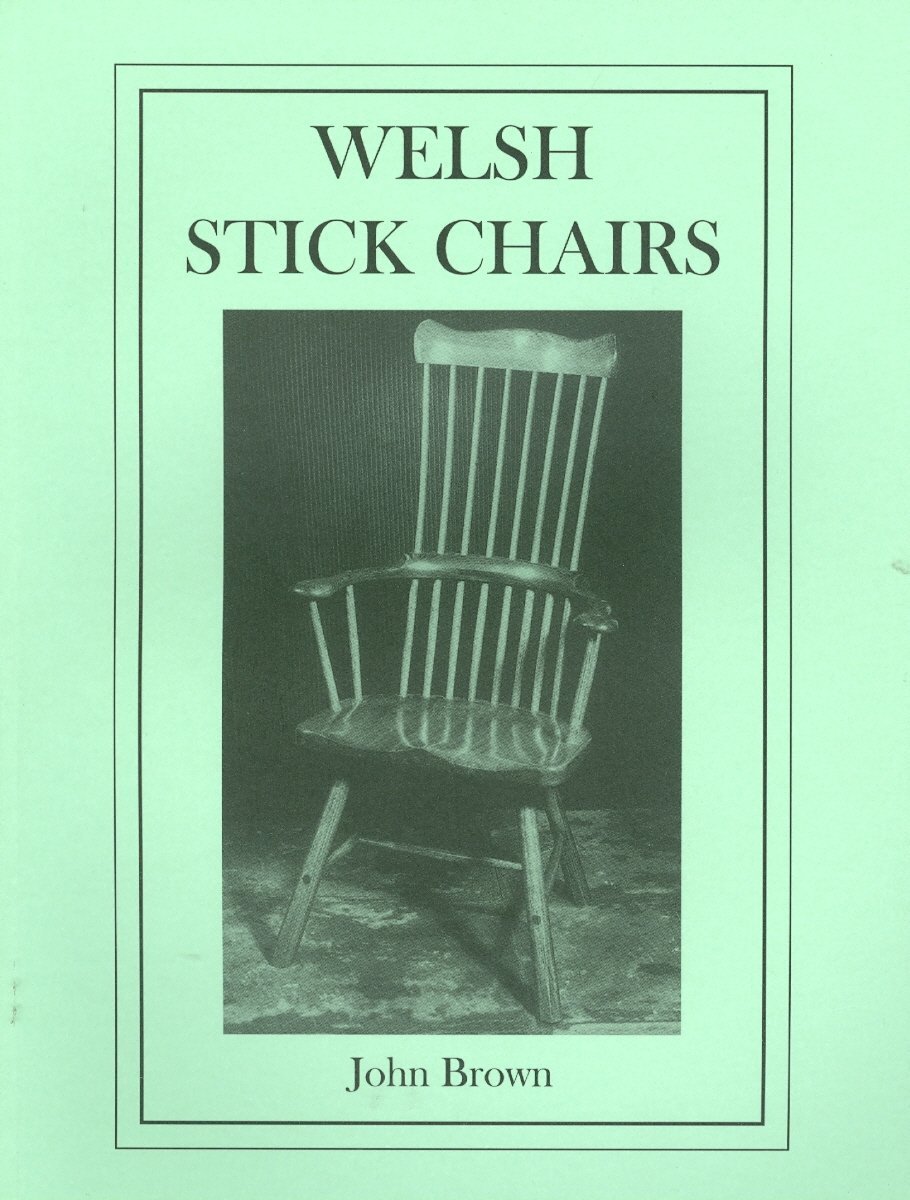
From what I can tell, stick chairs are made from whatever is available.  Most of the old ones have a seat from one plank, which means you need a pretty wide board.  I think this is the main reason so many different woods are used in these chairs.  

From a purely technical standpoint, elm is a perfect wood due to it's resistance to splitting.  Your chair won't break just because your cousin Tony comes and plops in it.

Looking around the antique furniture sites, it appears that just about any wood was used for these chair seats:  elm, oak, ash, even sycamore and yew.  American Windsor chair seats seem to have a preference for white pine.

My guess is the species of wood isn't so critical for normal modern use.

Modern chair makers seem to use woods that look cool with great effect like walnut.  Drew Langsner mentions in his book that an all cherry Windsor is a modern invention, but makes a spectacular chair.

Back to the seat for Welsh stick chairs, I personally think the wood used could be either kiln dried stuff, or mostly green wood.  The advantage with green-ish lumber is that as it dries over time and the wood shrinks, it will also shrink around the leg tenons and make those joints even tighter.  When was the last time you have seen a mass-produced chair tighten itself over time?  Another big advantage is that green wood can be easier to work on processes such as saddling the seat.

For our build, we are lucky enough to have a couple of really big elm logs that Jonas has milled into seat blanks.  Since he milled them only about six weeks previous to our build, it is doubtful they will be bone dry.  I am hoping this will make them a bit easier to saddle.  I have no worries about the wood being too wet, although Jonas expressed to me a concern that he hopes the seats don't check as they dry.

Time will tell.

We chose to use kiln-dried ash from the lumberyard for the legs.  Chair makers seem to stress that leg stock should have as straight of grain as possible.  Riven stock shaved down on a shavehorse when it is green and left to air dry over time is perfect. 

We don't have dry rivings to work with, though, so my thought processes wandered to regular, easy to get from the lumberyard kiln dried stuff.  When I went to look, I figured I'd check out what they had in oak, ash, walnut, or anything else that is ring pourous, or semi-ring pourous with straight grain.  Kiln dried lumber has to be cut on the saw, so the straighter the grain, the less problems with runout.

The first pile of lumber I found was some 8/4 white European ash (Fraxinus exelsior) that was perfectly arrow-straight and no knots.

I bought it and looked no further.  Beautiful stuff.

I cross cut it to leg-like lengths so it will fit in my VW Golf for the 12-15 hour drive to Denmark.  

There should be plenty of ash for about six chairs, using it for both legs and sticks.  If there's not quite enough, elm will work for the sticks, too.

Tools

My guess looking at these chairs, is that stick chairs were made using tools that were likely to already be owned by the person who made the chair.  Someone who likely was not a professional chair maker.

That being said, I think that having a few chair making tools might give us an opportunity to make some chairs with a little more refinement  (read: likely to be allowed in the house by SWMBO) than the chairs in my last post.  As much as I would love to see someone make a three-legged chair with an arm rail rived from a curved tree-branch, I know it won't be me.

So, I made a list of a few tools that most of us woodworkers might not have but would come in handy for chairs.  I fell off the anarchist's wagon and succumbed to the temptation of buying many of these tools.  That means I better make a few chairs at least to make  it all worth it.
  • Gutter adze - an adze with a curved blade is used for roughing out the hollow when saddling (shaping the seat blank to be comfortable) the seat.
  • Draw knife - a knife with the handle at each end that you pull to shave wood.
  • Spokeshave - basically a small plane with a handle on either side.  They have soles that are flat, rounded front to back, or side to side.
  • Scorp - mostly called an in-shave, I prefer the term 'scorp.'  It's shorter.  basically it is a rounded draw knife.  This tool is used after  the adze as an intermediate tool for saddling the seat.
  • Travisher - for lack of a better explanation, it is a spokeshave that is rounded front to back, as well as side to side.  Used after the scorp in seat saddling.
  • Tapered reamer - does exactly what it says - makes a round hole tapered.  Tapered holes are great for chairs.  Besides being strong, the angle of the hole can be adjusted a little bit right up to the last turn of the tool.
  • Bending form - more of an appliance than a tool - it is a block of something that is the shape you want your steamed wood to be.  You wrap the steamed wood around it and the form holds it in place until it is cool and dry.  We'll be using one to steam-bend arm rails.
  • Hammer - this really isn't specifically a chair maker's tool, I just wanted to see if you are still reading!
I'm sure there are plenty of other tools we'll need, these are just the ones I could think of off the top of my head that aren't really needed much in the woodworking I usually do.

Timeline

Here is the part where some of you experienced chair making folks out there could provide some extra-valuable input to let me know if this is realistic or not.  I have given us four full days to build these chairs.  That is because that is the time I was able to take off of work.
  • Day 0:  Travel - it's a long ways for me.  If I can't do it all in one day, I'll stay overnight somewhere and finish the drive early in the morning on day 1.  
  • Day 1:  Make chair parts - as in roughly dimensioned wood.  We will all need a seat blank, leg blanks, stick blanks, arm rail blanks, and a comb (the top bit of wood that is nearest your head when sitting) blank if making a high-back version.  Bring your earplugs.  My plan is to make a laminated arm rail so I can hopefully complete a chair while in Denmark, but I want to steam bend a rail too, to take home and make another chair once the steam bending cures.
  • Day 2:  Shaping and bending - Steam arm rails and combs if you want a steam bent part.  Combs are traditionally carved out of a thick hunk of wood rather than steam bent, but hey, there are no rules to this!  Shaping of parts that we won't steam may include saddling of seats, turning or planing legs, turning or shaving sticks, sawing out and shaping laminated arms and combs.
  • Day 3:  Continue shaping, shaving, scraping, etc.  Also, today we will aim to drill holes for the legs and taper tenons on the legs.  After that it should start looking kind of chair-ish.
  • Day 4:  Get the upper carriage of the chair together.  Lots more drilling holes and fitting tenons, I expect.  Anyone who actually gets finish on their chair this day gets the prize of smelling it the whole way home!
  • Day 5:  More travel.  I'm sure Jonas' family will be ready for some peace and quiet.
There you have it!  No promises that we'll get to stick to the plans.  I think that there will be lots of time adjusting going on, as since this isn't a woodworking school there will not be a standard kit of tools for each of us to use.  I expect that tapering legs will be a good thing to do while I am waiting for the scorp.

If you haven't seen what this is all about, check out my last post to read all about it! (It's OK, really.  That post has more pictures.)

Tuesday, August 19, 2014

The Great Welsh Stick Chair Extravaganza in Denmark

Perhaps the title is a bit much.

Painted ash chair with sycamore seat, ca. 1800.
Courtesy Paul Dunn Antiques
Jonas, aka Mulesaw, and I have been talking about getting together to make Welsh stick chairs ever since I read John Brown's book a couple years ago.

A great read if you are interested in chairs or not.
Jonas' neighbor needed a couple old elm trees removed, and we're in business.  In about ten days I'll drive the 12-15 hour trek to a remote part of Denmark, and we will get started.  It looks like there should be around three more people there to do the build with us, perhaps even another blogger who is trying to figure out how to drive to this part of Denmark from England with his family.  

Good luck, Travis, you'll need it!

The great part of this build is that none of us has actually ever built any kind of Windsor chair before (unless you count my entry in the Shop Stool Build Off), so we'll all be figuring it out as we go.  The only real help we will have is our collective woodworking knowledge, John Brown's Book, and Drew Langsner's book.
Drew Langsner's book should be a big help.
So what the heck is a Welsh stick chair, you ask?  Some call it a rustic Windsor.  Basically, like a Windsor chair, it is a solid plank for a seat in which the legs and upper portion of the chair are attached. However, while the quintessential Windsor chair is a highly refined piece usually made by a chairmaker, an authentic antique Welsh stick chair is a piece of furniture of necessity, or vernacular furniture made by a craftsman not necessarily a professional chairmaker, or even a professional woodworker more than likely for his own personal use.

Looking at examples of antiques, it becomes clear that these chairs are made by people who need a chair using whatever materials and tools they happen to have on hand.
From the Museum of Welsh Life
19th century.
Sometimes they have four legs, sometimes only three.

A nice three-legged version of ash and sycamore, 18th century.
Courtesy Welsh Vernacular Furniture.
There really doesn't seem to be any rules with these chairs.  John Brown says the legs on Welsh stick chairs are inset further than on English chairs, and often sport a dramatic raking angle to splay the legs out.
Fantastic splay to the legs on this oak and sycamore chair from the early 18th century.
Courtesy Welsh Vernacular Furniture.
As far as the legs go, they can be either turned round or octagonal, often tapering from a larger diameter base to a thinner top.
An ash chair again from the early 1800s.  I love the tapered legs.
Courtesy Paul Dunn Antiques.
As you can see from the photos, some seats are flat, some are carved with a round seat, and some are fully saddled.  I think it probably depends on the tools and skills of the craftsman.

As far as the arms go, there seems to be mainly three methods for the curved arm rail:  laminated from two or three pieces, steam bent, or carved from a single block of wood, such as a bent tree branch.
Ash and elm chair from the late 1800s or early 1900.  You can clearly see the different pieces of wood making the curved arm rail on this chair.
Courtesy Welsh Vernacular Furniture.
Solid oak chair from the early 18th century.  It's hard to tell, but I think this arm is steam bent.
Courtesy Welsh Vernacular Furniture.
Ash chair with a cool one-piece carved arm ca. 1760.
Courtesy Richard Bebb of WelshAntiques.com.
Find Richard's book on antique Welsh furniture at welshfurniture.com
As far as materials go, we will use elm (Ulmus sp.) from the logs that Jonas got last year and started to mill on his mulesaw for the seat blanks.  This is extremely traditional.  Elm resists splitting and should make a very strong chair.  Legs will be from some kiln dried ash (Fraxinus excelsior) that I'll bring up from my Munich lumberyard.  The idea is that if the elm isn't quite dry, or if it is still fairly green, it will shrink around the bone-dry ash leg tenons and never let loose.  I chose ash rather than oak or something else because these particular ash boards that were in stock that day had really nice straight grain and were beautiful.  We may use either ash or elm for the sticks, and probably elm for the steam bending.

Already I feel like I am doing it wrong, as I have collected an array of chair makers' tools over the last weeks in preparation for this class.  On the other hand, not having made one before, I think it might not be a bad idea to work with tools that will give us all a reasonable chance for success.

I am totally stoked to do this build with a group of like-minded people.  It will be a great experience, even if my chair fails.  Keep an eye on this blog as well as Mulesaw, as I'm sure this project will be one for the history books.  OK, perhaps a bit more exaggeration, but it should at least be entertaining.

The Frau isn't too crazy about this form of chair, so I may try to modernize my design a bit to make something that she will be crazy about.  If that doesn't work, I could always use a new chair in my office at work!

Thanks to Paul Dunn, Jonathon Holder and Richard Bebb for being kind enough to allow me to use photos from their respective antique businesses for this post.  Please check out their websites for pics of some fantastic furniture.

For other examples of Welsh stick chairs (inluding some neat modern ones), check out this link on Pinterest.