Showing posts with label Welsh Stick Chair. Show all posts

Saturday, September 22, 2018

Danish Chair Building Extravaganza! - the Plan

Jonas during the first DCBE in 2014
This year's DCBE is going to be amazing. I just know it.

This is the third time we've gotten together at Jonas' place in Denmark to build chairs. The first time we had the general theme of Welsh stick chairs. Last time we made Roorkee campaign chairs. This time it looks like we'll be going back to some kind of Windsor type chair.

These rules have always been pretty loose, basically anyone is allowed to do whatever they want.

This year has been a bit hard to pick something, as I'm living in Spain temporarily, and bringing a chair back with me on a plane from Denmark is problematic.

That problem aside, I really need a proper office chair. So what should I make? 

Naturally, something completely unsuited for shipping or working in, a rocker!
Photo courtesy Elia Bizzarri. He built this stunning chair.
It's only been a couple of weeks since I've decided on it, but ever since I saw this chair called Velda's rocker on Elia Bizzarri's web site, I knew I had to give it a go. Jonas said if I finished it, I was welcome to leave it in his summer house until someday when I can go fetch it.

Who knows when that will be, as The Frau has no interest in a chair like this being anywhere in sight of anywhere we live.

I gotta be me. I've been dying to make a chair like this.

I'll not be sticking too strictly to the design, as all I have to go by is photos of Velda's rocker on the internet.

It turns out this chair was designed by Curtis Buchanan, whose chair making videos on YouTube I watch whenever I have the chance.

I sent both Elia and Curtis an email making sure there was no problem with me using the design. I even got a few tips from them both!

When it was first released, I bought Elia's video about building a continuous arm rocker, and have been wanting to build a chair like this ever since. I highly recommend the video. There are a lot of things in that video, as well as Curtis' YouTube videos that will help during this build.

My plan is to build a chair with similar lines to Velda's rocker, but with more of a stick chair feel that has been the mark of the chairs that I've built up until now. I think I'll turn very few parts on this chair, instead going for octagonal shaped parts, as I like that.

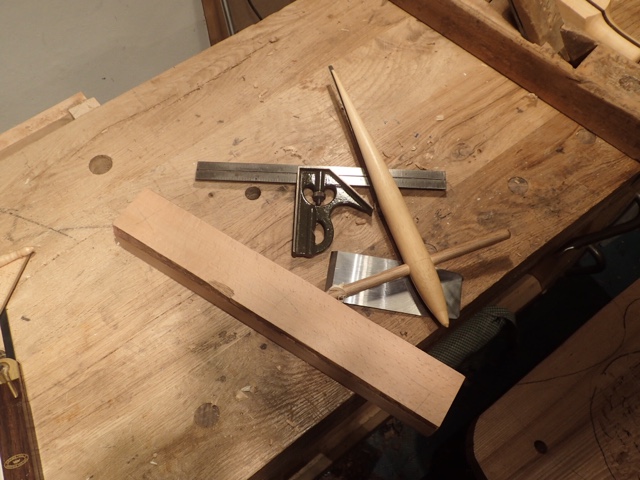
I'll be able to take a few tools in my checked luggage, including my tapered reamer, a roll of spokeshaves, a travisher, a two handed scorp, an adze, and whatever other bits and bobs I can fit in my suitcase. Hopefully Norwegian Air isn't too strict about their weight limit.

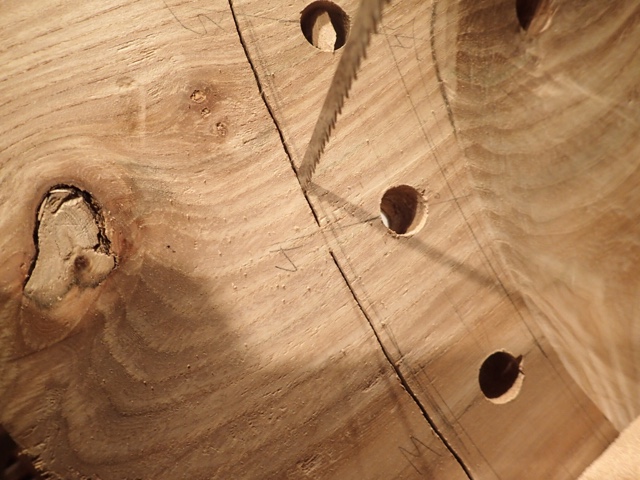
Jonas said he has solid, single plank seat blanks available in both elm and whitebeam. He probably also has some ash available, and an oak log. There also always seems to be a bit of apple flying about. We'll see.

Likely, all I will have to steam bend is the crest on this chair, which looks like it shouldn't be too much of a problem. I might do some bending to the spindles, too, but I think we'll see what the wood tells me I should do.

Stay tuned, as I plan to post daily about the event, as usual. Also, this time I'll be putting pics up on Instagram under #dcbeiii. Of course, I'm sure Jonas will also be posting on his blog, mulesaw.blogspot.com.

Wish us luck!

Saturday, September 8, 2018

The Third Bi-Annual Danish Chair Building Extravaganza

Woohoo!

It's that time of every couple of years again.

Me 'n' Jonas
I'll be heading up to Denmark in two weeks to participate in the DCBE III. I'm really excited.

We've tried to make a tradition of getting together at Jonas' place every couple of years for a week or so of chairbuilding. Last time we built a bunch of Roorkee chairs, and it was a blast. The time before that was all about Welsh Stick Chairs.

This time is weird, in the fact that we haven't settled on what we want to build yet. Not really.

The idea of rocking chairs has come up, along with more Roorkees.

It could be that I'll have to wait until I see the wood we'll use and see what it tells me it wants to be.

However, I am leaning toward some kind of Welsh stick chair again. Perhaps something with a higher back than last time.

The only thing that Jonas and I have decided on for sure, is that we will make a run of tapered reamers.
My tapered reamer made by Elia Bizzarri.
My tapered reamer has been great. This one is set at six degrees, and I find it a very precise tool. Much more accurate than the twelve degree reamer sold by Lee Valley. That one is pretty good, but if you really want to dial in a leg to the nth degree, you should use this style of reamer.

I'm the only one I know who has one, so we thought it might be fun to build some for ourselves.

But that's just a side project.

I think the Welsh stick chair I built at the first DCBE was the first project I made with this tapered reamer, and I have been hooked on staked furniture with tapered mortises ever since (much to The Frau's chagrin).

Maybe a Welsh rocking chair.

This time I'm not driving up there, so I'll be able to take a lot less luggage. In the past, I've brought along lumber, a toolbox, lots of chairmaking books, German beer, and who knows what else.

This time I'll be limited to a checked bag and a carry on.

I'll probably bring the chairmaking tools I have here, including my reamer, my spokeshaves, a travisher and scorp, and perhaps a few other little goodies.

Unfortunately, I'll not be stopping in Munich first where I have the rest of my chairmaking tools and jigs, a hardboard template for a seat, chairmaking books like Peter Galbert's and Drew Langsner's (both of them have been invaluable in past DCBEs). Maybe someone else will have some of that stuff there, or perhaps it's time for us to jump off the deep end and build a chair the way it was meant: with whatever tools and knowledge you happen to have with you at the time.

Stay tuned, as Both Jonas and I will be posting about the DCBE III like mad. You can also follow the fun on Instagram. I'll be posting with the hashtag, #dcbeiii

In the meantime, you can review what we've done in past DCBEs by clicking on the tab at the top of my blog, where I've tried to collect links to everything that's happened before.

Wednesday, October 19, 2016

The Second Bi-Annual Danish Chair Building Extravaganza.

That's a fancy name for the fact that I'm going back up to Denmark to build chairs with Jonas again. The last time we did it was at the end of August 2014.
The Mulesaw house with a couple of the young 'uns running around.
The pictures I have from last time are brilliant, because the weather was so nice. I have a feeling I won't be wearing shorts and short sleeves like I am here in Spain as I write this.

It should be a great time. Hopefully at least as good as last time, which was an amazing experience. Jonas has two lumber mills in his shop, and woodworking using as much wood in whatever dimensions you want is not something that most people get to experience.

This time we have some celebrity attendees. Alex the Austrian will be joining us. He teaches woodworking in Austria. I first met him and Jonas both when we all were in Christopher Schwarz's first ever ATC class at Dictum back in 2011.
Brian, Jonas, and Alex, along with Jonas' son Asger at Dictum last winter.
The other celebrity we are expecting for a couple of the days is Pedder, from Two Lawyers Toolworks and the Old Ladies blog.
Me, Pedder and Alex earlier this year.
Pedder is world renown for the beautiful saws that he and his business partner, Klaus, produce. Astonishingly, Pedder admitted this will be his first actual piece of furniture that he will build. I suppose one might as well start with a Windsor chair in the shape of a bar stool.

Finally, we are expecting our special guest superstar celebrity, Olav the Magnificent.
Jonas and Olav.
At least I hope he makes it. He is in France at the moment and might not make it back in time. I look forward to seeing him again. I learned a lot from him last time I was there.

Jonas' place is perfect for Widnsor chair making. He has access to huge elm logs that are perfect chair seat blanks. With that in mind, Jonas, Alex and I have decided to build Roorkees instead.
Two of my Roorkee chairs.
I know, it doesn't really make sense, but they are fun projects, and both Alex and Jonas haven't built one before. I ordered some leather, and will bring my leather tools with me.

Alex has a nice burgundy side of Latigo leather and wants a pair of chairs. Jonas has a beautiful chestnut colored double shoulder, and I have a buttload of black, alligator skin pattered leather. And I need to fix my black chair in the above photo.
Jonas with his mom and dad. I hope to see them, too!
I've long thought that a Roorkee chair is a good two day project. I'm hoping so, because I also want to build a pair of staked sawbenches like the one in the Anarchist's Design Book and ship them to my workspace in Spain. A pair of those should make my woodworking life about 9000% easier.
Lots of fun was had last time.
Previous to the last time I went, I posted a bunch of thoughts about Welsh stick chairs (like this one), because that's what we all built. This time I haven't done that, because I've had other things going on, but I have been looking forward to this trip for a long time.
Bent. He likes apples.
I should probably start fasting from now, as the Danes tend to eat like Hobbits. It seems they know everything about second breakfast, elevensies, etc.
Some elm logs out back. The big one is a monster.
Keep an eye on this space, the Mulesaw blog, and I suspect Pedder's blog for news of what's happening next week. I should also have some pics up on Instagram. It should be a good time. If you are lucky, I will try to get a video of Jonas' dad telling his story about how he acquired the original Milkman's Workbench.  :o)

Wednesday, August 5, 2015

June Chair Build - Finished in the Nick of Time

Another day or two, and I wouldn't have finished this chair in June!
Chair is done.
All kidding aside, I'm glad I took the extra time to do this chair properly.  Although it isn't perfect, I am very pleased with the shape and I learned a lot.  Mostly thanks to Peter Galberts' book.

Here are a few pics of the last part of the build.  The first is of the wedged leg from the top of the seat.  I wound up reaming the holes quite a bit larger than the 5/8" which is usual.  I did this because I felt it made for a stronger joint, which I think was necessary due to the extreme splay and rake of the legs.
Fumed oak leg with an elm wedge in the elm seat.
There is a little spring to this chair.  The legs tend to splay a little more when you put your weight in it, but it feels solid to the sitter.  The back springs a little, too.  I'll let you know if anything ever breaks.
Small chamfer on the feet.
I used a block plane to chamfer the feet.  This chair will live on a wooden floor, so the intent is to put some felt protectors on the feet to avoid scratching anything.  I have only ever had good luck with the felt protectors that you nail in.  The sticky-tape ones tend to come off over time, and the next set doesn't stick as well as the last.

Here is a pic of the chair while dry-fitting the back.  This was the first time I got to see the whole chair together in one piece.  All that was left from this point was to figure out how to permanently attach it.  I decided to wedge everything.
Dry fit of the back.
Here is how I did the blind wedges:  I cut some wedge stock from some scrap mahogany I had laying around (it was the right width).  I sawed a kerf in the end of the stick a little less than the depth of the mortise.  I placed the wedge loosely in the kerf with glue on one side, slopped glue around the end of the stick that will enter the mortise, and beat the crap out of it with a mallet.
Shortly before being driven into the mortise.  I did actually trim this wedge a little shorter right after this photo.
The idea is the wedge will force the ends of the stick in the mortise apart a bit making the joint tighter the farther it is driven in.
Imagine glue everywhere.
This went relatively smoothly.  To drive the sticks, I didn't clamp it in my face vice, I clamped the crest upside down on my bench to my planing stop.
Driven home.
For the bottom, I used through mortises and was able to drive wedges after the sticks were in place.  Once I did this, I flush cut them so they wouldn't be visible when looking at the chair.
Through mortises for the sticks in the seat.
And that's it!  This chair really wouldn't take too long to make if one was able to spend a few days uninterrupted.  The reason for me was I had not much time to do woodworking during this project, I had breaks of a week or so between shop sessions.  Even so, this project didn't really take THAT long.  I recommend a chair in this style to any aspiring chair maker.
The finished chair.
I'll soon post some more glamour shots of the chair, along with some of the more technical aspects of it and the build.

Saturday, July 11, 2015

Slow Progress

Boy, this June chair build is moving along right on time.  I'll surely be able to finish it by next June!

I've had only a couple of short shop sessions since the last post, but I am pleased with what is happening so far.

Here are some pics:
Here are the tools I used to smooth the seat and shape the outer portion.  The tiny drawknife has been working well, even though I have been asking more of it that it was designed for.  It's the only working drawknife I have at the moment.
Once the top was done, it was time to turn my attention to shaping the bottom so the chair doesn't look clunky and heavy.  I found the best tool for this (since I don't have a big drawknife at the moment) is my german scrub plane.  I drew a pencil line half-way between the bottom of the seat and the line on the front by eye.  I also eyballed a line that mimicked the shape of the chair on the bottom for the chamfer.  I scrubbed away until I got to my line on the front, and did the same on the sides with my little drawkife and spokeshaves.

Scrub plane for the front underside bevel.
I decided not to go right to the top edge of this chair with the underside bevel, as I think making this look too much like a whispy Windsor seat is a little out of character with the Welsh stick chair style I was sort of shooting for.  I think it should look a little heavier than that.  I decided that after beveling the underside, I would put another gentle bevel that I just eyeballed on the front to give it a little more grace.

I really like this look.  A bit of meat, but not so clunky as to distract.
This was the end of my shop time until yesterday morning, when I got a random 30 minutes in before work.

The next step was to trim off the back of the seat blank.  I had left it on until now so I would have something for the clamps to hold onto while doing all of the shaping of the seat.  I had intended to run the blank over to the Dictum shop and use their bandsaw.  That thing eats through this 2 1/4" elm like butter.  The problem was my work schedule prevented me from going over there when they were open.

I decided instead to give my biggest bowsaw a shot.  My biggest bowsaw is a little medium sized Swedish saw given to me by Jonas a couple of years back.  I really like this saw, but I thought it might be a bit delicate for this cut, and besides, it is in need of a sharpening.

I needn't have worried, as this cut was complete in about ten minutes.  Much quicker than driving to another shop.

It turns out the small blade of this bowsaw was just the thing.
Looking at this photo, I just realized I cut off the numbers I had for the stick holes!
I'm not the world's best sawyer when it comes to following a curved line, so I was pleasantly surprised that the cut was relatively even and square.  With a little rubbing alcohol on the endgrain, it was a simple thing to smooth this cut out.

Smoothing endgrain with this awesome spokeshave.
The endgrain wound up plenty smooth for this neat photo at 44X magnification with my new camera.
Smooth as a baby's bottom.
This is as much progress as I've made up until now.  Next, I'll probably round off the underside of the back and call this seat blank done.

Here is the final shape of my seat blank.  I like it!
All that is left for this chair now is to smooth up the crest, drill holes in it and glue the whole thing together.  I'll probably finish it with the same 50/50 recipe of tung oil and BLO that I used for the Viking Throne.

I am really curious if these different elements will work together:  the extreme rake and splay angles of the legs as a throwback to really old stick chairs, the sculpted seat remeniscent of a Windsor chair, the relatively modern look of the crest, and the dark color of the "I've-never-seen-it-used-on-a-chair-like-this-before" fumed oak.

One of the things I have really enjoyed about this build up to this point is the freedom of not sticking to a plan.  Much of the design of this chair was either chosen at random (such as the splay angles of the chair legs), or on the fly, like the shape of the seat blank, or dictated to me by the material I have, like the crest. 

If you have never build like this before, you should try it as it is quite liberating.

Wednesday, July 1, 2015

June 31st

It must still be June because I am still plugging away at my June Chair build.

Lots of pics today, so I'll try to keep the text to a minimum amount of superfluous recitation.  Oops!  Too late.

I woke up this morning unhappy with the size of my tapered tenons.  They seemed pretty delicate in comparison to the beefy legs.  I figured with the radical rake and splay angles of the legs, this tenon might not be enough.

The problem is, I used the biggest rounder I have to make those tenons.  It ends the taper at 5/8".  I remembered that when I got to chat with Tim Manney at Handworks, he had this ghetto, shop-made gizmo he said was superior as a rounder.  He told me he gets grief for not selling matching rounders to his tapered reamers, and his reason he doesn't is because they are simple to make and you should make one to exactly match the reamer you have.

Fair enough.

He blogged about it a while back, but it is easy enough I didn't need to reference his instructions to build.
First, get a stick of wood about as wide as a plane blade you have.

I drilled a 3/4" hole, and reamed it with my reamer.

I marked a line on each side that just touched the outside of the circle.  This will be a different distance on each side.

Saw to the line.  At least, don't go over too much.  If you do, don't go over near the hole.

After a couple swipes with a plane, I am getting close.
Once it opens up, clean it up with a chisel.

Clamp a plane blade (bevel-up) with a C-clamp.  I got extra fancy with a piece of leather, because this is a brand new blade.

Round 'till your heart's content.
Usually you want to stop when the end of your leg gets to the very top of the rounder.  I kept going, because I already used a smaller rounder before.  This tenon is getting pretty long.
Success!  The tenons seat farther now.
I figured I would lose some length to my chair legs doing this, but it couldn't be helped.  I think most people who sit in the chair would rather it is a little lower rather than the legs break when they plop into it.

There's an hour re-doing something I should have thought about in the first place.

Oh well, now on to complete my adzing.

It took a lot longer than the five minutes Peter Galbert said it would, but I figure that's expected when using elm rather than pine. I wound up having to use twice as many depth cuts as Peter says in his book.  
This actually looks WAY better than the last time I tried this with a vintage hammer adze.

Next up - the scorp.  What a cool name for a tool.  "Scorp."
The scorp is the medium tool here.  I tried to smooth out all of the adze marks enough so I could go to the fine tool, the travisher.
I find the travisher a very simple tool to use.  Don't think about it, just let the tool tell you what it wants to do.
Now that the chair is scooped out, I need to move on to shaping the front and sides.  Before I do that, it is time to work on the shape.

I had intended on going for a shape with a French curve in it, similar to any other Windsor side chair.  However, something wasn't quite right.  It dawned on me that I had never seen that shape in a Welsh stick chair before.  I decided to change it to a really mild and gradual taper to the back of the chair to give it a bit of a lighter feel without going crazy.

It just took a minute on the bandsaw at Dictum.
When I got home, I was able to use my spokeshave to smooth out the sides and front.
A little layout was required before the next step, so I smoothed the bandsawn edges and laid it out.

I have a couple of nice Swedish drawknives.  The only problem is, I haven't rehabbed them yet, and they have no handles.  Just in time, I was given this drawknife.  It is a new Pfeil, and is a real dainty thing.  Just perfect for those tiny details.

For hogging off an inch thickness of elm, not so much.

It is, however, amazing how much you can get away with when it is all you have and it is sharp.
Action shot!

Here's where I had to leave off for today.
There I am.  Most of the shaping of the seat is done.  Just some refinement and I'll have it.  Then I can saw off the back, bevel the underside and bang the legs home.  The only real work left after that is refining the shape of the crest and gluing it on.

June 32nd is only a day away!

Tuesday, June 30, 2015

Last Day for June Chair Build... Almost

This build so far has been perfect.  As far as I know, no one has finished their chair for the June chair build.  Including me.

There's still plenty of time, though, I think you probably still have a few hours depending on your time zone!

I have no problem with this.  On the other hand, maybe that's my problem.  Woodworking as a hobby is at the mercy of whatever else life is throwing at us.

The good news for me is that I made some real progress today, as it has been more than a week since I have been able to spend any time on this project.

Here goes:
Mark all to length at once.  It's faster and more accurate.
First, I needed to deal with my sticks.  I cut them to length, octagonalated them, rounded the corners, then scraped them with my roundish scraper.  Not perfect dowels, but I think I like it.
It's amazing how good results you can get with accurate layout.

Back to my Moxon vise for the octagons.

Finished off with a pollisoir.
I wasn't quite sure the best way to layout and drill holes for the back, as this one will be much different than my last chair.  The answer presented itself in Peter Galbert's book!
I spent five minutes making this jig, and most of that was digging through my scrap bin.
I did do it a little different, though.  Peter suggests using string with a notch in a protractor to find the rake and splay angles for this.  I decided to eyeball the sightline, and match the resultant angle with my plastic cheapo angle finder.  This worked perfectly.
I also spent ten minutes looking for a piece of string in my shop.
I decided to drill straight through the seat blank, and intend to wedge the straight sticks from the bottom to hold everything tight.  This requires super hyper accurate boring.
I had success by checking my angle about every turn or two.
Things are starting to look chair-like!
Look!  A piece of wood with sticks in it!
I really enjoy this part of the build.  Making the tapered mortises is an opportunity for dialling in the leg angles to absolute perfection.
Maintaining the perfect angle on the sightline.
I was a bit apprehensive about my leg angles that I chose on the fly.  Looking at photos of old Welsh stick chairs, the coolest ones seem to have crazy rake and splay angles.  I used Drew Langsner's recommendations for the last chair I made.  These were a bit conservative, in my opinion.  So I went crazy.  Splay angles are 25 degrees, the rear leg's rake angles are also 25 degrees.

I am happy with the look, except I suspect the chair legs will be a little less then 30 inches apart from each other when the legs are cut to size.  Maybe next time I'll move the legs in even farther.
Really starting to resemble a chair!
The next part I have been looking forward to since my last chair build.  I got a new adze from Tim Manney, and have been itching to try it out.

Caleb James posted a video of Peter Galbert demonstrating this technique the other day, so I thought I would do it just as he said.
The idea is to start by driving cuts to depth, followed by scooping everything out across the grain.
This tool is great.  I only had about twenty minutes before I had to quit making noise, and was able to get the seat to a depth of about 9/16" in elm.  Peter Galbert says he can do this in about five minutes, but he was working with pine.  I'm sure I'll be able to finish it up in no time in the morning.

Drew Langsner says to go shallower when using a hard wood, but I decided to go deep on this seat.  One reason is that it is so thick, the leg tenons don't come all the way out.
I took a break long enough to take a close up of Tim Manney's adze.
Even at this point, it is comfortable.
Pay no attention to the mess in the background.
If you have started a chair or have finished one, send me a pick and I'll post it.  Here are a couple pictures of some chairs that I have seen so far:
Here is Steve Voigt's Birdcage Side Chair.
Ray Schwaneberger's chair is coming along.