Tuesday, April 30, 2013

My Five Most Popular Posts (So Far)

I know you all would like to read a little self-indulgent narcissism,  so here we go.

It is humbling to consider that there are people all over the world reading my blog.  This post makes 96 posts to this blog.  Let's take a look at the five that seem to have generated the most hits.

#5 - Experiment: Let's Blow Up a Panel! 


I wanted to see if I could replicate a failure of a table top that was posted on reddit.  A woodworker there had built a table in which the top had split and cracked.  I thought the culprit was that he had glued in a cross batten that was attached with a sliding dovetail.

To test my theory, I made these two panels, and attached a cross batten with only three screws.  One of the panels received glue on the cross batten, one did not.

This post was fun because I got to throw out my theory of what happened for everyone to see.  In hindsight, it might have been good to wait until I had several weeks worth of photos to show the progress all at once, but I thought it would be fun to do this series in real time.

FYI, eventually the glued panel did fail, it bowed so much when the panel dried that there would be absolutely no way it would have survived on a table top.  The unglued one was fine.  All this in about three weeks!

#4 - Essential Tools for Newbies: Part V - Proper Bench Chisels


This post was one of a series on the tools I think should be in a Beginner's Tool Kit (BTK).  My general philosophy is that one shouldn't have to skimp on tools, one should just be picky and get a few really good tools.  When I started in hand tools I didn't know how to discriminate from true "must haves" from the gimmicks.  Oh, also, you shouldn't have to take out a third mortgage to do it.

With chisels, I think that rather than spend good money on a starter set, just pick up a pair of premium chisels that will last forever.  These two Lie-Nielsens will run about the same as a set of six plastic handled junkers.

There is a lot you can do with two chisels, and it is easier to keep two chisels sharp than it is twelve.  Later on you can pick up other sizes if you find you really need them.

I have been working with these chisels since about December when I wrote the post.  99% of my chiseling can be done with one of my two chisels.  Every once in a while I find I might need one that is narrower, but honestly, I think the only reason I might have pulled one of the others from my chisel roll in the old days was because it was the sharpest one.

Don't fall for thinking you'll save money, because you'll eventually buy premium chisels anyway.  Save the money and start now.

#3 - Money Can't Buy You Skill


This post surprises me that it is my third most popular post of all time.  I didn't have my camera that day, so the photo is a recycled one, and what I wrote about really isn't all that impressive.

What I did was build four try squares of my own design.  The "design" was that it was constructed with a lap joint, rather than a bridle joint or a mortise and tenon.  I started building squares this way because they could be easily built using my BTK.  I had made several of these before this post, and got very comfortable using my chosen tool kit to make decent looking lap joints.

The point of this post was to test if there was a difference between using my BTK and using fancier tools.  I made two with my BTK and two with the "proper" tools from my tool porn collection.  What I found out was unexpected.

I found out that since I had been using only my BTK for making lap joints, I had gained a level of familiarity with these tools that I didn't know I was missing.  I didn't save any time or make joints that looked remarkably better.  I think the fact that I had a timer going actually made my work more sloppy.

Moral of the story:  one needs to spend a lot of time with any tool to learn that tool.

#2 - "Mouldings in Practice" - A Non-Traditional Review 


This was a tongue-in-cheek review of Matt Bickford's book.  Along with a rehab of an old rabbet plane I had knocking around in my shop.


The reason this post is my all time #2 post is because Christopher Schwarz linked to this post on his Lost Art Press Blog.  This is one of my early posts, and having a plug to my site from CS totally wrecked my stats.  It took a long time before one of my other posts finally surpassed this one not too long ago.

Even though I was joking a little, I am serious.  You really should read this book.

Incidentally, this rehab turned out awesome.  This plane works better now than it probably ever did.  In a following post, Matt Bickford linked to a video I took of my very first rabbet cut freehand.  That post took a long time to fall off of this list, too.

It was a real ego boost to be mentioned by some of woodworking's heavyweights.  I am extremely grateful and honored.


#1 - Essential Tools for Newbies: Part II - Sharpening


This post had been out a long time before it took over the #1 spot.  I think that sharpening is a mystery to a lot of woodworkers.  I have to admit, I spent a lot of money on all kinds of different stones, jigs, and gizmos before I settled on this system.


Essentially, this post reflects that while it would be nice to have a dedicated sharpening bench, there just is no way in my tiny shop that I'll get one.  Surprisingly, I get perfectly good and fast results with the pictured setup.  The only thing I have added since this post is a hand-cranked grinder that I am just figuring out.

This is basically the same sharpening technique advocated by Christopher Schwarz and Tom Lie-Nielsen, with the exception that I clamp a cheap, plastic cutting board to my bench to protect it and provide a stop for the stone to rest against.

This set up is in my BTK because if your tools are not sharp there isn't much chance you will be successful with hand tools.  It happens that this is an effective and economical sharpening strategy that works.

There you have it.  Looking back on these posts gives me a feeling of accomplishment both in blogging and woodworking.  I love to blog because it helps me think, and blogging has helped me become a better woodworker.

Sunday, April 28, 2013

Essential Tools for Newbies: Revisiting the Bevel Up Jack

Last December I wrote a series of blog posts about what hand tools a beginner should first focus on.  There are a lot of list of "essential" tools out there, and making sense of them for someone new to hand tools can be daunting.  I have seen some lists of tools that every woodworker "must" have that would have scared me off of hand tools if I had seen it before I got started.

My thoughts are that one should start woodworking with the tools you already have, along with some truly essential tools for woodworking.  In short, my list includes only the following tools, which I think make a great place to start:
This seems a bit simplistic.  I'll admit that it is.  However, you can use these tools to build some cool stuff.  My recommendation is to start with these and once you get good at them, you'll soon find out what other tools you need.  Hopefully, you will find out that there are even more tools you don't need.

I had intended to build some real furniture using only these tools.  Yes, I did build several projects using only my Beginner's Tool Kit (BTK), but I have yet to get a furniture build completed.  Jonas from Mulesaw stole my thunder a bit by building a dovetailed sea chest (with canted sides, secret compartments and self-made hardware) using only the tools that happened to be on the ship he was on at the time.  This included only a Stanley #3 smoother, a hacksaw, a powered hand planer and a few junky chisels.  Trust me, it is possible to do fantastic things with just a few tools.

Made with a hacksaw, duct tape and chewing gum by Jonas.
Moving on to the actual subject of this post:  since I have written this series I have used my Veritas Bevel Up (BU) jack plane with the stock 25 degree iron for all of my planing tasks, almost exclusively.  My jointer and smoothing planes have rested comfortably in the bottom of my tool chest since then.  I only used a vintage (new to me) scrub plane on my current project just the other day.

My overall impression:  This plane works like crazy.  I haven't really missed the others.

BU Jack it use.
Handplane monogamy has not been the sacrifice I thought it would be.  In fact, it is quite liberating.  Not having to spend time choosing a plane, or for that matter, not having to keep four or five different blades sharp is a big benefit.  Focusing on just keeping one iron sharp makes it feel like I am being a lot more productive.

The secret is in the BU jack's versatility.

Ninety percent of what you need a bench plane for is one of three things:  rough work for removing a lot of material, flattening, and smoothing.  Let's go into how the BU jack performs in these three tasks, as well as some others.


BU Jack as a Fore Plane

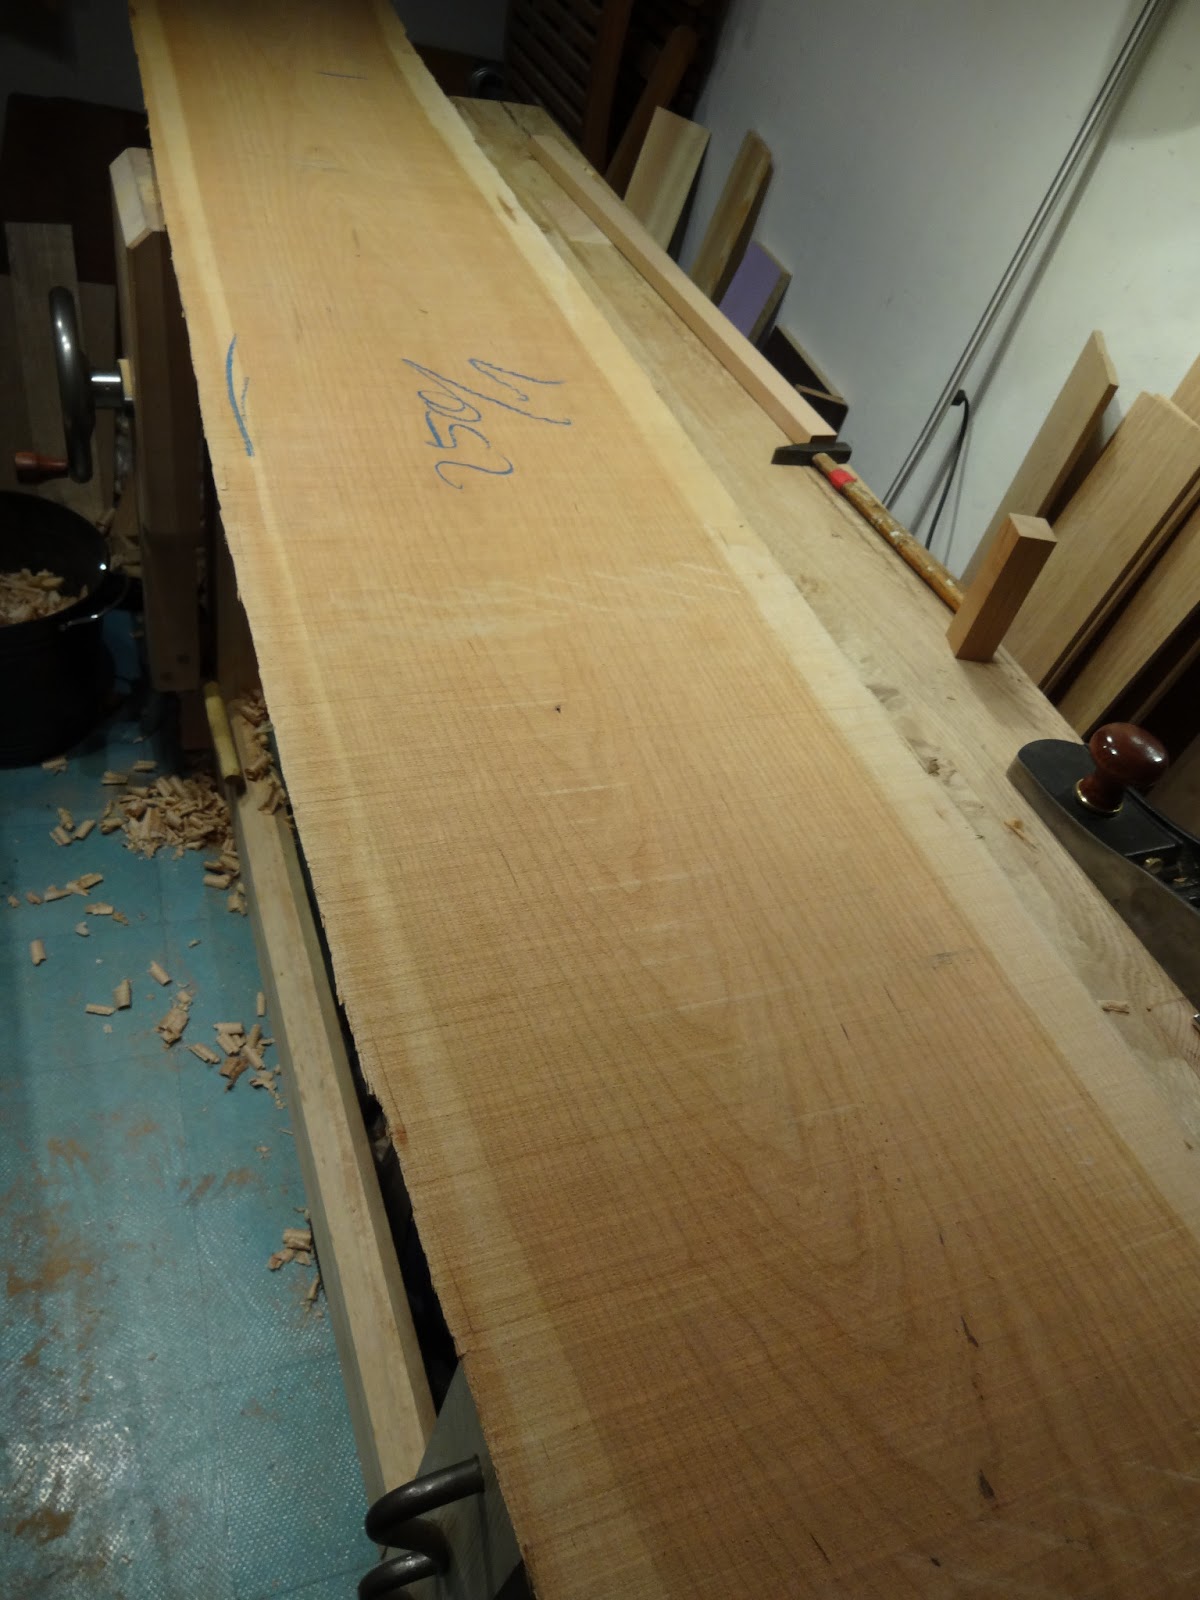
A fore plane is one of the first planes I use on a board straight from the lumber yard.  After sawing a board to rough dimensions, I will use a fore plane to remove all of the fur and get things sort of flat and square, taking the board down to near final thickness.

Traversing my bench top.
Adjustments needed 

Open the mouth wide.  On the Veritas model I have, it just takes a twist of the front knob to loosen the mouth, and the knob pushes forward to open the mouth. It takes about a half a second to do, and I am back to work.  Once the mouth is open, the blade can be advanced for a heavy cut.


How to do it

From a rough board I always start by making a couple swipes along the back edge to create a chamfer to prevent spelching, or blow out.  Then, I will traverse along the whole board, planing across the grain.  After a few passes across the grain, I will switch to a diagonal pass, followed by another diagonal pass 90 degrees to the first diagonal pass.  If at this point, there still are some low spots that haven't been touched by the iron yet, I will start the process over.

Once the whole face is clean, I will check the width and along the length with a straight edge to see if it is flat, and use winding sticks to check for twist.  The board does not have to be perfect at this point.  If there is a major flaw, it might be quicker to fix it at this stage.


BU Jack as a Jointer

After your board is roughed into shape, you will want to make it perfectly flat on it's faces and edges.  The Veritas BU Jack is 15" long, which is a bit short for a traditional jointer, but with a bit of care you can get excellent results.


Adjustments needed 

Retract the blade and tighten the mouth.  The finer the cut, the more accurate the results, but the longer it takes.  One benefit of the versatility of this plane is you can start with a medium setting and make it fine once you start getting close to finished.  It wouldn't hurt to run your iron over your honing and polishing process before jointing.


How to do it

If your board still looks a bit rough after the fore planing process, you can start on the face with more alternating diagonal cuts.  I wouldn't do any traversing at this point.  Alternate diagonal and with-the-grain passes until the deep gouges are removed.  Once the face looks perfectly flat, check with your straight edge and winding sticks.  Your face might start looking like it is ready for finish at this point, but don't pay attention to that.  We are looking for dead-nuts perfectly flat reference surfaces.

Once the reference face is done, we mark it and move to a reference edge.  I will take my time planing this edge as it is easy to mess up.  Once the plane is taking full length and full width shavings, I can check my progress just like before with a straightedge and winding sticks.  If I am satisfied, I will next check with a square to ensure this edge is perfectly 90 degrees to the face.  It often is not.  To correct this, I will move the plane over to the high side of the edge and take a full length shaving with just the edge of the plane taking a shaving only half the width of the edge.  I use my fingers as a fence to ensure the width of the shaving is consistent.  After this, I will take a full width shaving and check my progress.  It should be better.  Continue this way until the edge is perfectly 90 degrees.  This edge is marked to keep track of the reference edge.

Now that there is a reference face and an edge, I can use a marking gauge to mark the final dimensions of the remaining face and edge.  Now it is just a matter of planing down to the line.  If there is a lot to take off,  the mouth can be opened and the blade advanced for a thick cut like in the first step.  When I get close to the line, I change everything to a very fine cut and move to the line.  When it disappears, it is done!


BU Jack as a Smoother

This plane makes a pretty big smoothing plane, but if you were careful in the flattening steps, this plane can be made to work nearly as good as any smoother.


Adjustments needed 

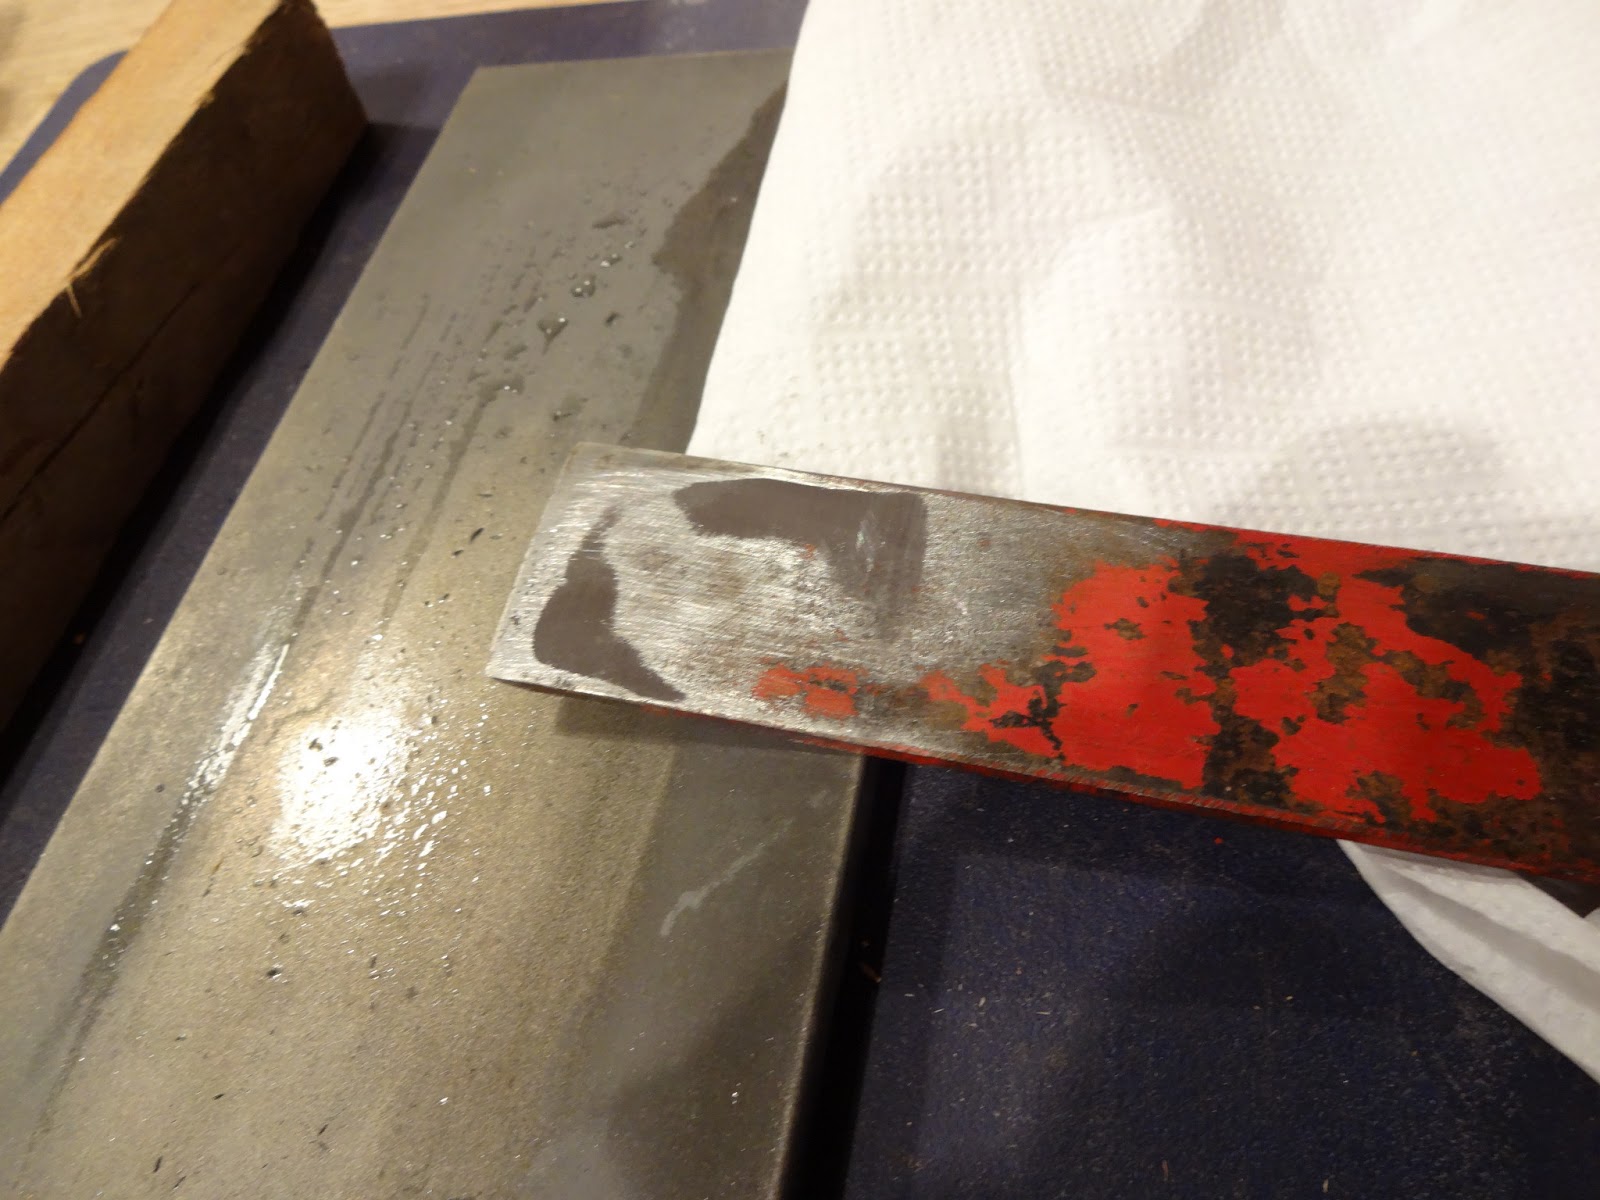
It is not a bad idea to touch up the blade on polishing medium.  Hopefully, after this step the wood will be in good enough shape to apply finish, so our best edge is useful.  Set the blade back to a very thin cut.  I like to close the mouth to as tight as I can get it without it touching the blade.  One alteration I did to my blade was to round over the sharp corners on a course stone.  It just takes a couple rolling swipes, and instead of a sharp corner, the blade will have rounded edges.  This helps avoid plane tracks during smoothing, and I haven't found that it has any negative side effects during roughing or jointing.

If you really want it to be a smoothing monster, hone a 50 secondary bevel on your blade, or drop in a dedicated 50 degree blade.  There is not much that this plane (with a total 62 degree angle) will not be able to handle.


How to do it

I will take my time and inspect every part of the surface.  There likely are some plane tracks or tear out left over from the jointing process.  These fine cuts should take care of those.  I look for wispy paper thin shavings as a sign that things are working correctly.  The final test is if the surface meets your exacting standards.


Other Things in Which a BU Jack Excels

Shooting

Nothing squares end grain as easy and fast as a plane with a shooting board.  This easily made shop appliance needs to be in every shop.  With this appliance, perfectly square end grain is a sure thing, every time. The real secret to shooting quickly, is to get better at crosscutting.


Jack on a shooting board.

Adjustments needed 

Sharp.  As always.  If your end grain has a line or two after shooting, it means there is a ding in your cutting edge.  A quick couple swipes on a polishing stone might be enough to give you a perfect cut.  A medium cut with a medium mouth opening should work fine in most cases.  I only ensure that when the plane is laying on it's side that the blade is perfectly 90 degrees to the bed of the shooting board.  Contrary to popular belief, the plane's side doesn't need to be square to the sole for this to work.


How to do it

This plane was born to shoot.  Indeed, I purchased this plane for the sole purpose of shooting.  It was a happy accident that I found out how truly versatile it is.

First, I examine the board to ensure I know which is the reference edge.  This edge will always go against the fence of the shooting board.  Next, I make a little relief cut or a chamfer on the edge to prevent blowout.  There are a lot of ways to do this, but I find it quick and easy to shave it with a chisel.

Proper technique involves holding the piece against the fence with one hand while moving the plane with the other.  Don't try to use the handle, a more effective grip is holding the side of the plane with fingers wrapped around the lever cap.


Tapers

Before and after
I never cut a taper with only a plane before just a few days ago.  I am currently working on a Shaker side table in cherry which has tapered legs.  As per instructions in the DVD, I used my jack plane to cut them.  Christopher Schwarz uses a vintage Stanley jack plane to cut them.  I was able to do it with my BU jack, as well as joint and finish the cut.


Adjustments needed 

I set the plane up the same as I would for roughing.  As I get closer to the line, I make adjustments to take a finer cut by retracting the blade and closing the mouth.


How to do it

I started the cut just like in CS' DVD:  I start with a short stroke off of the end of the leg.  The second stroke is started a little farther back.  The next a little farther, and so on.  When I get near the mark for where the taper starts, I start over.  I think it is important to check the taper cut is square to the reference face every once in a while.  If the cut goes off, you can easily remedy it using the same technique described in jointing.


Chamfers

I normally do chamfers with a block plane.  If one doesn't have one (because this is your only plane), the BU jack does an excellent job.  This plane, after all, is just a giant low-angle block plane.


Adjustments needed 

It depends on how big your chamfer is.  For a big one, start course, and set to fine as you get close.  For a small one you can start fine.


How to do it

I like a grip where my fingers from the hand that is holding the front knob are on the underside of the plane.  My thumb goes right behind the front knob.  I then use my fingers as a fence, which holds the plane at a specific angle to the piece being chamfered.  After a few strokes, I check the end to see if the angle is where I like it.  After a few correcting strokes, I plane down to the mark.  If there are multiple identical chamfers to cut, I count the number of strokes it takes and do the same on all cuts.  They should all look similar.  If the chamfer is fat on the ends and skinny in the middle, I take a few strokes out of the middle only until it evens out.  Then I continue with full length strokes.  This is a sign that I am not planing evenly.


Plowing Grooves

OK, the BU jack cannot plow grooves.  I was just checking to see if you have read this far or not.


In conclusion, a BU jack plane truly is essential if you do not have dedicated planes that can do all of these other common tasks.  I have also found that using this plane exclusively has really allowed me to get to know this plane.  I think I can do twice as much with this plane than I could when I originally wrote the BTK series.  My guess is I am not even using it to half of it's potential.

Perhaps you have found other uses for a BU jack.  What are your experiences?

Tuesday, April 23, 2013

Thicknessing Stock By Hand

I had a plan for this blog post.  I was going to thickness three similarly sized boards for my Shaker side table build by hand using three different planes: my newly restored vintage scrub plane, my home-made Krenov style scrub plane, and a special technique with my jack plane that I read about and always wanted to try.

The problem was I was so amazed at how well that vintage scrub worked that I couldn't put it down.

Getting started with my scrub.
Here is my process:

First, plane one side of the board flat.  I took some really thick shavings with my jack plane to clean up one side.  I backed the blade off a bit to work it down to a perfectly flat surface.

Second, run a marking gauge all around all four edges of the board (using the flat face to reference the fence of your gauge) to indicate the thickness you want the board to be.  The first one I did was about 1 3/8", so I marked it down to a little over 7/8".  Plane a chamfer on one long edge of the board that goes down to this mark.  This will help support the wood and prevent blow out.

Mraked for thickness and a chamfer to prevent blow out.
Next, secure the board on your bench and start planing perpendicularly to the grain.  I like to start in the middle of the board, plane over to one side.  When I get to the end, I move the other direction until I reach the opposite end, then return to the middle.  Here is a shot of this board after this point.

One pass with this aggressive plane.
At this point, I may move to a diagonal stroke until all of the perpendicular marks are gone.

Diagonal strokes.
Normally, I would go the other diagonal, but this board did not like that at all.  Massive tear out.  I just alternated between cross grain and diagonal strokes until I got close to my line.  It is important to keep checking your lines so you don't blow past them.  It's also a good idea to check them to ensure you are taking an even amount off the whole board.  If not, focus on the high spots until they are even.

Once you are down as close as you  dare with this plane, it is time to clean up all of those crazy waves with your jack plane.  A few minutes with an aggressive cut and I was very close to my line.  I backed off to a fine cut for the last few passes, ensuring everything was square, flat and true.

This took less that 15 minutes, from start to finish.  Way faster than I expected.  Indeed, this was so much fun, I had to do the next one with this scrub, too.

This piece was from a different board which was a little thicker.  I also decided to take it down to a true 3/4" just to see if I could.  The first piece will be the back rail, and won't get in the way of anything if it is a little thicker than the side rails.

A bit more to plane off this time.
I went through the exact same process and brought the thickness down.  It took about 30 minutes, this time.  This was not nearly as unpleasant as I was expecting it to be.


Before and after.
I am not scared of thicknessing lumber by hand any more.  Granted, these were small pieces, but normally one doesn't hog off quite so much wood when thicknessing by hand.  The secret is a dedicated scrub plane.  There are a few other options, but nothing quite like this.  For example, the thickest shaving I could get with my jack plane on this cherry was .031"  That is a pretty big shaving, but I was getting shavings thicker than .051" without really even pushing this scrub plane to it's limit.  Shavings that thick remove a lot of stock in a hurry.

After today, I will have one more side rail and the drawer front to thickness in this manner, and I will have all of the stock for this Shaker side table processed by hand.  The thing that took the longest was the legs, due to the fact that I couldn't get straight, clear stock in thin boards to cut them out as CS recommends in his DVD.  That would have saved me about eight hours of labor.  I cut them out of much thicker stock to ensure I could get the bastard grain on all four legs.

All of this work probably seems unnecessary to someone with a tablesaw and a thickness planer.  I am not so lucky.  I did want to try doing this entire project by hand without taking my wood to another shop for machining, though.  So far it has been successful, albeit a bit slower.  I am sure I'll get faster over time, but for now I want to ensure accuracy.

Next time, I hope to show some progress on the joinery.

P.S.:  There was a request f\or a better view of my grinder, so here it is:

See, hand cranked!


Monday, April 22, 2013

Rehabbing an Old Scrub Plane

One of my flea market bargains

I found this old scrub plane at a flea market the other day, along with a few other neat tools.  I'm not sure what drew me to this tool, other than it felt really comfortable in my hand.

It sure isn't pretty, though.  My guess is it was user made.  There is a bolt that goes all the way through this plane, which stabilizes a big crack in the body.  There is also a screw right above the bolt that stabilizes a smaller crack.  The iron is painted red on both sides, and I have a sneaking suspicion that this blade was repurposed from something else. 

The good news is that being a scrub plane, the tolerances do not have to be too fine.  This is a rough tool, so a lot can be forgiven. 

The first thing that needed to be done was the blade needed some serious attention.  As you can see, when I started lapping the back some pretty serious problems are evident.

Whoa!
Looks like there is some serious work to do.  As you can see, the tip was dubbed over pretty bad, and the back looks very uneven.  My decision was to lap for only 10 or 15 minutes, and I would grind the rest away.

After lapping as much as I could stand, I painted the back with machinist's layout fluid and scribed a line with my compass with a three inch radius.  I scribed this line pretty far back from the tip to ensure that the dubbed edge would be all ground away.

One edge was massively dubbed over, and I figured I was going to have to live with it.  I didn't want to spend two days lapping an iron on a scrub plane.

Now for the fun part.  I recently got a new vintage hand cranked grinder from eBay.  It is a Best Maide #151.  This thing is awesome.  It has the handle on the front, which I didn't think I would like, but I do.  I put a Norton 3X wheel on it and off I went. 

The big problem with this particular grinder, is there is no where on the casting to attach a tool rest.  So I improvised.

Ghetto tool rest.  Ugly, but functional.
I stacked a few thick offcuts on my bench, and the grinder is attached to the wooden cross brace from the back wall.  With the above setup, I could grind accurately.  This gave me a good 90 degree angle.  It is important when shaping an iron to grind at 90 degrees until you get to your line, then switch to your final bevel.  This makes things a LOT easier.
Grinding to my line.
It did not take too long or burn too many calories to give this iron it's new shape.


I did realize that it is important to wear eye protection when grinding.  I am unaccustomed to wearing Personal Protective Equipment (PPE) when using hand tools, but this grinder is an exception.  There is nothing to keep dust and metal parts from flying everywhere.  Safety First!

After grinding to the line it was a simple matter of finding another riser block to get the angle I needed for the bevel grind.


If this looks as if it isn't the worlds most stable and accurate tool rest, you are right because it isn't.  It is surprising, though, how well it worked.  Grinding doesn't have to be perfect, honing and polishing does.  Besides, this would have taken forever to grind on my coarse diamond stone.

Ground pretty close.  I can move to my stones now.
I was surprised and amazed at how quickly and easily this worked.  After I got to this point on the grinder, I finished honing the back using the ruler trick.  I normally don't use the ruler trick, just because I feel if an iron gets a back bevel, it is there to stay.  I have to admit that it worked brilliantly in this case because I was able to get a nice shiny area all along the cutting edge on the back, including where that nasty dubbing was.

Back of the iron after the Ruler Trick.
So, I sharpened this cambered blade to 8000 grit (complete overkill for a scrub) and noticed that the edge had disintegrated right in the middle.

I think this is a sign this steel isn't good for a plane blade.
I had to go back to the grinder.  After a few minutes, I had a new edge, sharpened and ready to go.

I put the blade under tension, backed out of the way, and planed the sole flat with my jack plane since it was handy.  Four or five swipes later, this plane was as good as new.

Now for a test!

I clamped up a scrap piece of cherry and started planing across the grain.  After a little bit of fiddling, the plane really started taking some nice cross grain shavings.  It didn't like it if it was too thick, it backed the blade out.  As long as the blade was just shy of too thick, it cut very nicely.


I took a random shaving to measure with my calipers.  51 thousandths of an inch, not too bad.  I'll have to compare that with some of the other roughing planes I have.

Sunday, April 21, 2013

Back to the Basics

This morning I started reading a new woodworking book; The Foundations of Better Woodworking by Jeff Miller. I waited a while to buy this book because like every fifth grade band student, my eyes glaze over when the the thought of having to do any work to get better comes up.


I read the introduction this morning and have to say I am now very excited to read this book. If I didn’t have to work today, I probably would try to read the whole thing.

What got me jazzed up about it, you ask? The last episode of The Highland Woodworker had a nice interview with Jeff Miller. I didn’t know before, but Jeff used to be a professional trumpet player and teacher. I could tell where he is going with this book by the first sentence of the preface:
Over the course of a long teaching career, I have found that a large number of students – even the most thoughtful and well-equipped – lack the most fundamental level of knowledge and skills.
I was also trained to be a music teacher and a professional brass player. I completely understand what this means, and would agree. I don’t think this is going to be a book about how the author cuts a mortise and tenon with his table saw and a $500 jig to make a project that is one of the chapters of his book, this is going to be a book about the nitty gritty basic skills that you will be able to use on the project you are working on right now. Or, better yet, how to practice those basic skills so you can use them with authority on every project from now on.

Another great woodworking teacher who is a former music teacher and musician is Shannon Rodgers of the Hand Tool School. I haven’t taken one of his classes yet, but I have watched a lot of his videos on YouTube. He also constantly speaks of Basic Skills, practicing certain operations and improving skills to use on your next project.

Let me tell all of you engineers what it means when one of us musicians keep harping on fundamentals, basic skills, or any other of our music education buzzwords that you have been programmed to ignore since your fifth grade band class. The most skilled musicians have only done a good job at internalizing these basic skills (such as breathing, posture, efficiency of movement, background knowledge of the piece, style, genre, etc.,) to such a degree that they can focus not on their technique, but on the overall effect of their performance.


I can remember one lesson I was teaching a young trombone player. I had assigned him a lyrical etude to practice the week before. Once he played it, I asked him how he thought he did. He said that it was hard, but he thought it was pretty good. He played all of the notes on the page. 

I wanted him to see his performance from a new angle, so I told him to imagine that he just played that piece for a whole audience that had paid $20 each to be able to sit in the theater to experience that performance. “Did they get their money’s worth?” I asked.

“No.”

“Try it again. This time your job is to make those people think they were lucky to be able to hear it.”

I could not believe the difference. Once this student learned what the goal of learning all those notes was, he put the piece he played in perspective. He actually did a good job over the week of practicing the fundamentals of that piece. He just needed to be shown what he could do with those fundamentals and what he should be thinking about and how to apply them once he had them.

I have noticed that just a few years ago I also was a fifth grade band student as far as my woodworking goes. Enthusiasm and nice tools are no substitute for knowledge of the foundations of woodworking. I don’t think it was really until I took a class and started interacting with other woodworkers and teachers that I feel like I am on the path to learning to be an effective woodworker.

Getting back to the book, I am looking forward to this read as I think I can relate with Jeff's style and I know the importance of maintaining the basics for becoming a better trombone player woodworker.

Saturday, April 20, 2013

Gloat! Flea Market at Theresienwiese

I do not get to do much rust hunting.

The Frau is not a fan of flea markets, so I rarely get to go to one.  If I do, I usually wind up dragging her in to one that we stumble upon.  Very rarely do I get to find any decent tools at these small markets.

Today, however, I made a plan.  One of the largest flea markets in Germany was to take place today on the location of Oktoberfest!  I invited my beautiful bride to accompany me, but she wanted to go to the outlet stores instead.

It was raining cats and dogs today.  I got up and to the flea market early (OK, early for me on a Saturday) at about 8:30 or so.  I figured if I got out of the house early, and since it was raining, that there might be fewer people shopping there.  That could be, but I still thought it was crowded.

The rain was a disaster.  Only about half of the stalls had any kind of tarp over it.  My guess is that any old tools that weren't bought today will be ruined forever.  For instance I saw two magnificent, big, old frame saws laying in the mud displayed next to a bunch of other old crap, just soaking up water.  More than once I found wooden planes laying on the wet pavement, in the mud, or in a tub with standing water in it.  I knew there were some tools out there that desperately needed rescuing before they disintegrated.

The second table I stopped at had a big plastic tub full of old wooden planes.  Most of them were crappy junkers, but  I pulled this nice little smoother out and paid 8 Euros for it.


I need another smoother like I need a hole in the head, but it would have been destroyed otherwise.  I picked it out because it had what looked like a user installed patch on the throat.  My opinion is this is a sign that a tool of quality was used well and taken care of.  I think this will turn out to be a nice little user.


There were no markings indicating the manufacture of this plane that I could make out.  The only marking other than a "48" on the heel was on the iron.
Not familiar with this iron.
Speaking of the iron, it looks to have a magnificent tapered iron that was sharp, clean, and installed in the plane correctly.  Nice.

Tapered blade.
Feeling smug I wandered around for the next hour not finding anything of note.

Then, I felt like I hit the mother loade.  I came upon a miter jack.

Miter jack.
As soon as I saw it I knew that no matter what I had to have it, even if it didn't work.  Amazingly, the wooden threads seemed to turn freely, and the moving block slid easily in it's track.  I was thinking at worst, I could use it as a plan to build my own.  Happily, as far as I can tell it is in perfect working order.

It appears to have two working sides, one 45, the other 60 degrees.

Nice manufacturer's medallion.
I really didn't need any new tools.  Who would think you would run across one of these in the rain and mud in Munich?  I hurriedly handed over the 30 Euros to take possession.  Once this thing dries out, I'll tune it up and put it to good use in my shop.

While the previous owner was helping me put this thing in my big framed backpack (thanks for the tip, Michael!), he saw the smoother plane that was already in there.

"You might be interested in what we have under this box!" he said, and opened a trunk full of old planes and mallets.  It was fun going through all of that stuff.  I chose a scrub plane that caught my eye.  One can really tell the difference between the modern junk and the quality old stuff.


This thing feels so natural in your hands.  I can't wait to try it out.  Well worth the 10 Euros that was asked.

Oh, I have no need for another scrub plane, either.

I had almost used up my alloted time, so decided to make a quick run in one section that I hadn't even been to yet.  While I was zipping down the lane, I stopped at one table and right in front of me was this, which I paid 6 Euros for:


Nice mortise chisel.
I am also unfamiliar with this mark.

When I bought it I thought it was a German mortise chisel.  When I got it home, I noticed the handle was a hornbeam replacement.  Not a bad handle, but it is round.  This tool actually is an old English pig-sticker.  When this one wears out, I will replace it with a traditional oval shaped handle.  I'm not positive until I check against my plow plane irons, but I think it is a 3/8" chisel rather than the metric equivalent.  Score!

I think over all I could have spent a lot more time there and hunted a bit more for some real bargains.  However, there is no way that I can complain on a day when I found a miter jack in the wild.  Who would have thought?

Besides, if I had spent any more time there, it could have really cost me and my bag was full.

Friday, April 19, 2013

I'm Going to a Woodworking Class!

The Schwarzmeister

I didn't think I was going to get to go this year.  It turns out that there are a couple days this summer where work perhaps won't interfere, and that lines up perfectly with Chris Schwarz' class at Dictum on building a bowsaw.

I have been extremely fortunate.  Last year I had the opportunity to build a Roubo workbench in his class, and the year before I built an Anarchist's Tool Chest and a layout square.

I didn't think I needed a tool chest, but I find it is awesome for keeping my tools and my shop in some sense of order.  Well worth it.

I definitely didn't need a new workbench, but find my Roubo with a 5 1/2" thick French oak top is totally badass, and is no comparison to the bench I had before.

Badass
Jonas from Mulesaw gave me a bowsaw last year.  It might look a little plain, but it works fabulously.  I don't really need another one.

So why do I do this?  It is difficult to explain, but it is just so great to be in a big honking workshop with a bunch of cool people working wood, trading stories, trying out tools, drinking adult beverages, and basically indulging in an opportunity to get my hand tool fix for the year.  Oh, I almost forgot, also so I can learn something.

As much fun as it all is, learning something - no matter what the end product is, is worth twice the price.  And in this case I will hopefully wind up with a smokin' bow saw.

I highly recommend Chris' classes.  If you ever get the opportunity to take one, do it.

Monday, April 15, 2013

Perfect Legs

Or more accurately, Perfect Leg, as I only have one so far.

I solved my leg problem by buying some more wood.  Feel free to continue voting in the poll at the upper-right side of the screen, but so far the overwhelming majority of respondents suggest buying more wood.

At least that is what three of the four people whose votes are in said.

I probably would have done that anyway. 

Today I went back out to the lumberyard and told them I needed one more board.  I went back to the stack of 33mm (5/4) cherry, and flipped through the few boards that were there.  I was looking for a board that had areas of very straight grain, and likely had straight grain along the edge, too.  This can be hard to see, because on flatsawn boards the edge is covered in bark.

I picked one out of the few that were left that seemed would yield enough straight grain for four legs for my side table.  However, there were quite a few areas that the board did not have straight grain.  This will be interesting.

While, the forklift driver was moving my board to the area to be measured, I decided to look at the 40mm (6/4) stack.  Lo and behold, there was an absolutely gorgeous piece right on top.  I signaled the guy helping me, and told him I wanted that instead.

It barely fit in my car, but I got it home.

This is a big board.  Total overkill.

It practically takes up my whole shop!
I decided since I have this extra thick piece of wood, that I would take a cue from Ralph in a comment he made.  The first thing I did was square up a little piece of scrap so it was 1 1/8" square, to use as a template on the end of the wood to see which direction my rings can go.

This is the thickness of my table leg - 1 1/8".
One end had grain that looked nice and straight.  So, I cut off about 30" or so, and put the other seven foot board away.  I think I will be able to get all my legs from this end piece.

I put a straight edge inside the sapwood, and as straight as I could match the grain of the tree and struck a line.  This was my first cut with the rip saw.

Incidentally, this is what I think is fantastic about hand tools.  I can cut any line I want without doing all kinds of goofy things that I might have had to do to make this cut with a table saw.  Draw a line, and cut to it.

When I cut along this piece, I found that indeed the board I picked had beautiful straight grain through its thickness.  This could make the perfect leg.

With my little square of scrap, I laid out something on the end grain that will result in perfect 45 degree rings.  I planed the edge of the board to match this angle, marked and struck another line to rip, and let my Ryoba do the talking.  I thought this would work well making an angled cut.

Layout for the grain the way I want it.

Angled cut with Japanese saw.
From here it was just a matter of squaring, hogging off, and cleaning up faces so the grain went the way I wanted on a blank that was the dimensions I wanted.

It turned out perfect, making me glad I went through the trouble of using the right piece of wood.

I think it turned out perfect.

Exact same grain orientation on each face.

Caused by the rings going at a 45 degree angle.  "Bastard Grain."
Another couple of weeks of this and I'll be ready to start the joinery on this weekend project!

One could save a lot of time and effort if you can get stock that is the right thickness to start with, and with the grain doing what you want it to.  Machines definitely would have been a time saver with the oversize stock I bought.  However, after looking at the 27mm (4/4) stock that was available today, I think I did pretty good.  All of the pieces of this project are going to look great and be exactly the grain that I wanted.  The only one that will look a bit odd is the rail that will be on the back.  It is quartersawn, where everything else is flatsawn.  I figure no one will know, as that part most likely will be up against a wall anyway.

Tomorrow I will (hopefully) make the other three legs the same way, and perhaps get started on thicknessing the other stock by hand.