I recently bought a new natural oil stone that I really like. I thought it might be good to make a box to keep it in.
 |
| Oil stone box. |
After a little searching on the old YouTube, I came across
a video with Bill Carter making a traditional box for an oil stone. It's a brilliant little series of short videos, and he made it look easy enough for me to do.
I had the perfect leftover cutoff of golden dumpster wood: a section a little less than two feet long. In a previous life it was a handrail from a stairwell. I liberated as much of the handrails as I could along with a bunch of the stair treads. It's weird to me that this kind of thing winds up in a dumpster, but good for me. I suspect this wood is
sapele (
Entandrophragma cylindricum), but I don't really know.
 |
| Golden Dumpster wood. |
I planed the board until all the finish was removed, except the stuff on the round overs which will disappear once I chamfer everything at the end. Once it was uniform width and thickness along the whole length, I measured and cut it in the middle to get the largest pieces I could: in this case 11 1/8 inches in length.
 |
I planed the board down until the groove disappeared.
My new Stay-Set 4 1/2 did a fine job with this. |
I laid the stone on the board to mark the cavity. This stone, like most natural stones, was not uniform in width and thickness. It is close, but once it's done the stone will only go in the box one way.
Bill used a big mortise chisel in his video to excavate the sides of his cavity. This worked well for him. I found that a regular bench chisel doesn't really do that job as well, so I went with a 10mm brad point bit in my tiny little eggbeater drill instead. This seemed to work just fine.
 |
| I used a piece of blue tape as a depth stop. |
 |
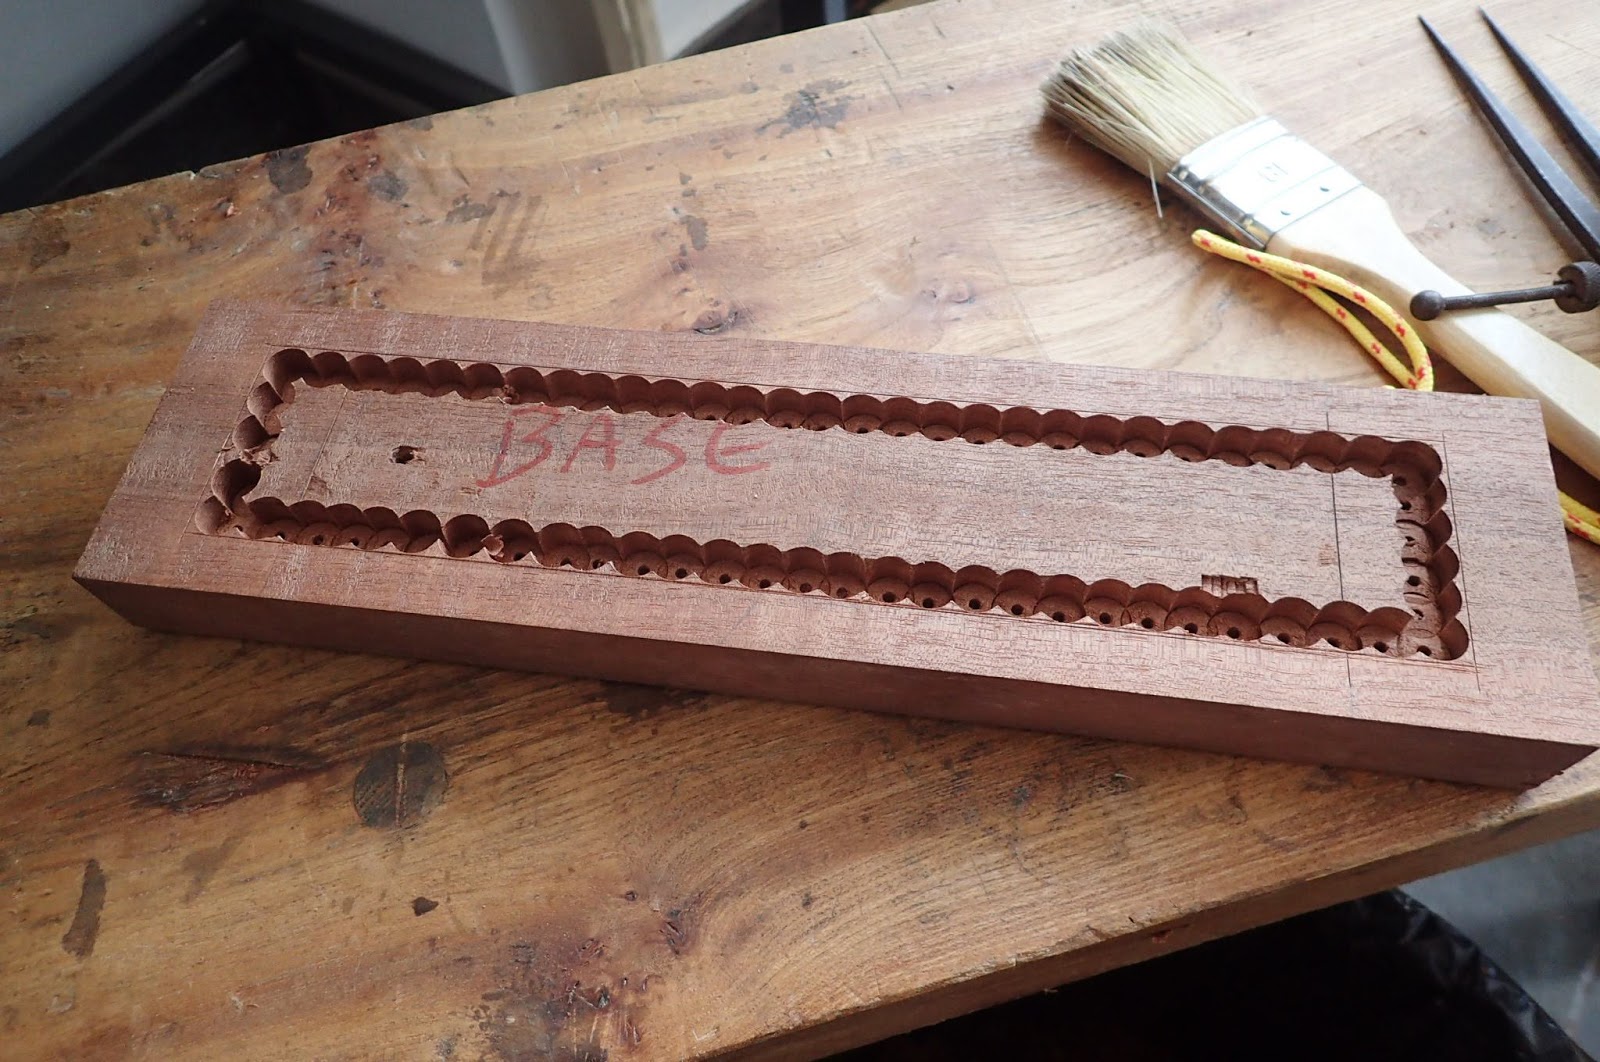
| I used the 10mm bit to drill holes all around the periphery of the cavity. |
To hog the rest out, I used a gouge. I like the gouge for purposes like this because it removes a lot of wood fast just like a scrub plane. It works with or perpendicular to the grain, and does it giving you a lot of control.
 |
| I started at one end and moved back. |
Once I got close to the bottom, I pulled out my router plane. This tool provided a quick way to smooth the bottom and get to the correct depth.
I found using the front shoe on this open mouthed router plane to be critical for this job. The Lie-Nielsen #71 doesn't have one. A #71 1/2 with the closed throat would do a fine job, too.
 |
| Easy peasy as long as the front shoe is level with the sole of the plane. |
Incidentally, I used half the thickness of the stone to be the correct depth. I had briefly considered just leaving 1/4" or so sticking out at the top, but that will just necessitate having to make another box in twenty years or so. This one should last a lifetime with this stone.
 |
Same thing for the top. Except I didn't feel like drilling so many holes.
With a little care, this worked just as well. |
It was necessary to use a chisel and a mallet to clean up the sides. I focused on those first, and left the ends until the stone sat firmly in the cavity and the lid went on properly.
 |
| The stone fits. |
The extra space at the ends is for some end-grain wood blocks. Mine wound up being 13/16", but I think a full inch would have been better. These blocks allow you to use the whole length of the stone. They are like little extenders.
Sharpening Stone Aside:
I have found that 8" x 2" is a common size for natural oil stones. I have been using stones of this size for the last couple of years, and find that they work just fine. I really liked my waterstones in 3" x 10" sizes, but oilstones in those sizes can be very expensive. The longer sizes of stone really help when using a honing guide, but you only wind up using five inches or so of the stone.
While using my oilstones, I have taken to freehand sharpening. I like to use a honing guide once to set up the angles on a blade, but after that I find it a pretty quick thing to touch it up freehand.
Being able to use slightly smaller stones is a big advantage to the prohibitive cost of some really great stones.
Aside Over.
Once everything fit in the box nicely, I moved to the outside of the box to make it pretty. To plane the bevel on the lid evenly, I marked it out with a pencil and put a board under one half of the box lid. This way I could just plane a flat to get close to the line with my jack plane, then use a smoothing plane (I have plenty to choose from) to finish it off.
 |
| Making the beveled lid. |
Once all the chamfers were done, I slathered on a coat of my linseed oil. Once that was wiped off, I put three coats of shellac on it. I used a gray scratchy pad to rub it down after each coat dried. Finally, I added a coat of my soft wax and buffed it with a paper towel.
 |
| The finish came out stunning. |
My thought in spending so much time finishing it was a hope that the dirty oil slurry will wipe off and clean up easily when I'm done using the stone. Time will tell if that plan works.
Alternatively I could have left it unfinished and allowed years of patina to work itself in. For now, I like the shellac finish.
 |
| Finished. |
I bought the stone on eBay in the UK. The seller said it is Welsh purple slate, and I am happy with it as a finishing stone before stropping. With this stone, I'll retire my Dan's black Arkansas stone to kitchen knife duty.
As far as this box goes, it was a very satisfying project. I would recommend it even if your stone is already in a box. The wooden spacers let you get to the very end of the stone when sharpening. I bet if one of them was even longer, it would make using an eight inch stone a lot better with a honing guide, too.
Bill Carter's videos were a big help with this project, and I highly recommend you watch them.
Let me know if you make one, I'd love to see it.


You know you could start cutting out the middle man and just start liberating chunks of handrail and stair treads when you need them... cant see any problem with that.
ReplyDeleteNice work on your box, looks good.
Haha! I have plenty of handrail for the moment. But OMG, I just got a ton of this stuff out of the tip. 3/8" thick, 5" wide and about 6' 6" long x more than 50 pieces. The Frau was NOT happy. 😁
DeleteThat's a nice stone box.
ReplyDeleteI can only imagine how long it would take to hog out a blanket chest.
Haha! Or a coffin.
DeleteIf that is old wood, you probably have one of the genuine mahoganies. Sapele is a newer substitute wood.
ReplyDeleteEither way, it's quite nice.
Thanks, Steve. It could be. My guess is it is from the 50s or 60s, based on the shape. Pretty square. If it was really, really old it would be a bit more ornamented, I think.
DeleteHey Brian. I recently made a box for an oil stone and while it came out nice, it's not as nice as yours. I love the bevel detail on your lid. Nicely done. And great use of dumpster wood!
ReplyDeleteHey Matt! Thanks for the kind comment. I blame everything good about this box on Bill Carter. It was his instructions that I followed.
Delete:)
I had totally forgot about this post, when we were talking about sharpening stones the other day.
ReplyDeleteIf you get an oilstone, I highly recommend this kind of box. The endgrain extensions are amazing.
DeleteI'm failing to see the purpose of the two wood blocks at the end. Would you be able to use the entire stone without the blocks since the stone is raised above the wooden holder? What am I missing here....?
ReplyDeletep.s. Lovely work....
The wooden end blocks allow me to register the blade all the way to the very end of the stone. Without them, only the very center parts of the stone gets wear. This really helps to keep the stone flat and even without having to flatten the stone as much.
DeleteThanks for the comment!
Brian