I seem to have adopted the bad habit of not posting regularly anymore. I suppose it's time to fix that.
Please bear with this post as it is a bit longer than usual. I didn't realize I did so much to my chest since the last post. If you'd like to skip through, this post has three main sections: 1) Layout of the main compartment, 2) Saw racks on the lid, and 3) Painting a bad ass bit of graffiti on the lid.
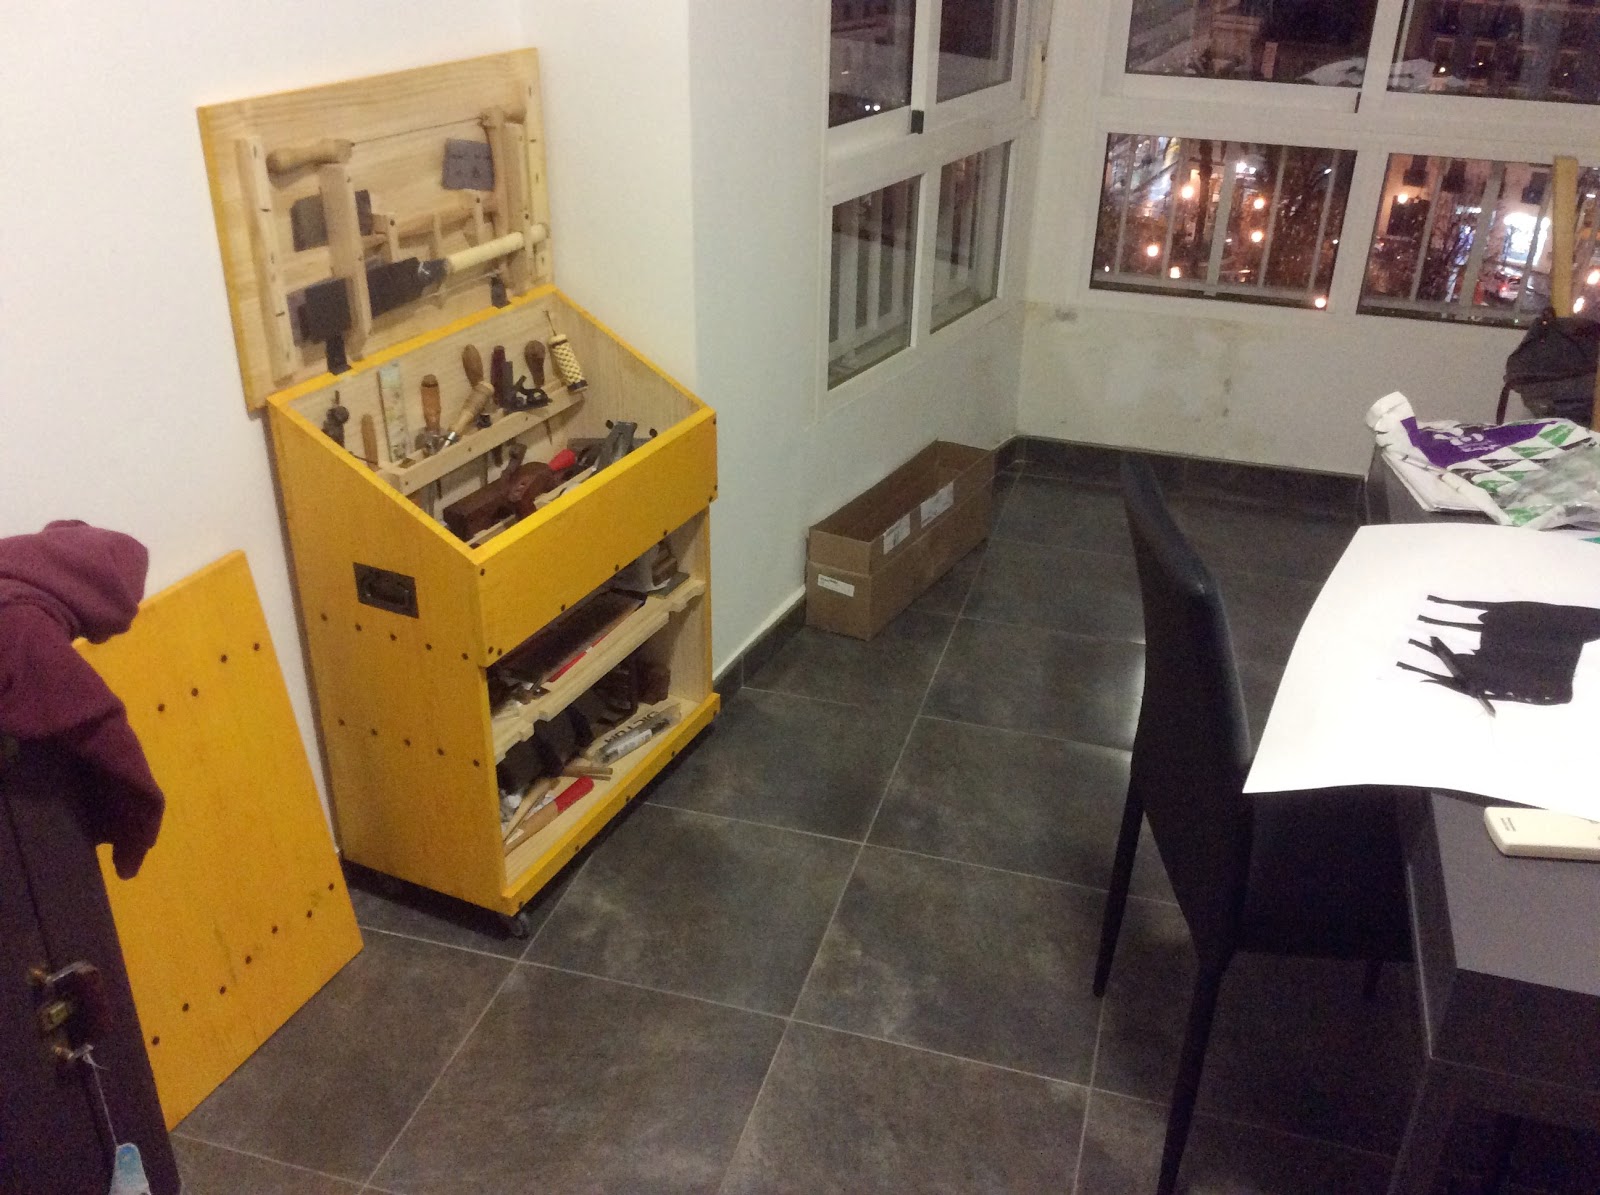
The chest now parked in it's spot.
While I was back in Germany over Christmas, I decided to use my shop and work with some appropriate hardwood. I want to upgrade the locking mechanisms of the chest. I had originally made all these parts with the same pine from which the rest of the chest is made. I decided that these parts could potentially take some abuse, so here we go.
First was making new lock pieces for the fall front out of ash.
The locking mechanisms were simple, and the measurements were standard that I used. When I installed them, I glued some bamboo skewers into the old screw holes and started over. I didn't want the old screw holes to take things out of alignment.
Next, I found an old hunk of American birch rolling around since I bought it online years ago. It happened to be the perfect width I needed, and it was flat sawn. If I cut a hunk off the end, I will wind up with two quarter sawn sticks that should be nice and stable.
Resawing the birch.
I decided that I wanted to make a heart design for the opening on the top which functions as a grab hole. No reason other than I thought it was cute.
To do this, I left my stock double thickness, and did the piercing to the whole thing at once.
Drilled 5/8" holes for the hearts.
Fret saw the rest away, followed by a little rasp work.
Once the piercing is done, resaw to near final thickness.
5 point teeth right in the middle of my heart.
Two identical hearts.
Once I got back to Spain, I planed them to proper thickness and cleaned them up.
My face planing set up.
Then it was just a matter of unscrewing the old fall front locking bits and attaching the new ones.
This works a little better for the final pass.
A coat of beeswax and they are done.
I think they look cute.
Next was plane storage. I just nailed this together with butt joints.
Hehe, I said "butt."
I used Roman nails on the ends, and cut nails in the middle. This was a lot of trouble, and I would recommend avoiding all that and use wire nails. This till is trapped inside the chest, so it does not need to be particularly strong.
Someday I might make a new one, but it seems to work.
On the front of the chest, I just nailed a small spacing strip to the front to hold the jointer away from the front of the chest. This makes it easy to install the locks, as the jointer will always be out of the way.
Plane till fit. It is in with a friction fit, no nails to secure it to the chest.
Next I wanted a rack for my chisels, marking gauges, screwdrivers, etc.
I like the flexibility of a loose rack rather than individual holes for each tool. To each his own.
My thought with this was to use Spax screws where they would be covered up, and more expensive brass screws where they would show.
First hanging tool rack completed.
Here is a view of the front of the chest from the inside.
I made a second rack and screwed it to the first. I left it a bit short in case I needed some more room for something tall.
Second rack installed.
This second rack has really opened up some space for growth. The one was just a little tight for my tools, but with the second, there is now room to spare!
Tools in the chest.
I thought I'd offer some close-ups.
Now for the lid.
First things first, I wanted a rack for my Dick saw that would allow the bow saw to be mounted behind.
Once I was happy with the thickness of my supports, I clamped one side down for the handle opening.
Clamped and laid out for the cut.
Once the saw cuts were made, chisel to depth.
Test fit. Perfect!
Now to lay out an opening for the latch.
Voila!
For the blade, I ripped the other bracket down a line I marked, then glued in three heavy shavings I got from my jack plane.
Once this is cleaned up, it will be great.
Once those parts are ready, I'll mount the bow saw.
This was really pretty simple.
It turned out I needed to bring it a bit higher, as the hinges were in the way of the saw. I did this with a couple of little spacers you can see in this photo.
Here is a photo of everything installed.
Another one with the saws installed.
Problem?
As you can see, things didn't go perfectly to plan. As I mentioned above, the hinges and the screws pushed the bow saw out just enough to make things tough on the Dick saw.
The answer, some spacers!
An easy fix.
Here they are installed. Everything fits perfectly now!
Those gaps left by the spacers leave some room to store some more tools!
Notice I have some scrapers in here.
The open chest in it's spot.
Next up, some beautification treatment. Since I'm not in Germany, the Posthorn won't be as appropriate as a Toro!
First step, make a template!
Second step, mark centers and rough in an oval.
Third step, drive some nails (there's particle board under there).
Fourth step, tie a string as long as the distance of the long axis of the oval (distance between the two other nails). Put the loops on the top nail.
Fifth step, use a pencil to draw where the string crosses the line.
Other side.
This is where we are now. Drive nails at those spots.
Sixth step, attach one end of the string to each new nail.
Seventh step, trace the oval!
Keep tracing...
Keep tracing...
Done!
Once I had an oval traced out that I liked, I divided it into thirds and cut out the top and bottom.
Finished template.
Now stick it to the chest...
And spray the crap out of it.
Haha! This is fun!
Now attach the second stencil, and spray.
Toro!
OK, I promised video.
If you are still reading this, kudos to you. I wanted a video about ten minutes long, but wound up with one more than twice that. If you're a glutton for punishment, and want to see how I loaded the tools in there, here is a pair of videos.
Enjoy!
And part two:
Now you should be mostly caught up. Next post(s) will be about the Wall Shelf Build Off! Or, you could see what I'm doing with the hashtag: #WSBO on Instagram.
I think you just broke the record for the longest blog post :-) great looking chest. And I have to reluctantly agree that "El Toro" is more appropriate on a Spanish chest than the "Posthorns" are.
Well done Brian. Really like your Toro ornamentation, nice touch for your current location. When in Rome.... :-) I think this kind of chest would do just fine for my kids tool chests, i got a few good ideas looking at your videoo and reading this post. thanks
Thanks, Bob! I'm glad you found something useful in all that. Also having a traditional ATC, I can say that this DTC is also a superb form. I give it bonus points if it needs to be more mobile, and it takes up less square footage of shop space.


Great post!
ReplyDeleteThumbs up to the video... although I was expecting to watch your "sexy behind" when you're loading the chest.... LOL
YT channel Subscribed
Haha! Thanks.
DeleteI think you just broke the record for the longest blog post :-)
ReplyDeletegreat looking chest. And I have to reluctantly agree that "El Toro" is more appropriate on a Spanish chest than the "Posthorns" are.
Cheers
Jonas
The Posthorn would have been cool, but I felt this toro would be better.
DeleteWell done Brian. Really like your Toro ornamentation, nice touch for your current location. When in Rome.... :-)
ReplyDeleteI think this kind of chest would do just fine for my kids tool chests, i got a few good ideas looking at your videoo and reading this post. thanks
Bob and Rudy. Sipping coffee
Thanks, Bob! I'm glad you found something useful in all that. Also having a traditional ATC, I can say that this DTC is also a superb form. I give it bonus points if it needs to be more mobile, and it takes up less square footage of shop space.
Delete