Boy, this June chair build is moving along right on time. I'll surely be able to finish it by next June!
I've had only a couple of short shop sessions since the last post, but I am pleased with what is happening so far.
Here are some pics:
I've had only a couple of short shop sessions since the last post, but I am pleased with what is happening so far.
Here are some pics:
 |
| Here are the tools I used to smooth the seat and shape the outer portion. The tiny drawknife has been working well, even though I have been asking more of it that it was designed for. It's the only working drawknife I have at the moment. |
 |
| Scrub plane for the front underside bevel. |
 |
| I really like this look. A bit of meat, but not so clunky as to distract. |
The next step was to trim off the back of the seat blank. I had left it on until now so I would have something for the clamps to hold onto while doing all of the shaping of the seat. I had intended to run the blank over to the Dictum shop and use their bandsaw. That thing eats through this 2 1/4" elm like butter. The problem was my work schedule prevented me from going over there when they were open.
I decided instead to give my biggest bowsaw a shot. My biggest bowsaw is a little medium sized Swedish saw given to me by Jonas a couple of years back. I really like this saw, but I thought it might be a bit delicate for this cut, and besides, it is in need of a sharpening.
I needn't have worried, as this cut was complete in about ten minutes. Much quicker than driving to another shop.
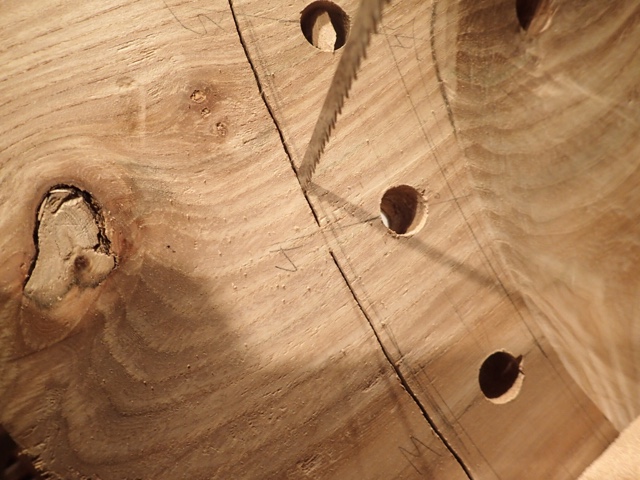 |
| It turns out the small blade of this bowsaw was just the thing. Looking at this photo, I just realized I cut off the numbers I had for the stick holes! |
 |
| Smoothing endgrain with this awesome spokeshave. |
 |
| The endgrain wound up plenty smooth for this neat photo at 44X magnification with my new camera. |
 |
| Smooth as a baby's bottom. |
 |
| Here is the final shape of my seat blank. I like it! |
I am really curious if these different elements will work together: the extreme rake and splay angles of the legs as a throwback to really old stick chairs, the sculpted seat remeniscent of a Windsor chair, the relatively modern look of the crest, and the dark color of the "I've-never-seen-it-used-on-a-chair-like-this-before" fumed oak.
One of the things I have really enjoyed about this build up to this point is the freedom of not sticking to a plan. Much of the design of this chair was either chosen at random (such as the splay angles of the chair legs), or on the fly, like the shape of the seat blank, or dictated to me by the material I have, like the crest.
If you have never build like this before, you should try it as it is quite liberating.
Brian, I love the shape of that seat, good eye my friend.
ReplyDeleteLook like you will be done before next June :-)
Bob, who never tried his hands at a chair...its on my to do list
Hey Bob! Thanks for the compliment.
DeleteDo yourself a favor (sorry, do the Canucks spell it, favour?) and build a chair sooner rather than later. When I built my shopstool, which has similar joinery as this chair, I found out there was nothing to be scared of.
Also, with a project like that, there is no need to buy a bunch of new chair making tools. If you don't have a tapered reamer, just use a brace and bit and a buttload of wedges. Christopher Schwarz saddled a chair seat recently with only a jack plane.
Also, don't be afraid to use whatever lumber you can get. I can't get green wood (except I was lucky to get this seat blank), so I use what I get from the lumber yard. I also wouldn't be afraid to glue up seat blanks from thinner lumber, especially if I were to paint them.
Good luck!
Yes Brian, Favour, flavour and colour :-)
DeleteThanks for the tips and encouragements, but don't tell my wife, I should be able to buy a few more tools :-)
Bob
Buy all means, get all the tools you can!
DeleteI think that one shouldn't use the excuse of not having a travisher to not start a chair, though.
It's been great to see this evolve over on Instagram. And great to see it all brought together here.
ReplyDeleteI really like the way this is turning out. The grain especially is amazing.
Thanks, James. This elm is amazing. I was lucky to get it. Strangely, this one has been pretty well behaved so far.
DeleteInstagram has been a lot of fun so far. You guys over there have been a lot of fun. It's neat to see what everyone is doing. Also, it is fun to get pics out right away, then expound on the point here on the blog. I'm not sure if I'm doing a good job or not, but I have been trying to put different pics up there than I do here.
You definitely have done a good job. I have found it interesting reading both.
DeleteI have followed this blog for quite a long time funnily enough and it was one of your recent posts that inspired me to try out Instagram.
It is a great place to see what woodworkers get up to and is a great way for people like me (that are too lazy to maintain a blog) to share what they do.
You've taken away my "no reamer" crutch!
ReplyDeleteLooks like I'm going to have to start on something.soon and chip away at it in small increments of free time.
I like your chair seat a lot. I'm a big fan of the chunkier stick chair look over the ultra lightweight Windsors especially in an experimental chair.
Thanks for the compliment. I think a stick chair shouldn't be too delicate.
ReplyDelete