Tuesday, August 13, 2013

The ICBMs - Part II

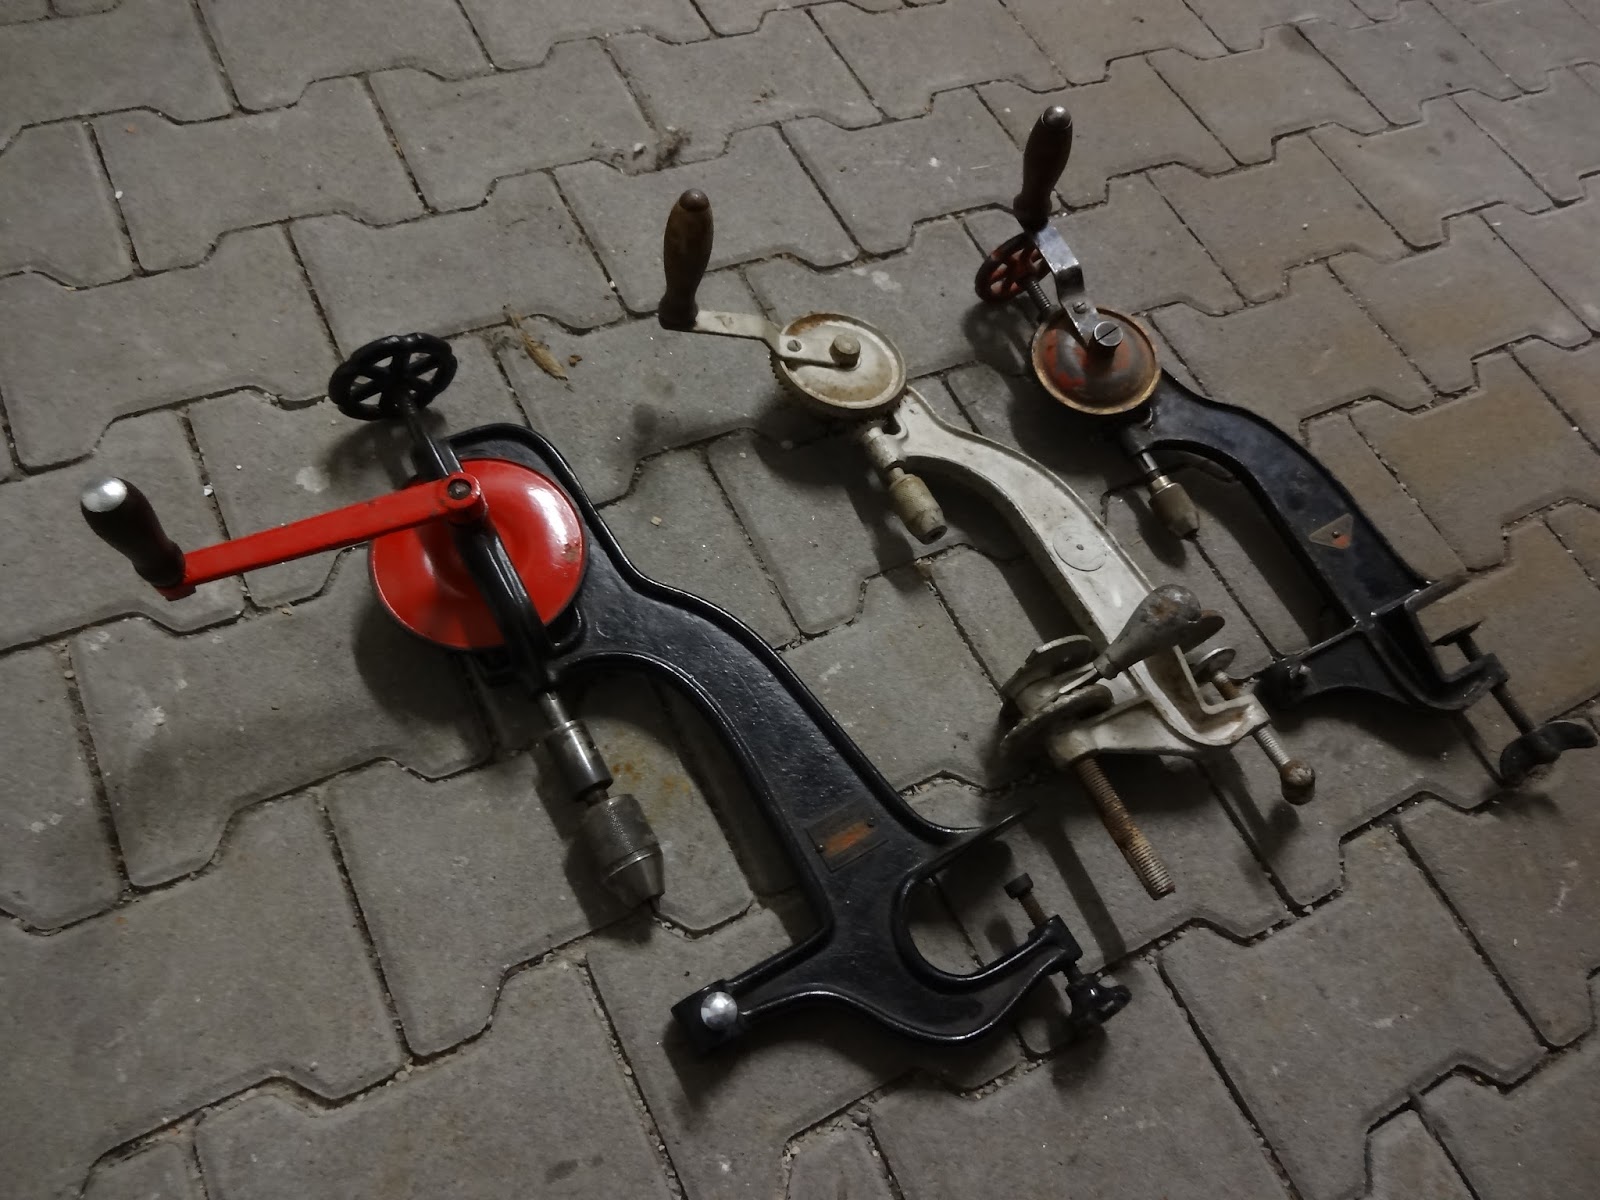
Jonathan at the Alaska Woodworker recieved the Inter Continental Boring Machines that I sent him a while back.

I had these laying around for a few years waiting for me to figure out how to get them working.

It took him about five minutes.

Check out his post!

A photo of one of the working ICBMs from the Alaska Woodworker blog.

Saturday, August 10, 2013

Panel Gauge In Use

I never knew I really needed a panel gauge before tonight, when I used one for the first time.


In the past I made due with a regular marking gauge. That, and I avoided ripping by hand as much as possible.

I recommend avoiding ripping, if possible. But when you do, I heartily recommend a panel gauge. I had a board tonight that I had to rip into four equal widths. I stepped off the distances with a pair of dividers, and marked the lines with my new panel gauge.

A few posts back, I wrote about this new panel gauge I got on eBay. I actually didn't intend to use it, but to use it as a pattern to make one from scratch. Then use that one.

Well, long story short, I hadn't got around to making it yet, and I needed one tonight, so I pulled out this vintage one. The boxwood wedge holds very tight. The pin is a replacement, I think. It is a nail that someone pounded in and filed.

I didn't sharpen it, but it still cut a fine line in the beech plank. When I use a regular marking gauge for this purpose, it tends not to be that accurate because the narrow face becomes more unstable the farther out it is set. A panel gauge has a much wider fence which keeps the beam plenty stable.

I highly recommend purchasing or making one.

Monday, August 5, 2013

I Shot My Finger Off!

Then, for good measure I thought I would try what it felt like to gouge a big hole in my arm with a mortise chisel.

I've had better days in the shop.

Today, I intended to finish the shelf project I am working on for some friends. The project is turning out, except for when I cut something too short and had to go buy another board.

This project is interesting, because it has some good paramaters:
  • The client said she wanted shelves in a particular place.
  • She agreed on the choice of wood.
  • I decided that it needs to look better than she expects it to,
  • And this project shouldn't take much time.  Preferably less than three hours labor.
With these guidelines, I went to work.

I chose to use laminated beech from the home center. If it's good enough for a Roubo, it's good enough for me. This will actually take a lot of labor out of this project -- no dimensioning lumber or glueing up laminations.

On with the safety message:

One should try not to rush a project, no matter how fast you want to do it. While planing end grain on my shooting board, My index finger got in the way during the stroke. Let me tell you, your plane will take a much thicker shaving out of your flesh than it will endgrain beech.

After some swearing and a bunch of band-aids, I was back at it. Next, I had some mortises to chop.

On the last stroke, my chisel got stuck in the stock. I pulled hard with one hand, while holding the stock with the other. The chisel jerked out, and my natural reaction was to try to stop the momentum once the chisel was free. I then felt a scratch on my fore arm. Looking at it, I realized how sharp my mortise chisel still must be, as there was a nice crimson arc on my arm, ending with a pretty deep gash.

At this point, I decided to stop for the day.

I took lots of pictures of this project in progress, but wound up leaving my camera elsewhere. I promise there will be pictures of the project when I finish it.

Sunday, August 4, 2013

Beam Me Up!

The Frau and I are helping some good friends out with a massive renovation project they have. They have an older house here in Munich that was built in the 1930s. It has been a while since the last renovation, so they thought it was time to have contractors come over and redo all of the bathrooms.

The contractors did a nice job on the bathrooms, but now it is clear there should be some sprucing up of the rest of the house, too.

While they and their four kids left town for a two week vacation, we talked them into giving us the key to their house so we could have our way with their upstairs.

The upstairs is a former self-sufficient apartment that they basically only use for storage now. The plan is to make the upstairs a nice mom & dad only zone with the new bathroom, a new bedroom, and a walk-in closet that was formerly a kitchen.

Unfortunately, I didn't get before pictures, but the kitchen had a built-in cabinet in the corner that needed to come out. When I pulled the cabinet down (they don't build built in cabinets like THAT anymore!) a structural beam going from floor to ceiling was exposed.

After inquiring, our friends let us know they wanted the wooden beam featured in the room, rather than painting it or covering it up with sheetrock.

Goodie!

It was a mess, though. It was covered in plaster spatter from when the walls were originally done, and it was very rough.

The Frau spent a few hours yesterday cleaning it off, and this is what it looked like when I got there after work today:


Now what?

After consulting around the internet, I decided the best way to proceed was with scrapers.

After four or five swipes with a card scraper, I realized this wasn't fine cabinet work. This beam needs to be smooth enough that it will invite people to touch it, but it will not get a French polish.

So, I went snooping around my friend's work room until I found a random orbital sander. Actually, this tool used to be mine. I gave it to him when I decided I probably wouldn't use it anymore.

How handy!

It only took about 20 minutes to sand the whole beam down to 80 grit, which turned out to be fine enough for this project. I spent a little more time sanding out the chatter marks from the knots, and I was done.

To finish it, I decided to take a note from my tool building and use boiled linseed oil.

Don't tell them I used their good pot to heat up the finish!

I used a trick I learned finishing a dining table of heating up the BLO in a double boiler before applying it. This 80 year old pine beam was super dry, and sucked the oil in like crazy. Using hot oil allowed it to suck even more. Hopefully it will only take one or two more coats to finish.

Speaking of finish, here is the after shot (at least prior to us painting the room):

I really like the way the BLO looks on the steel support.
I tried to leave the layout lines from when the original Zimmerman cut the mortise.

A couple more coats of BLO over the next few days and it will be done! Unless I decide to put some wax or something over it. Easy peasy!

Next, I am making a shelf for the new bathroom.

Wednesday, July 31, 2013

ICBMs Launched, Part I

If one learns from one's mistakes, I learned a giant lesson on what not to do on eBay.

Now what?
A couple years ago, I got an egg beater drill that I thought was just great.  So great, in fact, that perhaps I should see about getting a hand-cranked drill press. I think what I really wanted was a post drill, but there is no way one of those will fit in my shop.  The next best idea was one of these table-mounted thingies.

In retrospect, it really was a good idea. Next step -- eBay!

Bad idea.

I found three likely candidates, and not knowing anything about them, thought it would be neat to have one.  So I bid a low price on all of them hoping I might get lucky with one.

Here's where I learned something important:  Never do that.

I won all three auctions.  They all showed up, and I wondered what I was going to do with them.  Then, upon closer inspection, I realized none of the three were complete.  Two of them were missing the beds, and one had a bed that was broken.

So I did what any other pack-rat tool collecting wannabe would do:  I put them in a box, stored them and forgot about them.

Then, the other day I read a post by the Alaska Woodworker.  He actually wanted one of these things, and lamented in his post that someone beat him to one that he found for sale.  In his defense, the one he wanted was complete, and probably worked perfectly.

To make a long story short, I contacted him, and he agreed to take them off of my hands.  It was nice to see them in the mail going to someone who might be able to get them running and perhaps used.

When these Inter Continental Boring Machines arrive at their destination, I am hoping the Alaska Woodworker will post Part II of this series, documenting either his rehabilitation of these magnificent tools, or his drive to the dump to dispose of junk sent to him from half a world away.


Monday, July 22, 2013

Productive Procrastination

I have not been able to spend any time woodworking for the last month or so. The last real project I did was the bowsaw class I took with Christopher Schwarz.

This isn't the way I like things to go. I get cranky if I don't get my shop time.

Plus, projects are starting to pile up. I have a dinner table to get working on, and my Shaker side table came to a screeching halt and has stayed there.

The good news, is today was the first of two days that I get to spend in the shop. A perfect time to get in gear and finish this side table. I have made a pledge that no matter what, this table will get finished in these two days.

As is my habit of getting some work going forward on this project, I ignored it and started something new. I decided to make a couple of bench hooks.

Yesterday I found Roy Underhill in a Lie Nielsen YouTube video, where he demonstrates building a pair of bench hooks. Do yourself a favor and watch this video right now if you haven't seen it yet. Roy also demonstrates construction of these bench hooks on his PBS show.

I followed his instructions and had good results.  What's more, this is a project that can be done with my Beginner's Tool Kit.  There really is only a few tools needed to make this project.

The finished product.

Rough stock sized correctly and six squared.

Kerfs to aid in chopping out the waste.

Chopping out the waste.

Cleaning things up with a chisel ...

... and a plane.

Finished bench hooks in use.
My Beginner's Tool Kit contains only a few tools.  A jack plane, a pair of chisels, a Ryoba saw, and something to keep everything sharp.  These bench hooks can very easily be made with these tools.

I did use a couple others on this project.  First, a card scraper makes getting the face of the bench hook to look good easy. Without it, there is an ugly transition where the plane can't reach near the hook.

Of course, I used Trevor the Mallet to bash out the waste.  It worked great.  I made that mallet with the BTK, so I think it's OK.  If you don't have a mallet, I'm sure you'll find something in your shop laying around that will work, such as a heavy piece of scrap.

Lastly, I used a rasp for the round over on the second hook.  The first I did with my chisel, as Roy does, but I rightly thought I could finish it easier and faster with a nice hand-stitched rasp.

My AAR for this project:
  • Roy is hilarious. I especially liked his secret to flawless woodwork.
  • Oak splits like crazy, and one should be mindful of the grain when laying this project out.
  • This is a great project that takes only a couple hours from roughstock to finished product.
  • One of the bench hooks was from a piece of wood that had a crack. I finished the piece, and then glued the crack shut. I probably should have done it the other way around.
  • While one should strive for two bench hooks whose dimensions are exactly the same, there is a point where returns do not justify the time and effort spent.  Mine are close, and will hold a piece of stock any size stable. That is all these are supposed to do.
Hopefully tomorrow I'll get to get something done on the side table.

Monday, July 15, 2013

Good Idea for a Collapsible Trestle

The other day I was trying to describe to my friend Jonas from Mulesaw an idea for a table. He said a local club asked him to build some tables for their house. Since he is in Denmark, I suggested he should call them Viking tables. I don't think these are really called that, but if you make them, you can call them whatever you want. Right?

Later that week The Frau and I went on a hike up to the Schachenhaus.  Lo and behold, there were some old, handmade versions of this exact table I was thinking of up there.

They look good in this setting

This one has two pine boards for a top.

Fairly straghtforward joinery with lap joints and wedged through tenons.

A neat touch is the sliding dovetail.  You can also see removable pins holding the top to the legs.
It looks like they go together and come apart to store flat.  Sitting at them was comfortable, and they are stable.  Plus, as you can see, they last a long time under hard use.

Here's a couple more pictures from our hike:

Even with the mist it was a beautiful day.

Mmmm.

Crazy King Ludwig's hunting lodge.

Alpine gentian (Enzian) in the botanical garden.