Tuesday, June 11, 2013

Procrastinating

The Frau is out of town for a couple days, I have a list of chores to do before she gets back, and I need to make some progress on this Shaker side table.

So I did what any of you would have done.

I spent the whole day in the shop making a new handle for an old cross cut saw!

Isn't it pretty?
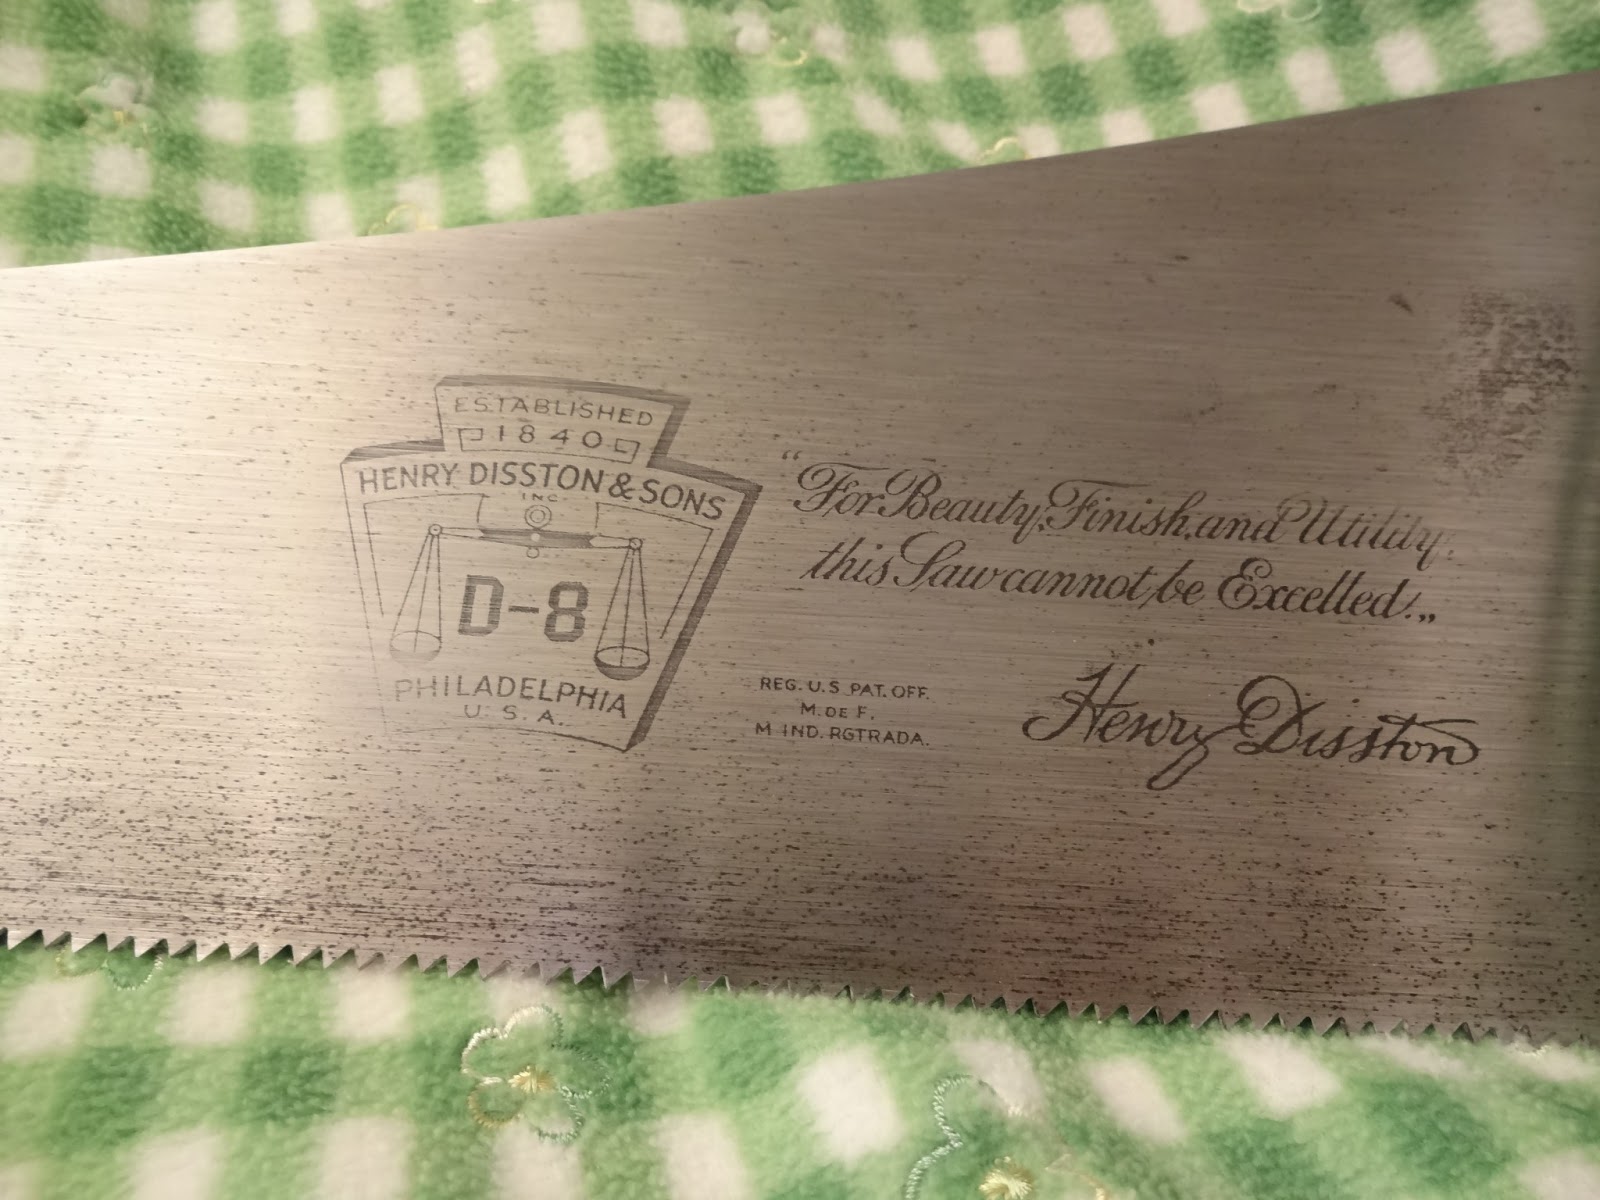
I took that ugly handle off of the Diston D8 that I have, found an appropriately sized hunk of scrap, glued on a template (I chose to go with a vintage D7 pattern from Two Guys In a Garage tweaked so the saw bolts lined up), and went to town.

I had never done this before, so I was pleased that I finished the saw, including sanding the saw plate until it was shiny, then sharpening it.

Here's the glamour shots:

Before

After

Plus a nice shiny, sharp saw plate with a nice etch.
The new handle is from a chunk of perfectly quatersawn oak I had laying around.  I've never seen an oak saw handle.  I finished it with the polissoir and Dick wax.

After I screwed the handle back on, I tried a cross cut in some one inch maple.  After a couple of adjustments, It saws bang on straight, fast, and extremely smooth.

This is my new favorite saw.

Lessons learned:

  • There is a reason saw handles aren't made in oak.  It is hard and doesn't shape easily.
  • Bowsaws are cool!
  • Decent hand cut rasps are a must, but a project like this still needs sandpaper.
  • This project was a blast!
  • It wasn't as hard as I thought it would be.  However, If I hadn't been so impatient to get it done, I think it would look and feel even better.
  • Drilling precision-depth holes for the saw nuts with a breast drill isn't so easy.  I don't think I got a single hole the same depth as another.
  • I love building tools.
Overall, I look forward to doing this again.  


My Crosscut Saws

A couple years ago, I bought a couple saw filing kits from the guys at vintagesaws.com. Saw filing kits from this site are great.  You get to pick out whatever vintage saw you want, have the teeth shaped however you want them, and they throw in the correct saw file.

I wound up with two pretty cool saws.  A mid 20th century Diston D7, and a really cool old, old saw with split nuts that is of an unknown maker.  

I really like the handle of the old saw, it fits my three finger grip perfectly.  The D7, not so much.  I'm thinking of making a matching saw handle for the D7, and sprucing up the old unknown saw.

Here they are, enjoy.


Monday, June 10, 2013

Spear & Jackson (BadAxe-ified)

This is what I would consider the very first "decent" backsaw I have ever owned.


I feel like this saw is an extension of my hand when I use it.

I got it from Mark Harrell at BadAxe Toolworks.  It is a Spear & Jackson 10" backsaw with a steel spine that I use for dovetailing.  It is hard to tell from the photo (which is actually a scan), but the saw plate is shiny and new.  At least it was in 2010.  Mark put a brand new saw plate on this old saw.  It definitely makes a sweet user.  I don't know much about the dating of S&J saws.  Perhaps someone out there knows when this beauty was built?

I've recently bought a bunch of used backsaws from eBay, with the intention of learning how to rehab them.  Over the weekend I spent some time following the links around on the Old Ladies blog, and I think that I am ready to try making a new saw handle.  While I'm at it, I should finally get around to repairing the chipped bits on this one.

Here are a couple of shots of this saw handle that one should be able to print out and use as a template.  The lines in the photos are one inch squares.  You should double check before you start that the template printed exactly the way you want.  Enjoy!


Friday, June 7, 2013

Change of Plans

http://www.zeit.de/gesellschaft/zeitgeschehen/2013-06/fs-hochwasser-deggendorf-2
photo courtesy Zeit Online
The above photo is near Deggendorf, Germany, not far from where my woodworking class with Christopher Schwarz will be in a few days.

Needless to say, Dictum had to come up with a 'Plan B.'

Luckily, last year Dictum opened a new retail store right across the hall from their newly-acquired workshop in Munich.  The nice folks at Dictum called yesterday to make sure it would be OK if they moved the class there.

It's perfect for me, as I live only about a 10-15 minute walk from the Munich store.  I think that for some others it might be a problem as accommodations in Munich tend to be a bit more expensive than at the abbey in Niederalteich.

If you aren't signed up yet, it might be worth an inquiry with Dictum to see if there is still room for you in either Christopher Schwarz' bow saw class or his Roorkhee chair class. It is sure to be a lot of fun. Plus, supporting this company by purchasing their products and attending their classes is probably as good of a way as any to help them recover.

Hopefully the thousands of other people affected will recover, too.

Monday, June 3, 2013

Shut Up and Sharpen - My Entry

Chris Schwarz recently challenged people to shoot a quick video of how they sharpen.
Here's mine.

Tool Review: Trevor the Mallet

Trevor the Mallet
Finally! I am able to work on this Shaker side table project. It is weird how a month can slip by without having an opportunity to get any time in the shop.

Today the first order of business was to finish bashing out the mortises.  A while back, I did a poll on how I should fix a mistake, because I went and chopped two mortises out of a leg that only needed one. 

Oops.

Feedback I received on that post was nearly unanimous in the desire for me to stick with the original leg orientation, and patch the extra mortise.  It was a great idea, as the drawer would cover the patch and no  one probably would ever know.

With this information and advice in mind, I promptly ignored it and decided to re-orient the legs.  These legs all look good, and I don't think it will detract too much.  The biggest benefit, is I was able to move forward with this project, rather than go back and fix a mistake.  

Worst comes to worst, I'll just build another one.

What does this silly table dilemma have to do with Trevor the Mallet, you ask?  Well, nothing.

I was able to finish the mortises on the legs without causing a revolt with the neighbors.  It is Monday morning, I waited until most who would be going to work left, and spent an hour bashing away.  I found out that putting the leg in a clamp and chopping them on the floor Japanese style makes remarkably less noise in my shop than doing it on the bench.

Too bad, really, because my Roubo with a 5 1/2" oak top was born for mortising.

Chopping these mortises really gave me an opportunity to give my new heavy mallet, Trevor the Mallet, a good workout.

The mass of this mallet is perfect.  It isn't so heavy that you get really tired chopping a few mortises, but it is big enough to make mincemeat out of the cherry that I am working on.  The mass makes things nice and easy, just the way I like them.

The handle is comfortable, and the traditional shape of it lends itself well to knowing exactly where you should be holding it.

The big advantage, in my opinion, is the angle of the faces of this mallet.  While constructing this mallet, I measured the distance between where the center of the mallet face would be to the tip of my elbow.  I used a string to lay out this angle on the face of the mallet, and cut the face using this mark.


This angle is a lot steeper than any commercial mallet I have ever used.  I am convinced that this is the perfect angle for me.  

I had absolutely no problem hitting the chisel square every single time without even having to think about it.  This lets me focus on the angle my chisel is at when entering the wood.

As long as the lamination holds together for this mallet, I see no reason why this mallet won't last me a good, long time.  There seems to be very little damage to the face of this mallet, which gives me even more confidence.

If you didn't catch it, I built this mallet using only the tools in my basic tool kit.  You can read about this build here.

Next up, a review of Trevor the Mallet's little brother, Travis the Mallet.


Sunday, June 2, 2013

The Good, the Bad, and the Ugly: Latest eBay Find

The Good:

18th Century Ovolo Moulder
I decided to bid a few quid on British eBay, to see if I could get a nice example of an 18th century moulding plane, for use as something to look at while I make my own.  I found this nice example for a low price.  18th century planes seem to go for a lot on US eBay, no matter what kind of shape they are in.


This plane has gorgeous color.  My guess is someone put a coat of wax on it in the not-too-distant past, but the wax actually gives the plane a nice glow.  And it is clean.  Not a speck of dust on it, so I know it didn't come out of someone's user kit.


The arises on the bed are crisp and clean.  This plane was not ragged out.  Also, the blade very well could have last been sharpened when this plane was new.  I'll have to take a closer look at this blade to see the tool marks on it.


The little details are what I needed to see for real.  I have never seen an 18th century plane in real life before, so I was excited to get this one.


The Bad:

The wedge on this plane is a replacement.  Not only is it probably a hundred years or so too new, but it is from a plane that had a skewed blade.  Strangely enough, it cants in the mortise because it is too narrow, but holds the blade.  This in itself isn't the end of the world, as I could make a replacement and fit it properly.  That might be good practice.


Because the wedge is for a skewed plane, it has apparently put stress on the blind side of the mortise, and a small crack has developed.


The Ugly:


I think I know why the sole and the blade look brand new.

My guess is that there is no point trying to get this thing to cut.  It is so far out of whack, that I hold little hope for it as a user.

Conclusion:

I am not too overly upset, as I didn't buy this plane specifically to use, but to inspect.  There are a couple things I really like about this plane, such as the treatment to the wide edge below the grip (I forget the name of this part at the moment).

I could put it back up on eBay and sell it, but I am thinking of a better use for this plane.  After I am done with my inspection (and hopefully a hollow and round pair), I am thinking of passing this plane on to someone else who would like to do the same, with the caveat that they pass it along to someone else when they are done.  This old dog may have a way to benefit the world other than being nailed to a wall somewhere.

Who's in?