Showing posts with label Japanese Tool Box. Show all posts

Tuesday, April 23, 2019

Japanese Toolbox-Style Humidor - Part III: The Cigar Till

I actually like making dovetails. I wonder why I don't do it more often? I can't think of the last project I used this joint. I suppose it's time.
Sawing tails first.
Now that my Japanese toolbox-style humidor has a Spanish cedar lining, I turn my attention to the till. I need a box that sits on top of the lining I just installed, and that also permits airflow above and below the cigars that live in it. I chose to make what is essentially a small open box with strips of cedar going diagonally glued to the bottom.

I set my marking gauge so the width of the side pieces would go from the top of the lining to just under where the lid of the box winds up. With that measurement, I ripped some pieces from the bits of Spanish cedar that I resawed earlier, and cut the pieces to length.
Cute little buggers.
With that done, it was just a matter of marking out the dovetails and cutting them.

Easy, right?

I found this to be a real challenge in such small dimensions. Also, I didn't have a proper dovetail saw here. For some reason I took my new dovetail saw to Germany and left it there.
Work holding for cutting the pins using my Dick saw.
With a little patience, a lot of pairing and a lot more time than I thought I'd need, they were done.
Joints are ready to glue up.
First I thought I'd drill some holes in the end pieces to make the till easier to grab and lift out. Plus I think they look cool. That was relatively straight forward, except that one of the end pieces split in half when I started boring the hole. A little glue and I can't even tell where the crack was.
I'm happy with the dovetails.
This next picture is perhaps a better explanation of what I am doing. This box will sit directly on top of the short lining. If I had run the lining all the way up, then the till would have had to be even narrower in order to sit inside of this lining.
This way, I get a little extra capacity in the till for longer cigars.
All that is left is to glue on some diagonal strips to the bottom of this box and I'm done.

WRONG!!!

I forgot to include the thickness of the applied bottom. If I do it this way, the lid of the box won't be able to go in.

I can't cut the box down, as the dovetails are already done and I'll compromise the strength of the dovetails if I do that.

The option I decided to go with was to lap the strips into the bottom of the drawer.
I know, this looks like I'm going to wreck my box.
It was a bit scary cutting into my box like this, but at the least I figured I'd learn something.

Mostly I learned that I need to think my plan out to the end before starting.
Close up of the cut I'm making.
It was fairly easy to measure out and mark the cuts. I did my best to be accurate with these.
All of the cuts made and coped out.
I cleared the waste with my fret saw and a paring chisel. Once I was sure everything fit, I glued it up.
Now it's starting to look right.
All of the pieces I glued in were a bit oversize. My plan was to plane them down to size after glue up so they would slide smoothly on the track. To see where I was, I just dropped the till into the box upside down.
Seeing how much needs to come off of the bottom pieces.

It was then just a matter of planing them to the desired length.
Almost done. I just chamfered all of the sharp edges.
Done.
I did have some leftover strips that I was able to make into moveable tray dividers. They are a friction fit. They fit in either the till or in the main compartment of the box.
Till in place with moveable dividers.
Let's load this sucker up!
I put a few cigars in the bottom compartment. The space on the left is for my hygrometer until I decide exactly how I want to mount it.
There's more than plenty of room in this box for lots of cigars. I estimate three to four boxes of cigars would fit in this box easily.
Room for lots of cigars, and keeping them organized.
Overall I'd say this is one of the most enjoyable projects I've done. It's weird that the inside of the humidor took longer than constructing the actual box, but that was part of the fun.

I kind of want to make another one.

If you haven't read the first two parts of this build, you can find them here:

Part I
Part II

Monday, April 22, 2019

Japanese Toolbox-Style Humidor - Part II: The Inside

If you are a regular reader of my blog, you'll remember I recently finished a Japanese toolbox-style box intended to be a humidor.
My Japanese toolbox-style humidor.
I made it out of laminated scots pine (Pinus sylvestrus) and nails. I was a bit concerned that it might not work very well at keeping the humidity where it should be for cigars (I like 55% to 75% relative humidity).

Also there was a real possibility The Frau might steal it and convert it into some kind of jewelry box or something.

I was lucky in the fact that it wasn't stolen, and it seemed to keep the humidity where it should be.

The box seems to maintain humidity perfectly.
A proper cigar humidor needs to be lined with Spanish cedar (Cedrela odorata). The aroma of this wood is very complimentary to cigars. In fact, most fine cigars come in a box that has this type of cedar in it. That's why I kept my cigars in the original box, and put the whole box in the humidor.

It turns out that I can get plenty of this type of cedar through the mail from Comercial Pazos for a reasonable price.
Strangely, the Spanish term for Spanish cedar is Brazilian cedar.
The block of wood I got was 85mm x 65mm x 400mm. I needed strips of this in five or six millimeter thicknesses. That means it's time to resaw.
I use a sawblade clamped to my bench on a spacer the correct thickness to start a kerf.
This makes it easy for the saw to stay where it should.
Just a few minutes work.
Rinse and repeat.
While planing these to a smooth finish, I wound up with a bunch of awesome smelling shavings all over. I decided to keep them. I stuffed them in large tea bags and taped them shut. I suppose if I have to transport cigars in a Ziploc, one of these thrown in might help.
At a minimum they'll keep the bugs out of my sock drawer.
Once I had some pieces marked out for length for the sides and bottom of the box, I had some shorter lengths left over. After all that work resawing, I thought it a shame if I didn't use the scraps. I used them in the ends.

I edge glued them to a longer piece, then fit the whole thing in the end. This panel doesn't have to be particularly strong, because it will be captured by the pieces I'll put on the bottom and sides.

I chose not to glue any of the lining in, so that it can be removed and replaced if needed.
Self-made Leimholz used on the ends of the box.
Next was the lining for the floor. I was able to use only two pieces. I left a little room for them to contract and expand, but I don't really expect that to be a problem. Better safe than sorry, that is.

The side pieces went in next. I made them so they went up about half way to where the bottom of the lid goes. The cool part about this is the till will ride on these two pieces, so the till will be no narrower than the bottom compartment when it is all finished.
The lining in the box.
So far, I think it looks and smells great. It is all tight enough that it stays put with no glue. I also did not plane much on the faces that touch the pine. I left them pretty rough, right off the saw.

So far I think this is a fine upgrade to this cigar box.

Next up, the till.

If you haven't seen it, check out Part I.

Wednesday, March 13, 2019

Japanese Toolbox-Style Humidor

The finished humidor.

I've recently found myself with a box of fine cigars. The great thing about cigars is that it's a great thing to do socially. I.e., you sit around with good friends who also smoke cigars, and contemplate how good life is. That's really all you can do while smoking a cigar.
A fine cigar with a great friend in a good beer garden. What could be better?

I've never smoked cigarettes. I'm sorry, but that seems to be a filthy habit. I shake my head when I see smokers outside in the snow getting their nicotine fix. That doesn't look like any fun at all. I have no problem going all winter without a cigar. In fact, I enjoy smoking only once or twice a year these days.

Rant over.

I tried to just put a humidifier in the box my cigars came in, but it turned out to be hard on the box. Those boxes are for presenting cigars, and the joinery isn't up to the demands of the differences in humidity. Plus, I was having a hard time keeping the humidity up to 55%. Good cigars need it a bit more humid, around 70% is ideal.

I looked around and had enough left over laminated pine to make a small Japanese toolbox style container, so that's what I did.
Drilling pilot holes for the nails.
I built a Japanese toolbox once before, and I borrowed heavily from Greg Merritt's fine tutorial. I did this one nearly the same, only to a smaller scale.

Measurements of this box were determined according to how much wood I had available, with the stipulation that it was big enough to put the cigar box I have inside.
I used Roman nails, except on the bottom where I used regular cut nails.
Really, I should have cut dadoes in the wood to house the joints, but I didn't do that on the last one of these I made, and it is holding up fine with heavy loads. This box is just meant to sit and hold dead leaves.

One thing that I changed was the handles. The handles should be solid blocks that go from the outside of the end wall to the very outside edge. I didn't happen to have anything appropriate, so I used 18mm stock and just bumped it out to be flush with the end.
I changed the handle to get away with thinner stock.
I think that this will be no problem for this small box, but if you make a bigger box for heavier loads, it could be worth it to laminate something together to make a solid block for the handle.

I was so proud of my nailing skill up to this point, as I hadn't marred the surface of the box yet. Well, that ended when trying to attach the end caps.
Woopstie!
This is the Frenchiest of all French marks. So far, I've left it. Perhaps someday I'll saw it out and attempt a repair. For now, it's just a sign that says, "Hand Made."
Marking where to drill pilot holes.
I think last time I left the cross battens on the lid a little over-length, then trimmed them to perfection after they were nailed on. This time I cut them to length first, and struggled getting everything lined up. Eventually I got there.

Since this is not a work box, but something that will sit on furniture, I needed a way to keep the nails on the bottom from scratching whatever it is sitting on. I happened to have a thin piece of scrap sycamore, so I ripped it in half and glued the strips to the bottom. These will keep the nails away from the surface of whatever it sits on without looking like I added feet.
My clever feet.
It turned out kind of cute, I think. The Frau thinks the lid looks like the letter "N," which is the initial of her last name. Don't be surprised if this humidor eventually turns into a jewelry box.
The little one next to it's older brother.
These two boxes are made of the same wood. The older one has about nine months worth of sunshine which darkened it considerably. Neither of them has any finish at all, other than planed surfaces and a bit of polissoiring. After chamfering off all of the sharp edges, it is done.
Cigars go in there.
I have no Spanish cedar here to line it with, but I do in Munich. Someday it will get a proper lining to make the cigars happy. For now, I'll just leave the whole box in the bottom and hope the humidity doesn't cause the lid to swell shut.

Tonight I leave for a short trip to Munich. That means more work on the trestle table. This was a good warm-up. Stay tuned!

Sunday, July 8, 2018

Japanese Tool Box


I finished something!
I have had a very inspiring few weeks since my last post. I traveled to Germany and crashed Christopher Schwarz' French workbench class at Dictum, met several woodworkers, carved my first spoon, and started a staked side table project while there.

I'll not write about any of that today. Instead, you get to see the Japanese tool box that I built a couple of days ago.

One of my Instagram friends that I was finally able to meet while in Germany suggested that I build a Japanese tool box. It sounded like a great idea since my Dutch tool chest was starting to get cluttered with too many tools.

The DTC is fantastic, but it works best when everything is neat and orderly. Something I typically am not good at. The Japanese box will hold some of the tools that I don't frequently use.

Because most of my tools will stay in my DTC, this box doesn't need to be particularly big. My longest tools, my Ryoba saw and my jointer plane will not live here. I might put my oversize, giant Dick saw in this box, but it does break down, so that shouldn't be a problem.
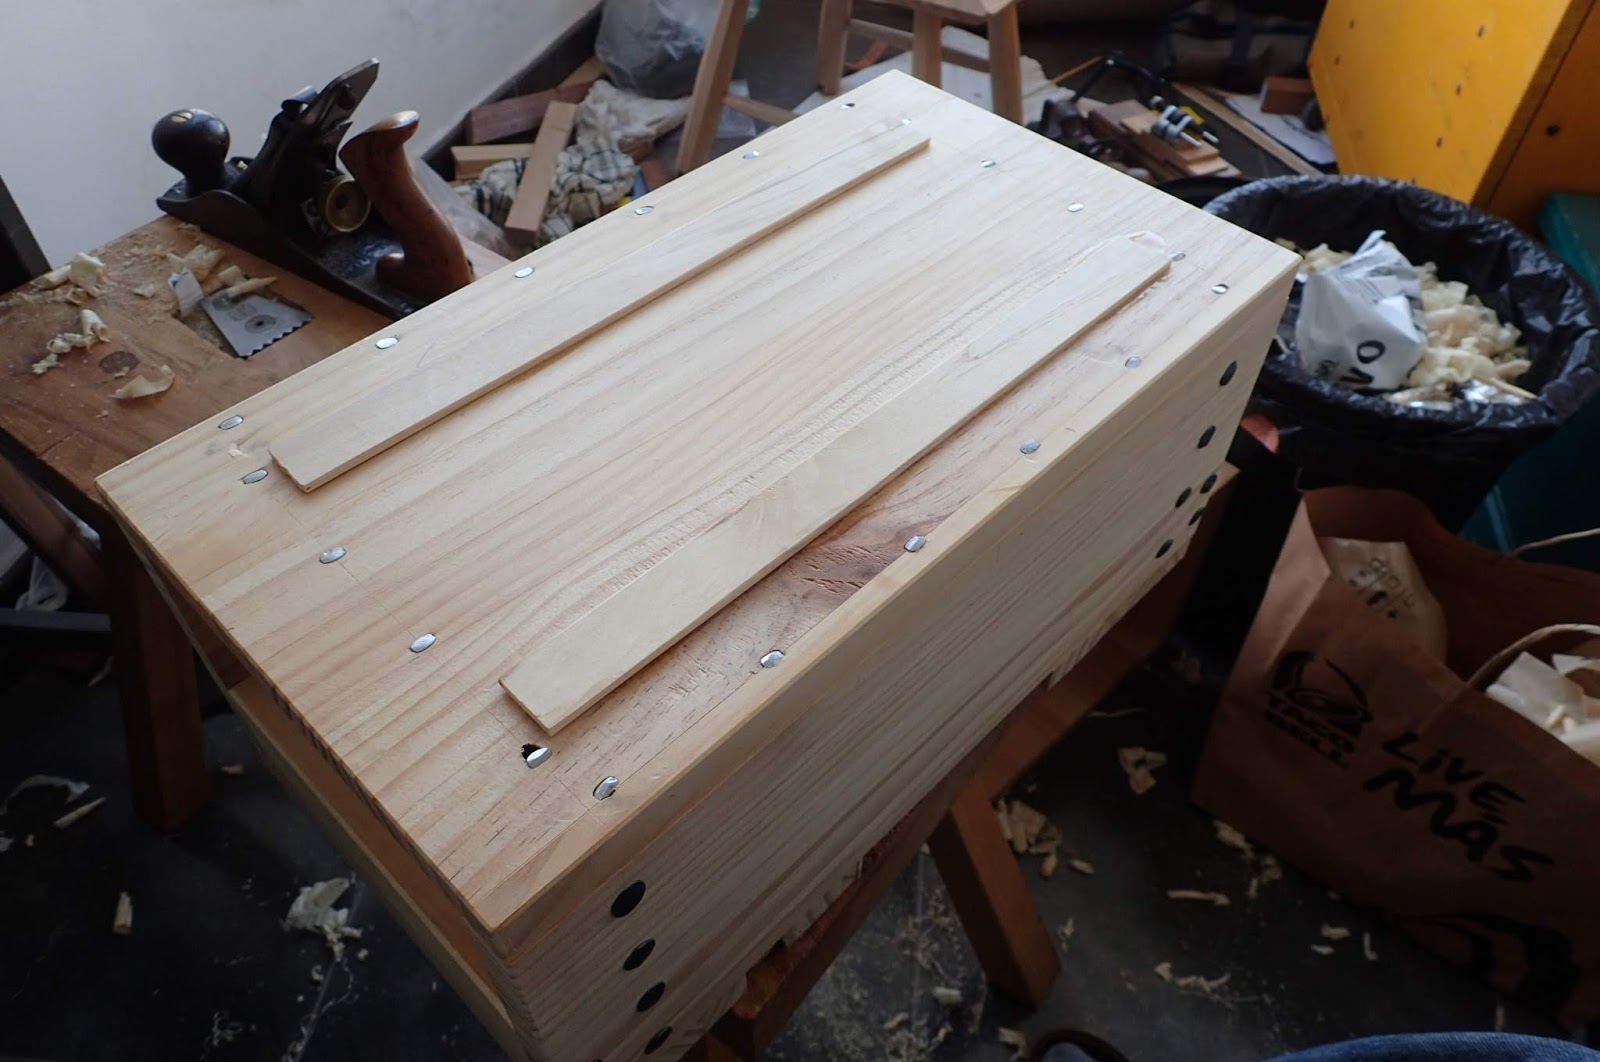
Available suitable lumber for my new box.
I have some plastic wrapped, laminated wood lying around that I had intended for another project lying around. This will work perfectly. They are 1200 mm long. The wide one is 300 mm wide, and the narrow one 200 mm. These will be perfect for a box that will be around 600 mm long.

The very first thing I did was some internet research. I happily discovered that Greg Merritt built one of these a year or two ago, and posted his usual impeccable drawings on his website. I relied heavily on his drawings, but I used nails and skipped the housing dadoes. Nails, no glue and no fine joinery sounds like a fun way to build a cool box.

I probably should have read his blog a bit more carefully, and I would have prevented a few problems. Instead of joining the carcass together, then nailing the bottom on, I started by nailing the sides to the bottom (after sawing to length and smooth planing).
I wouldn't recommend starting this way.
I thought it would be simpler considering that I have no bench and my workholding is limited. It made things a bit more complicated as I had to be extremely precise in sawing the end pieces to length. In fact, I had to scrap the first pair of end boards and make a new pair. Thankfully, I had enough wood.
I toenailed most of the nails to add mechanical strength.
To make it look nice, I stepped off the spacing for the nails with dividers and drilled pilot holes for the Roman nails with a tapered drill bit. I used regular 8d cut nails on the bottom, so the heads could sit flush or a little below the surface allowing the box to sit on the floor without messing up the floor.
Cut nails are incredibly strong compared to wire nails.
Assembling the box was relatively straightforward. All of the visible nails were stepped out with dividers and have a big, decorative head.
The box is nailed together, awaiting all the sharp edges to be chamferred.
One note about the handles: if you build a box like this, take Greg's advice and use nice thick stock for them. I used some spruce or fir or something for mine, and they are 1 5/8" thick. This leaves an extremely comfortable handle that really lets you grip the box. Even though it is small for a box of this type, loaded up it could be very heavy, and balancing a heavy box on the tips of your fingers is not fun.

The endcaps are nailed on with an eye toward overkill. The nails go in the box's sides, ends, and handles to keep the endcap firmly in place securing the lid. I imagine this part of the box doesn't take so much stress, but nails aren't that expensive.
Lots of nails - because I can.
The last thing I did was construct the lid. The lid drops in, then slides under the endcap to lock it. I followed Greg's instructions and it works perfectly. For joining the battens to the lid, I clinched the nails. I love clinched nails, they are very strong.
Clinched nails on the lid.
I didn't really mention it, but before nailing any part on, it was smoothed with my #4 and burnished with my pollissoir. If it was an edge that would stay, I chamferred it with a plane, then burnished. After everything was assembled, I spent some time chamfering the edges that needed it, and burnished the remaining spots.

I had originally planned to paint this chest gray. However, I have changed my mind, in no small part to the good people who left comments on my Instagram post. The traditional finish for one of these chests is to leave it as is after burnishing.

Paint would not work because of the sliding lid. The paint would either come off on the parts that rub, or cause the lid to bind and not open at all.

This is a tool box, after all, and will get it's share of abuse over time. Hopefully it will prevent the tools inside from taking that abuse. Over time it will darken up and get more beautiful.
The top of this cabinet I built last year is the same material as the new box. Wood darkens over time.
I call this box finished. I might decide to deepen the chamfers on the corners and the bottom to help protect against bumps and dings, then again I might not. I also might make a sliding till, or some boxes that live on a rail inside, but the box is small enough that I think they could get in the way. How the tools in this box fare over time will determine what I do inside of it.

If you build a box like this, I highly recommend Roman and/or cut nails, and Greg's fantastic drawings. I also recommend this project for woodworkers of any skill level: it's a great first project.