The good news, is I was able to salvage the doors, and this project is now almost finished!
 |
| As it stands now. Only a little a little adjusting to the doors and touching up of finish remains. |
It was kind of hard to show in a photograph, but the problem was essentially the same on the bottom of the cabinet:
 |
| When I lined up the sides of the door panel, the top and bottom were obviously out of square. |
While evaluating the problem, I realized that if I lined the sides of the door panels up, the tops and bottoms could be flushed up without losing too much. The top door was a bit oversized in height, anyway, and I think the bottom door will be fine.
I am considering leaving the bottom wonky like that. If I plane it square, I might have to laminate a spacer there to compensate for the look. The Frau didn't notice it until I pointed it out, so we'll see if I can live with it or not.
A challenge was how to plane the parts of the doors with the rabbets so the glass would fit.
I set the doors up so one side of the rabbet was flush and needed no adjusting. The other side, I marked where it needed to end up. This means I need to taper this edge of the door until I meet the mark.
 |
| The first step was to crosscut the batten. I think going right to the plane would just be asking for blow out. |
 |
| I used a dull card scraper to remove most of the paint. A few swipes with my jack plane and I am at my line. |
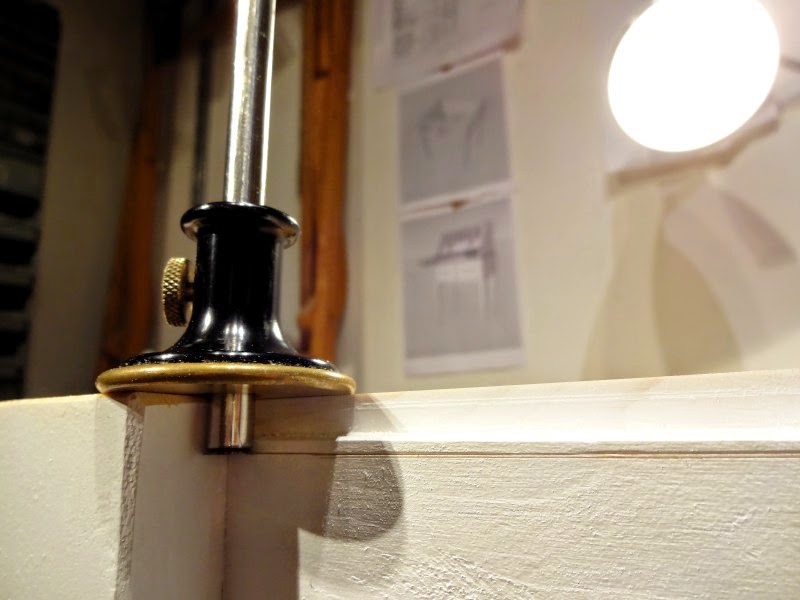
Now that the top edge is square, I CAN use a marking gauge to re-define my rabbet. That will have to be re-cut.
 |
| Marking where the rabbet now needs to be. |
I considered using my plow plane, but thought that running the fence against the paint on the show side of the door would create some problems for me down the line. What I did instead was to remove the fence entirely from my Veritas plow plane, and use it freehand. The rabbet was defined, after all. All I had to do was sink the rabbet a little farther until I reached the line from the marking gauge.
 |
| Fence-less plow worked a charm. |
 |
| Finished rabbet. You can see the wood that was removed, as there was paint on the rabbet before this step. |
 |
| Now, the glass panel fits and the doors line up. |
A comment on my last post had me thinking that I hadn't really done a proper job of explaining how this door goes together with the glass. Here are a couple of pics that hopefully explain better how the glass is captured in the rabbet by the batten.
 |
| Glass captured in the rabbet by a cross batten. |
The next step is to install the lights. We found some really cool low-profile LED lights that were perfect for this project. The package came with three lights that plug into one socket. Very efficient, as the whole contraption only uses 7.5 watts!
I decided the interior of the glass cabinet looked best with two of the lights. I put the third on the top of the cabinet to shine on the ceiling.
 |
| Lights! |
 |
| Here is the cabinet with the door open. |
 |
| I like the look. |
 |
| The bear is looking at my lighting job. |
All in all, this mockup is a success so far. I learned some important lessons in construction of a cabinet like this, and spent relatively little money on it. The Frau was looking online for vitrines, and the ones she liked cost about ten times the price of this one.
Ironically, now that this cabinet is in the place we want the final piece to be, the Frau has decided a vitrine is not what she wants there. Perhaps a side table instead. I am really glad we didn't get stuck with an expensive store bought piece of furniture!
I was bit confused on this too. Seeing the pic with the door open explained it all to me. I had thought that the glassed portion had it's own door as did the rest of the cabinet.
ReplyDeleteThanks for the comment, Ralph.
DeleteIt was a bit hard to envision, and also to explain. This went together from only a photo, so I had to figure out how it worked on the fly. If I make another one, I'll definitely change a few things to make it easier and look better. I am pleased with this one, though. It will wind up in the living room of our 2nd apartment.
I like your design and it has given me some ideas to build a corner cabinet. How clever to use your plough plane in place of a bullnose. My Clifton bullnose does not get much use but it gets me out of a hole now and again. Regards, Bernard Naish
ReplyDeleteThanks, Bernard!
DeleteI have to admit, I didn't really know how I was going to sink that rabbet, leaving the batten where it was until I did it. I remember picking up the plow, adjusting the fence, and then the lightbulb went off.
Hi Brian,
ReplyDeleteoh I guess I got the problem now, which we had discussed in your last post.
Solved well. And the cabinet looks great.
Thanks, Stefan. After reading this and the last post again, I really didn't do a good job explaining it. Lucky thing one can post photos!
Delete