I spent a couple days making this neat little project.
 |
| The finished spokeshave. |
This project turned out to be pretty easy to make. I was a bit apprehensive because there are plenty of "how-to" videos and instructions out there and I wasn't able to find anyone who built the whole thing without a single power tool. Pretty much the consensus is that you need a drill press for this project.
Me being me, I took it as a challenge to see how this project works without one.
Since there is plenty of instructions out there, including the instructions that come with the Veritas kit, I'll try to be brief with this post and focus on the parts that I did by hand that often are done another way.
The first thing I did was get an apropriate blank of wood for the body of the spokeshave. I had some blocks of air dried sycamore that were perfect for this. Sycamore has a beautiful pattern when it is perfectly quartersawn.
While a table saw is great for sizing a blank of wood like this in a few seconds, I like to do this by hand as I find it easier to get a perfectly quartersawn piece out of any blank of wood. This one happened to be almost two inches square, and riftsawn.
I planed a couple of quick chamfers on the edges in order to clamp it to my sawbench. Laying out and ripping to the required angle was simple.
 |
| Making quartersawn wood from riftsawn. |
I would recomend spending this kind of time on a small project like this, especially with a wood species that has a particular look when quartersawn.
The next bit was drilling holes for the posts that hold the blade. It requires two different sizes of holes for this particular kit, as the adjusters are tapped into the wood.
This needs to be done precisely, and it is highly recommended to use a drill press if you have one.
But, it isn't absolutely necessary.
I find that I can drill fairly accurately with just a little practice. Also, it always helps to keep your chin or your forhead on the back end of the drill, whether it is an eggbeater like this, a brace, or even a hand held electric drill.
To increase accuracy even further, I accurately marked both sides of the blank, and went in half way from either side, meeting in the middle.
 |
| I try to keep everything as stable as possible, and put my chin on the handle of the eggbeater. |
It could be that it isn't as perfect as a drill press would be, but it is plenty accurate enough.
 |
| Drilled holes. |
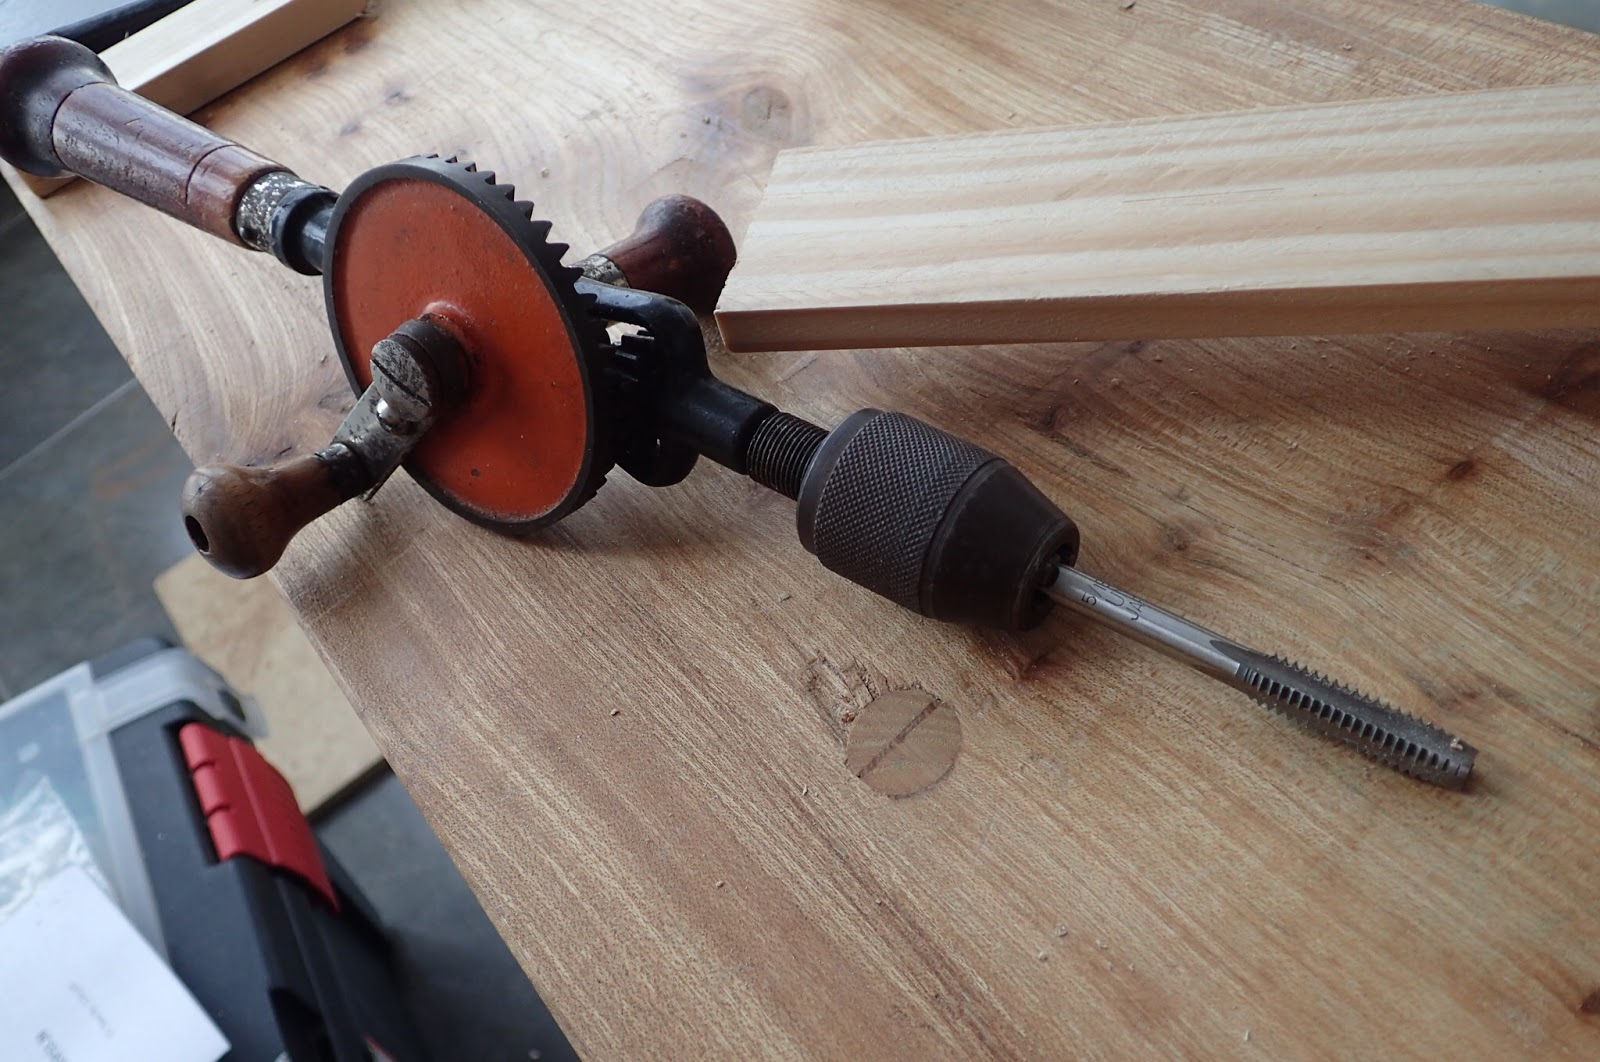
The kit came with the correct tap, but I did not have a tap handle laying around anywhere. After trying a couple things, I realized it fit in my eggbeater. As long as I went slow, there were no problems.
 |
| This worked, but I would rather use a tap handle next time. |
I decided to just super glue the brass wear plate rather than inset it with dovetails and screw it to the base. Time will tell if this will hold up or not.
Unfortunately, I didn't have a hacksaw, either.
To solve this, I had a serrated all-purpose Chinese knife that I found in the kitchen. It took a while, but it eventually did the job.
 |
| I marked the brass, clamped it to a piece of wood to use as a guide. |
Needless to say, the cut with the kitchen knife wasn't glass smooth, so to smooth it out I cut a notch in a block of wood that was square to the base.
 |
| End-smoothing jig. |
Then it was just a matter of holding the brass in the block and rubbing it back and forth over a diamond stone to polish it up a bit.
 |
| This worked great. |
Once the wear strip was in, the tool was nearly complete. I just sawed out the profile with a bowsaw.
 |
| This was quick and easy. |
 |
| Now it is shaping up to look like a spokeshave. |
After that, it was just a matter of smoothing the sawmarks with another spokeshave and a rasp, round over the handles to my taste, and finish.
 |
| Front view. I really like the look of QS sycamore. |
I finished it just with a coat of BLO. Once it cures, I'll add a coat of beeswax.
 |
| The bottom. There are some gaps that are cosmetic flaws because I could only get a metric drill bit rather than the required 5/16" bit recommended in the instructions. |
This was a fun and easy project. I happen to have the Veritas large spoke shave kit, and also the Hock large spoke shave kit. I can see a couple more of these in my future.
 |
| I even picked up some cool wood for the large ones: leopard wood and goncalo alves. |