Yes, I am still working on this simple project. No, I haven't gotten anywhere in the last week or two on it. Yes, this post is about work that I did weeks ago, but no, I haven't blogged about it yet.
I blame the Chinese.
Actually, the Chinese have been good to me. I started a new job teaching English online to Chinese kids. The kids are great, and I am having good fun. The only problem is it is interfering with this project.
Perhaps writing a bit about it will get me back in gear.
ACTUAL WOODWORKING CONTENT STARTS HERE:
I am using a piece of mahogany that used to be a drawer front. I rescued it from a dumpster, and this particular piece is very nice. It yielded two boards of appropriate size for this project. Perhaps if I ever finish the first one, I'll make a second.
I printed out a paper gameboard about the same size, and instantly decided that I didn't want to copy it. I want to use the board I have just as it is. To do that, I'll need to lay out the squares on this board.
 |
| Two mahogany blanks and a paper template that I won't use. |
The chisel I have is about 3/16" or so, so that is what I'll use for measurements.I set my marking gauge at 3/8", enough for the chamfer and the outside border of the game, and ran the gauge all around the outside.
The boxes must fit inside this border.
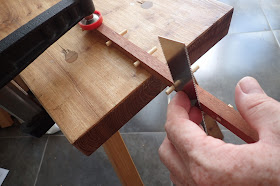
The trick for laying this out perfectly now lies with the use of dividers. I did not measure a single thing. I used dividers first to divide the width of the target area into three, then I divided the length into eight equal parts.
I just had to make sure I also allowed for the width of the border to be added to the size of the intended square.
 |
| It took a couple tries to get the perfect measurement from the dividers. It was smart to mark the points in an area that will get removed later. |
 |
| It is turning out just like I planned. Don't screw up the crosscuts! |
 |
| This is where this project sits now. |
Next up, I will try chip carving for the first time to define the designs on the board.


