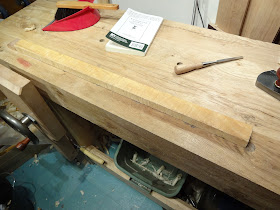
I started a new project today (rather than finish one of the dozens of projects it seems I have started), and needed to square up a piece of maple that was rolling around in my scrap bin.
 |
| An old maple off-cut. |
 |
| Close up of the rough stock. |
I have noticed one thing that is different than processing stock with machines. The smaller the piece, the easier it is. Most wouldn't think of running a six inch long piece through a planer, but doing it by hand is pretty easy.
Today I would like to cover a small part of this process, marking references. Remember the steps for processing a board:
- First plane one face flat. This is your reference face.
- plane one edge square to the reference face. This is your reference edge. All other measurements are gauged off of these two references.
- Cut to length
- Rip board to width.
- Plane to thickness.
Actually, it is really pretty easy. Depending on the size and species of the wood, you may or may not break out a sweat.
The order of the last three steps isn't all that important, as long as you do the first two steps before the last three. I usually cross cut before ripping because it makes less wood to rip. I then thickness after cross cutting and ripping, becuase I will have to plane the smallest amount that way. However, sometimes there are situations in which you may want to do it different.
One of the most important things in this process is to mark your references. If you lose track of where your reference face is, you may wind up with gaps in your work that could have otherwise been avoided. The accuracy of all other cuts might not have to be too accurate. For example, if you are making a decorative box, you want your reference faces on the inside so the joinery fits the way you want. The outsides do not have to be all that square at all. If you are making a drawer, the outsides must be nearly as accurate as the inside faces so it will ride in the drawer guides smoothly. In this case, your secondary faces need to be extremely accurate.
So, how did the old-timers do it? Here is a way that I first found in Ian Kirby's book, The Complete Dovetail. Mark your reference face with the following squiggly line, ensuring your mark finishes with your pencil going off of the edge:
 |
| First planed face marked. |
Once your edge is planed up and perfectly square to the face, mark it with a little "v" that meets the mark on the reference face like this:
 | |
| Reference edge on top, reference face toward the camera. |
Trust me, this will save your bacon. One gets so used to marking lumber this way, it becomes second nature. Seeing those surfaces marked so clearly ensures that mistakes with reference surfaces just don't happen.
When we process lumber with machines, the tolerances are good enough that we do not have to pay too much attention to reference surfaces.
Hand tools, are another story. Perfection in hand work starts with approaching perfection in making secondary surfaces parallel to your reference face and edge. There is absolutely no way to approach this perfection if you forget which face you started with.
Thanks! I've seen those marks in photos and known what they were for but hadn't understood exactly how to use them.
ReplyDeleteI tend to move #3 up to the top. On my first hand tool project, I made the mistake of trying to flatten all my rough stock first (thinking, I guess, that I was a human powered planing machine). Because most of my lumber was twisted somewhat, it made for a lot of extra work and much thinner finished boards. As you say, hand work requires a different approach.
Good point! If I needed a 4" wide board and had a 7" board, I would break the stock down first, then go with processing in order.
DeleteOr, I would buy a narrower board. :o)
Brian,
Deletejust a couple of minor nitpicks :)
It's really purely cosmetic but the squiggly line for the face is the wrong way around for the traditional mark. It should be the first half of a cursive lower-case "f", indicating "facia" or "face".
If you move the cross-cut to length (rough, +.125" to +.25" depending on the curvature) to the first position, you'll have far less work to flatten the board and you'll also minimize the wasted wood.
Well put. Marking is something I really didn't do until I made the jump into hand tools...
ReplyDeleteI tend to examine the wood and look for the most character; that typically decides which side my reference surface will be (depending on whether or not it is critical in the joining process as you mentioned above)
Excellent post Brian. I first learned to do this when building some timber frame structures and just out of habit carried it over into my woodworking, power and hand tool.
ReplyDeleteI always wondered how you'd do it by hand. I have to try it one of these days.
ReplyDeleteFrom what I have been told the first mark on the face is a lower case cursive F. If you look at it that does make sense.
ReplyDelete