I got a lot done in the last couple of days, but neglected posting to the blog. Long story short, I'm almost done and am applying some home made milk paint.
 |
| Mmmmm... Paella! |
If you want the long version, here goes:
When we left off, I was attaching shiplapped boards to the back. Now it's time for the front. After I cut the top piece to length, I drilled pilot holes, only to realize too late that the pilots going into the case actually cross nails that are in the side holding the shelf up.
 |
| Attaching the front. |
No problem, I just cut the nails a bit short. They should still hold plenty strong enough, plus this part will have glue.
 |
| Trimmed the nails. |
Next I decided to make the wooden parts for the catches. There are four on the big chest, although I bet one could get away with just two on the top. No matter, they are easy to make.
 |
| Mark them out one inch from the ends and clamp to bench, |
 |
| Saw to the line, including a couple of clearance cuts. |
 |
| Pop out the middle with a chisel. |
 |
| Done! |
I had been dreading the big panels for the drop front and the lid, even though I bought one wide enough and glued up the other. Turns out, this was pretty easy, too.
 |
| Rip it to width, and a long grain shooting set up keeps the edge square. |
I decided on clinched nails for the battens, since I had plenty of Roman nails.
 |
| Done my usual way - aka Richard Maguire's way. |
 |
| These nails are ideal for this. |
Once the drop front was together, I realized there was a problem when it would fit. I realized there was no clearance for the battens. The Popular Woodworking plans didn't show clearance cut outs, but I figured that was the only way to go at this point. I later saw a photo of Christopher Schwarz's large DTC he did the exact same thing.
 |
| Extra cutouts for clearance of the drop front battens. |
Christopher Schwarz recommended to my Instagram photo that perhaps I should use a few more nails for the panel. I figured it couldn't hurt, so I put a total of seven on each side instead of three. These ones I clinched across the grain, as it is supposed to be even stronger.
 |
| Interesting pattern. |
 |
| These square nails are fun to clinch, and look better than wire nails. |
This chest is coming along, so why not get some skim milk and vinegar going and in a couple days I can make some paint.
 |
| Making milk paint. |
The lid was essentially the same. At first I wanted to do breadboard ends, but without a plow plane, I thought it might be a bit much when I could just nail battens on.
 |
| Just like the drop front. |
 |
| A happy coincidence, my Dick saw fits between the battens of the lid! |
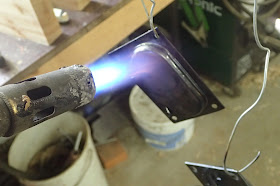
Now it's time for hinges. Olav gave me a pair of suitable stainless steel hinges when I was in Denmark, and Jonas used a propane torch to "blue" them. I think they look great.
Because of the way it was constructed, it required a little bit of a different install.
 |
| There needs to be clearance for the entire barrel. |
 |
| Nice fit. |
It took a little trial and error, but I finally got them on in a way that makes me happy.
 |
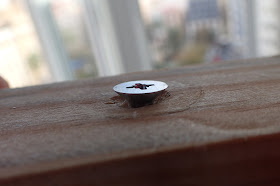
| Installed. Ugly screws. |
All of my screws and the casters I bought had a thick coat of zinc on them. Especially the casters. The only real acid I have about is apple cider vinegar, so in they went. They will come out in a day or two.
 |
| It's not what you think, it's apple cider vinegar! |
I also need to install the inset chest lifts I got from Jonas. Those we stripped of zinc, and burned in some BLO with a propane torch for a nice look.
To install them, I need to excavate all the wood where the handle needs to go. I chopped most of it out with a chisel, and finished it off with a home-made router.
 |
| I sharpened it on my diamond stone. |
It can take only a very light cut, so it is no good for hogging out material, only for evening up the final surface.
 |
| I first went down only the thickness of the metal, |
 |
| then I routed the cavity for the handle. |
The finished look of the handle is really good.
 |
| I like it. |
Instead of screws, I used machine screws with bolt anchors on the inside of the chest so the handles don't get ripped off when the screws fail.
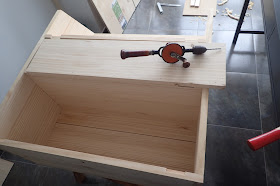
BTW, I've discovered that drill bits made to fit in a cordless drill work exceptionally well in an eggbeater. The bit doesn't ever slip.
 |
| A new 5mm brad point bit. |
Time to get that crap out of the bucket and see what we have. After two days, even the thick coating of zinc on the casters came off. Unfortunately I won't be able to color those because of the rubber wheels, but they will look better with a coat of oil on them.
The screws and machine screws will get the Benchcrafted flaxseed oil treatment.
Only, I have boiled linseed oil here, so I'll use that.
Basically, after washing the parts, I dropped them all in a small jar of BLO. When I removed them, I dried them off with a paper towel, and put them on a piece of tinfoil in our toaster oven.
 |
| Naturally, only when the Frau is at work. |
After only 15 or 20 minutes, they had started to darken.
 |
| It works! |
I quenched them in the little jar of BLO, and repeated for a total of three bakes.
 |
| They turned out great! You can't even see the screws on the handle from here. |
All that is left for woodwork, is the thumbnail profile on the lid. Back to the rescue is my ghetto rabbet plane!
 |
| As long as I score the cross grain ahead of time, it works great! |
 |
| Then I rounded it over with my BU jack. |
 |
| Screw on the casters. |
Now it's time for paint. I thought it would be fun to tint it with some locally available material. Here in Spain, they love to make paella, and for paella, there are some cool colors of spices.
 |
| Sweet pepper, and yellow paella colorant. |
My plan was to put a base coat of yellow on, and follow it up with the darker red.
So far the yellow colorant works extremely well. The Frau loves the color and wants me to keep it this way. I'm not so sure, I'll have to think about that.
 |
| Yummy! |
The sweet pepper is a quite a bit coarser in texture than the yellow colorant. I'll have to test it. If it is not suitable for paint, then for sure I will have a yellow chest.
Next post we'll find out!


